

|
| DOHCED |
|
|||
|
Awesome mate, good to have people like you around on sites like this.
Cheers, Justin.
_________________ XG Ute - 3 Seater - Auto - Dual Fuel |
|||
| Top | |
|||
| TimmyA |
|
|||
|
Happy new year to all...
Been busy these holidays... Had a ripper storm come through on the 23rd and tore down a stack of trees... We've never had winds like it before that I can remember... After repairing a skylight that disappeared and unblocking drains in the pouring rain I did manage to get the camera set up in time to get some photos of the lightning before it disappeared over the horizon...  Not that I mean to plug my own interests but those of you on FB feel free to check out and like my photography page on facebook... More lightning photos on there and I had a crack at light painting the car one night and such... https://www.facebook.com/TimAnnettsPhotography Anyway,,, The 24th was spent cleaning everything back up... Then christmas is christmas and then the tinkering began... Brother's silver ED got a repainted bonnet and new bumper and now looks magic... Then my car was next... It got a new mercury exhaust and has been handling like crap for some time despite always measuring up on the wheel aligner... Replaced the front, semi flogged out, radius rod to chassis bushes with some pedders nolathane ones... Got it back together and put it on the wheel aligner and discovered it now had 3mm toe out... Wound it in 6mm and talk about better to drive... Fixed it right up... Who'd have thought the little bit of play these had in them could make the car handle so bad and then measure up right when it wasn't moving... Very happy now... Other things to do are put in the two whiteline bars I got for christmas... Just need to get the swaybar link rubbers first... Hopefully the guys I'm trying to get in touch with will be open tomorrow... And then replace the discs... I have new RDA pads here for them... But I'll do the discs at the same time... RDA have replaced their slotted design so we'll give those a whirl... The ebay braided brake line set made a massive difference to pedal feel... At least until I adapted to it anyway and it was back to feeling "normal" so would be nice to compliment that with better pads and discs... And I discovered Magnaflow make a direct bolt in metallic cat to suit PH4499's so may give that a whirl too... I hate making cat's and die grinding out exhausts... PITA... Not much exciting stuff and no photos due to the heads down bums up approach of trying to get the exhaust in and radius rod bushes changed before 10pm one night... Cheers, Tim
_________________ {DESCRIPTION} |
|||
| Top | |
|||
| TimmyA |
|
|||
|
As mentioned the second of my christmas presents have now gone in...
30mm fixed front bar and 24mm fixed rear bar... Now I love my car... It made it no more obnoxious on corrugated roads and improves the corner feel tenfold... Everyone needs these... I opted for the fixed bars and then continues to run the std link pin design because I have no quarrels with that design... Replaced all the link rubbers to nolathane at the same time... I have the "tie rod end" design can flog out and that on top of needing to fabricate something was too hard... If these bushes flog out in 100,000km I'll fit a new $20 set of bushes... In doing this I stripped one front link pin (apparently the rattle gun wasn't such a good idea on these)... And the ford dealer had one brand one left... $2 later we're set there... All 4 front saddle bolts began to pull threads as I did them up so I drill all the mild steel inserts out and then slid high tensile M8 flange nuts with the serrations around the bottom of the flange up on top the brackets and did the exisiting bolts up into them... Ford's design was OK for the first time they needed to be tightened... Not so much for the next time they needed to be tightened but... Rear one did with all manual tools... No worries at all... As mentioned very happy... No photos... Most people could work this out OK... I also ordered and fitted the lateral clamps to stop the bar sliding from side to side... Neat enough idea... Due for new discs and pads and then it should be good as gold and fairly trouble free... May look at getting the front grille repainted and a new front bar of some description... The open road takes it's toll... Cheers, Tim
_________________ {DESCRIPTION} |
|||
| Top | |
|||
| BenJ |
|
||
|
Told ya you would like it.
I would however consider upgrading the front link pins to EL ones. MUCH larger. When I first got my wagon one of the EB link pins was snapped in half. Enjoy. Cheers BenJ
_________________ {DESCRIPTION} - Current Ride |
||
| Top | |
||
| TimmyA |
|
|||
|
Not gonna lie to you Ben... Yeah you told me... Ahhh... Much the same looking thing but? Just like a 3/8UNF instead of the 5/16UNF or something? I may have a poke around... Thanks mate, Tim
_________________ {DESCRIPTION} |
|||
| Top | |
|||
| BenJ |
|
||
|
There are pics of the difference in my build thread.
Same but thicker. Cheers BenJ
_________________ {DESCRIPTION} - Current Ride |
||
| Top | |
||
| TimmyA |
|
|||
|
Sweet... I'll look it up...
Back ones change or they were the same part? Here's me fiddling this arvo with a couple of new lenses I've spent some money on for my DSLR... Reasonably sharp too I might and the wide angle lens can sure upset reality too... 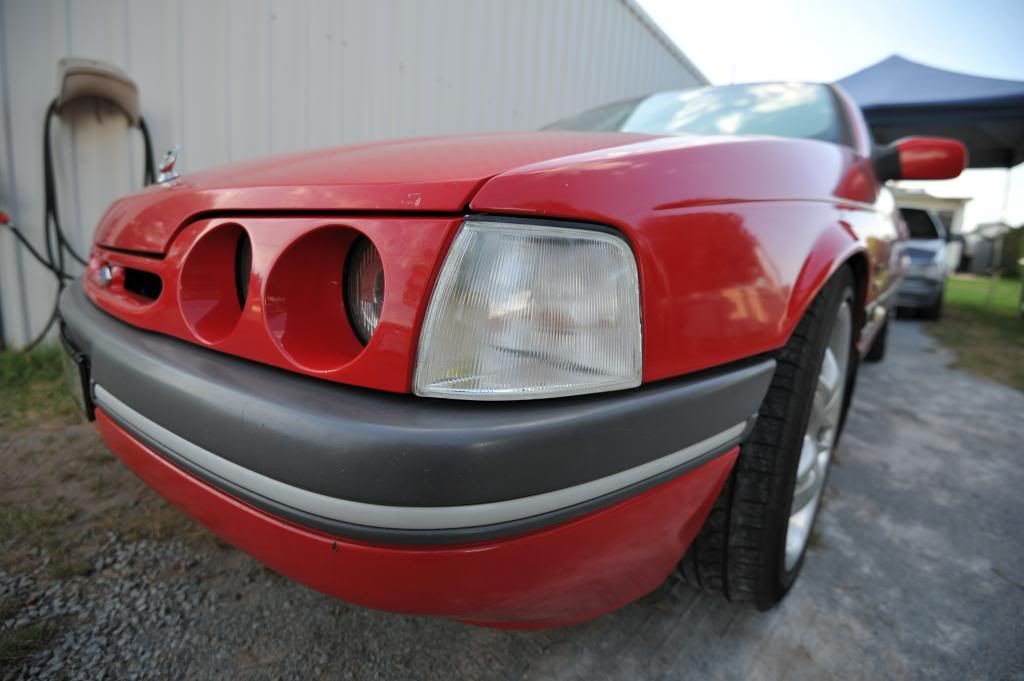 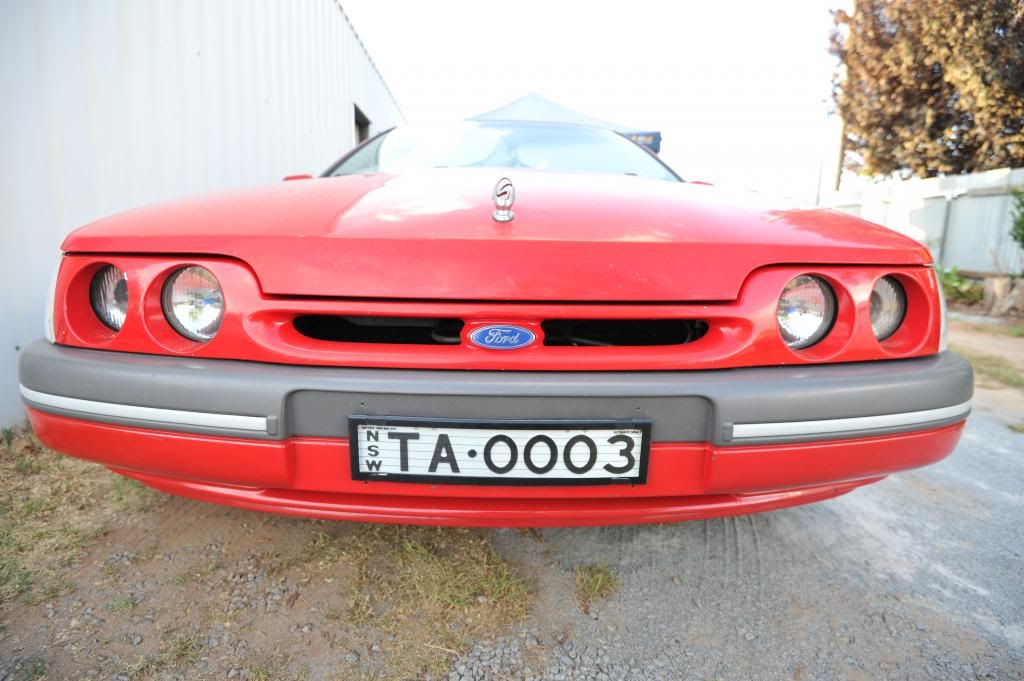 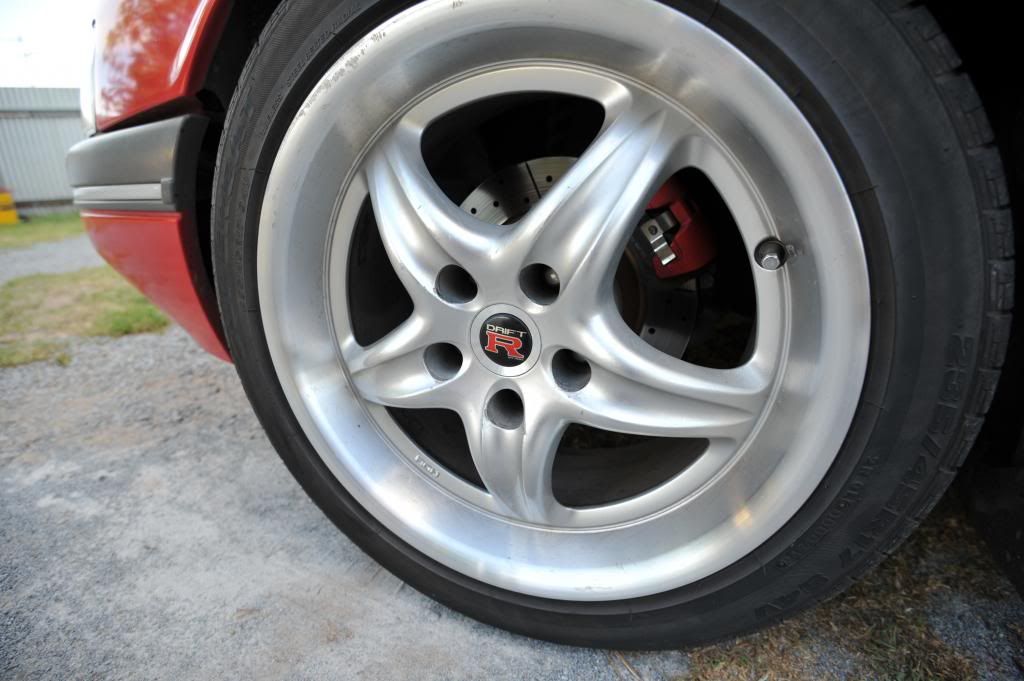 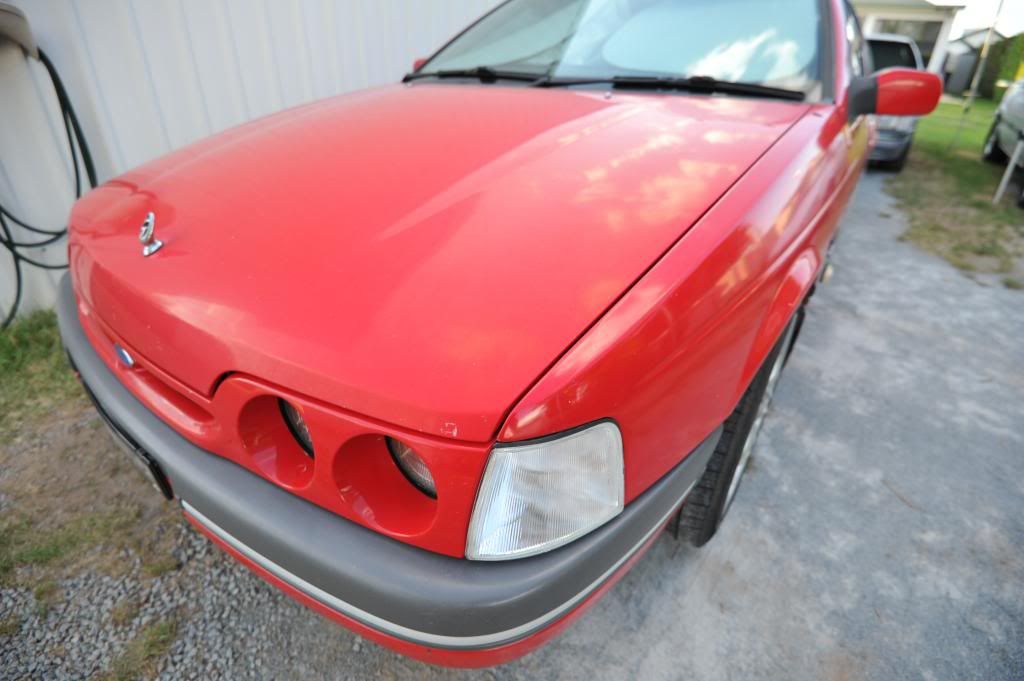 I like this one... Awesome looking dish, but where the hell's the brake? 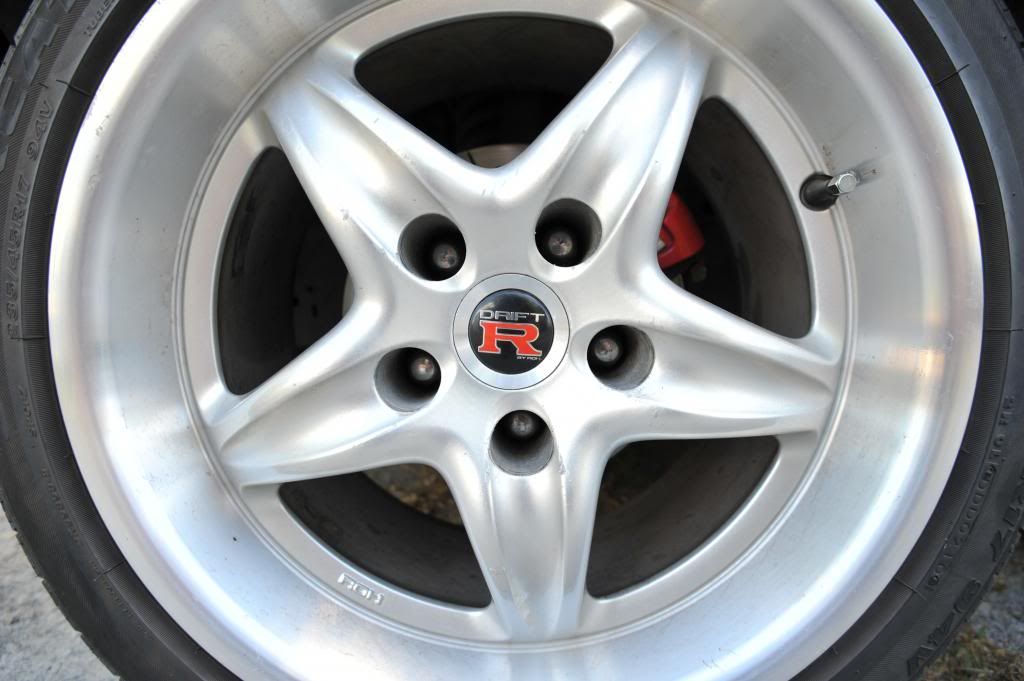 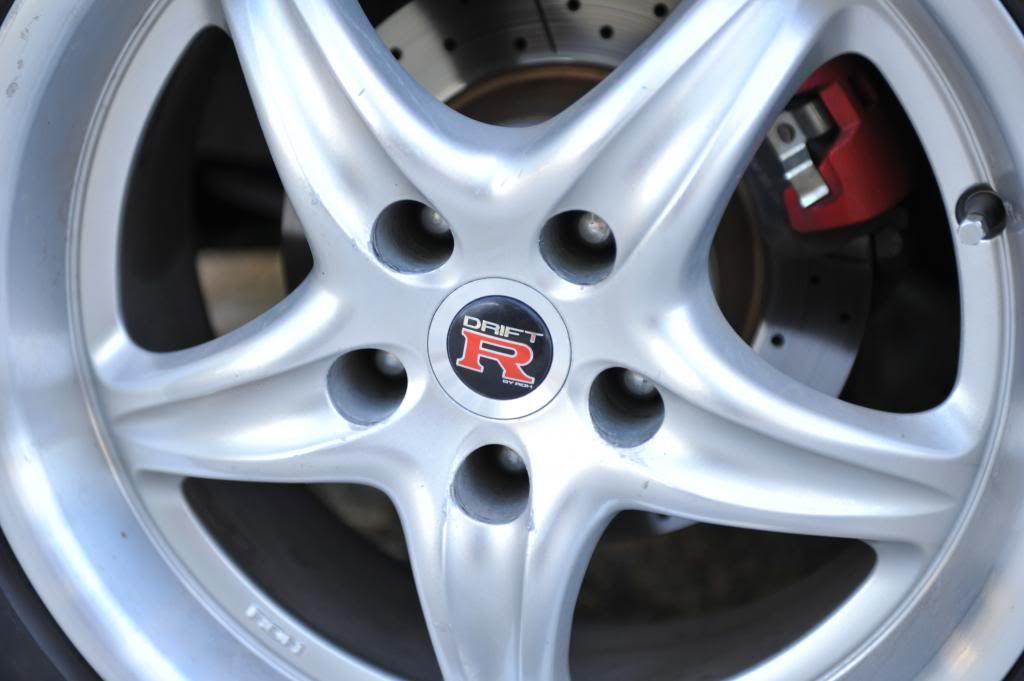 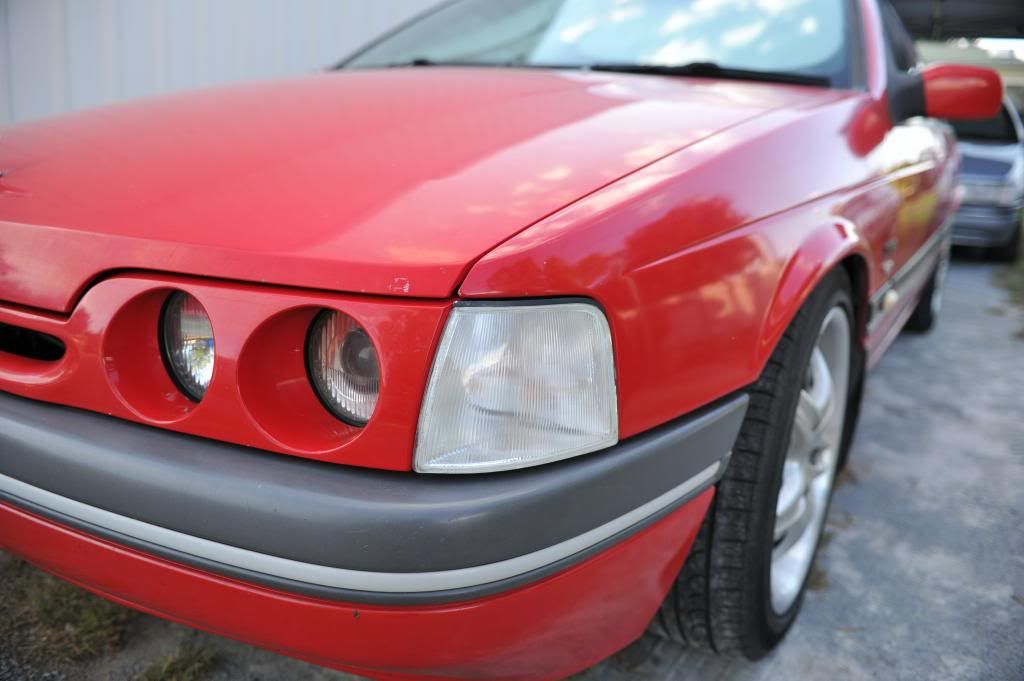 Cheers, Tim
_________________ {DESCRIPTION} |
|||
| Top | |
|||
| snap0964 |
|
|||
|
How's the fit quality of your front bar Tim ???
I bought two sets 30mm/20mm whiteline fronts/rears - fronts were a poor fit with respect to the link pins - the bar wasn't directly overhead and slanted slightly away. I recently tried to fit superpro link pin bushes - because the linkpin was slanted they wouldn't compress properly. {USERNAME} wrote: I have the "tie rod end" design can flog out and that on top of needing to fabricate something was too hard... If these bushes flog out in 100,000km I'll fit a new $20 set of bushes. It's not that hard - I cut up some VY commo front links and made these:
You do not have the required permissions to view the files attached to this post.
_________________ 96 XH Longreach 'S': LPG, Alarm, 3.23:1 LSD, Cruise, Trip Comp, ABS, Power Windows, Mid Series Dome Lt, Climate Ctrl |
|||
| Top | |
|||
| galapogos01 |
|
|||
Posts: 1139 Joined: 27th Feb 2005 Ride: Supercharged EF Fairmont Location: T.I. Performance HQ |
Nice work on the bars - made a big difference to my EF.
Love the pic of the lightning to! Cheers, Jason
_________________ {DESCRIPTION} - {DESCRIPTION}, {DESCRIPTION}, {DESCRIPTION}, {DESCRIPTION} and more! |
|||
| Top | |
|||
| TimmyA |
|
|||
|
{USERNAME} wrote: How's the fit quality of your front bar Tim ??? I bought two sets 30mm/20mm whiteline fronts/rears - fronts were a poor fit with respect to the link pins - the bar wasn't directly overhead and slanted slightly away. I recently tried to fit superpro link pin bushes - because the linkpin was slanted they wouldn't compress properly. Hey Snap, I had no major dramas with my bars... Not the way yours kicked in toward the tower anyway... On that axis mine lined up fine... The only way they slanted was as if they pointed up toward the front of the car, mainly due to the really low ride height... It wasn't terrible but could have been better if the gap in the link pins was about 3/4" shorter... All in all the new whiteline nolathane link bushes did up fine and looked pretty good... Yeah the tie rod end design wouldn't have been extremely hard... It was more that this design works fine for me and gives no issues and was quite happy just to replace the worn bushes and keep it... {USERNAME} wrote: Nice work on the bars - made a big difference to my EF. Love the pic of the lightning to! Cheers, Jason Thanks Jason! Much appreciated...
_________________ {DESCRIPTION} |
|||
| Top | |
|||
| snap0964 |
|
|||
|
I'll see how they perform with the ball joint links - theoretically, response time should be better as there's no bush flex.
Haven't driven the car for a few weeks - a fair bit of suspension/steering work to do, just routine/upgrades.
_________________ 96 XH Longreach 'S': LPG, Alarm, 3.23:1 LSD, Cruise, Trip Comp, ABS, Power Windows, Mid Series Dome Lt, Climate Ctrl |
|||
| Top | |
|||
| TimmyA |
|
|||
|
Here's a project that's been 6-12 months in the making because it required a fair whack of thinking on how I was going to make it all fit properly and look reasonably good...
Another member on here did a HID retrofit for me and don't get me wrong... They work awesome... Very happy with the light output... I just tried to get that little bit more perfection and tuning out of the idea and had a go at it myself... The original design was the alloy globe base on the read of the XR light was removed, the hole enlagred and then the sides enlarged slightly to fit the D2S projector down inside and then the std mount with the big nut which held it in the base of the XR lamp... The downsides were the std glass element was used which has a different parabolic shape to the one which comes with the projector... And the distance between the front of the reflector and the back of the glass element was larger by about 3/4" over what it has when you pull it out of the box... So I set about fixing these... Removed the factory beam cut off plate from the glass element holder and then set about mounting the reflector inside this at exactly the right distance from the back of the glass element... After removing most of the outsides of the reflector with a dremel and bench grinderI had it so it would slide down inside the element holder... I then measure from the element rests and down onto the two little tags which supported the from of the original beam cut off plate... Marked them and then removed them with the dremel so I had a "stop" to slide the reflector up against to ensure that when I made mounting brackets and welded them on I could maintain the correct distance from the front element with ease... I folded up and cut out the brackets from some thick gal sheet... As I had to remove all the original reflector mounting points I decided to pick up the two screw points which hold in the solenoid plate... Attached them there and assembled it in the vice and the tacked it inot place, removed the reflector to prevent burning of it and then tacked it a bit more on both the outside and inside of the frame... Mounting the element itself was the next most difficult part... I had to use a screwdriver to re-shape the top where the element sits... By turning the circle shape into a slight triangle like shape I manage to keep the element in the centre and shrink the overall diameter of the top so the cir-clip would hold the new element firmly in position... This hole assembly then bolted to the read of the housing and didn't hit any part of it at all... So the next issue was to work out how to get it to protrude through the rear of the housing, manage to seal it and get it to look reasonably OK and not cheap and horrible looking... I decided to "machine" off the rear of the old housing (original reflector) so it was level with the end of the thread on the D2S globe... I punched out a 37mm hole in two pieces of aluminium plate and then marked out the shape it needed to be and then removed enough material to make it look ok when fitted... The using Sikaflex I glued it onto the plastic... I was going to try to find plastic but had my doubts about what type I needed so it wouldn't melt... And then figured I'll use aluminium sheet as it work like a heatsink and help get the heat out of the light... The stuff I acquired is 6mm think... The D2S reflector nut was used to clamp it on overnight until the Sikaflex dried... Lastly was to dismantle the lamp again then fit the white reflector seal and clamp it all up... a little bit of plastic was required to be removed from the front part of the housing with the clear the reflector mounts... Then we basically have something which looks like this... 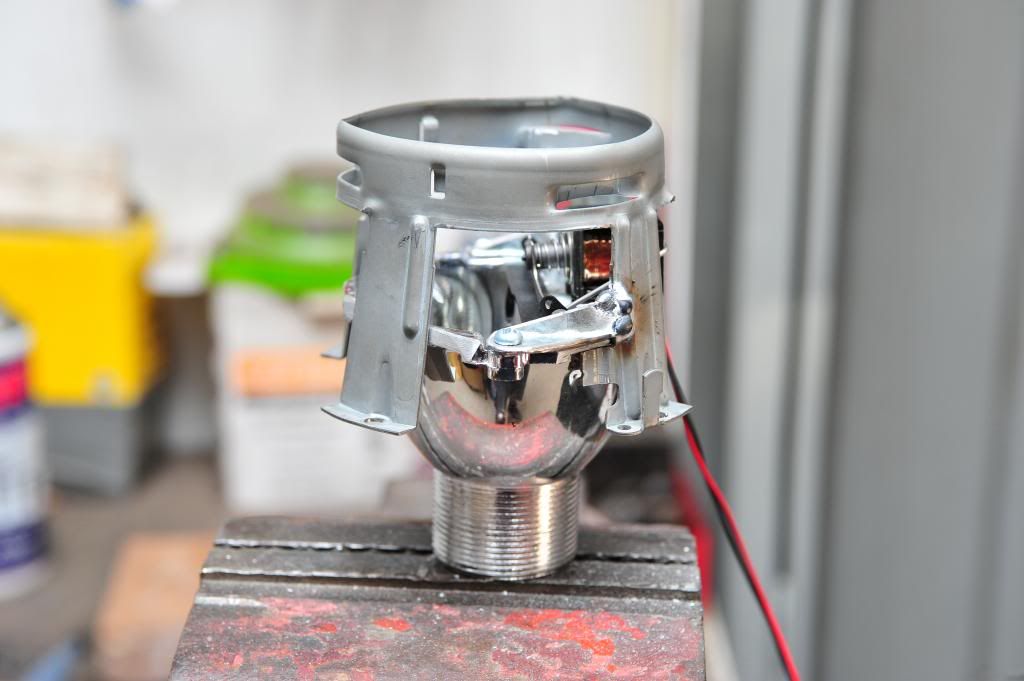 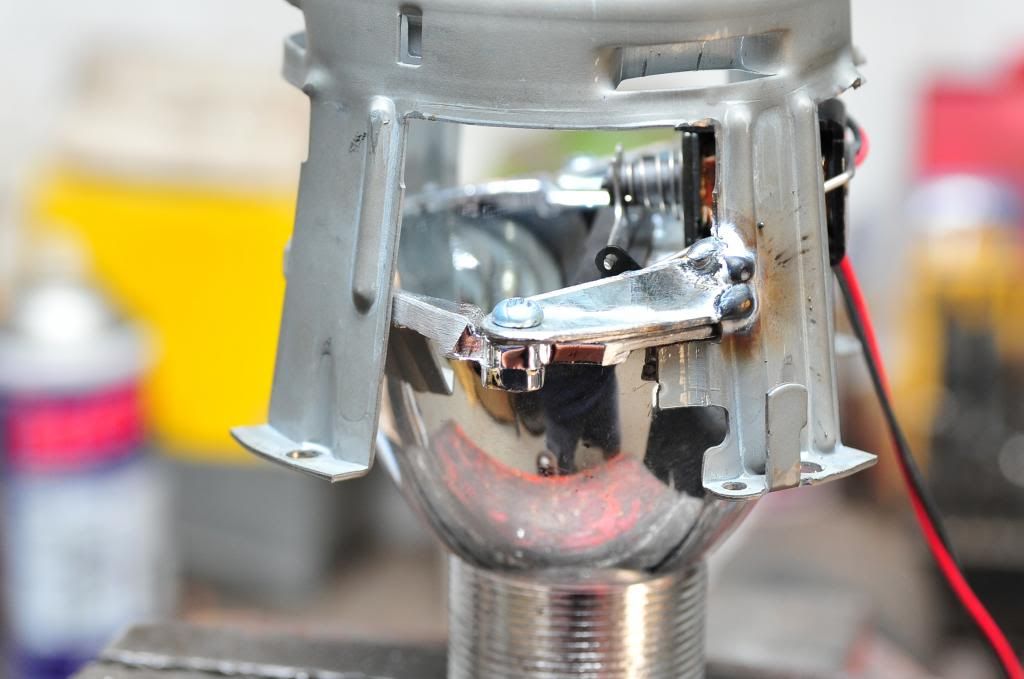 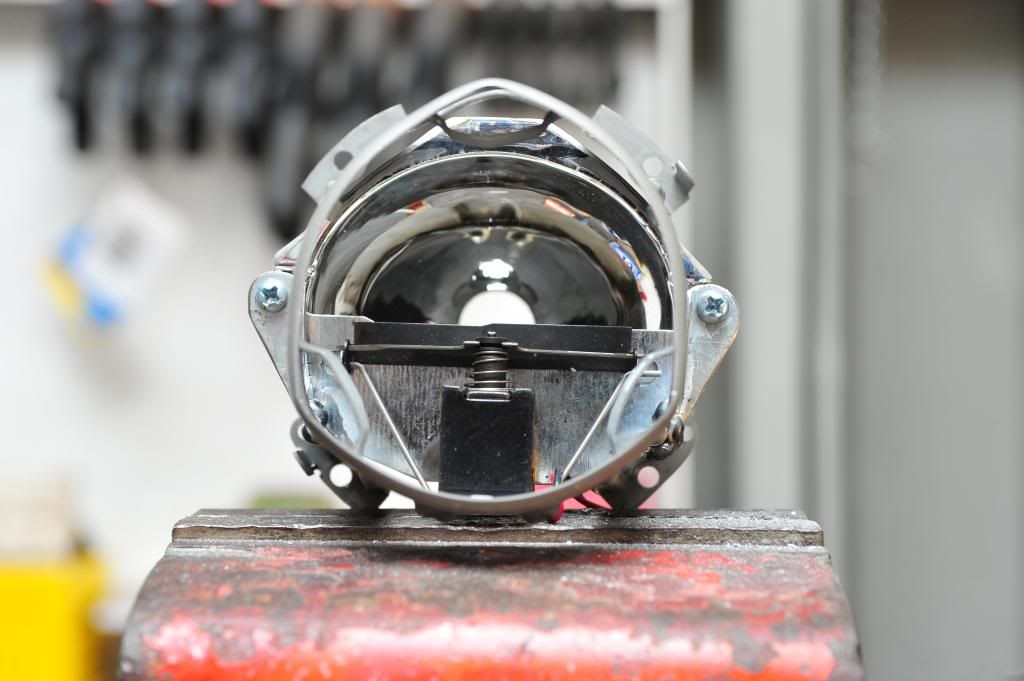 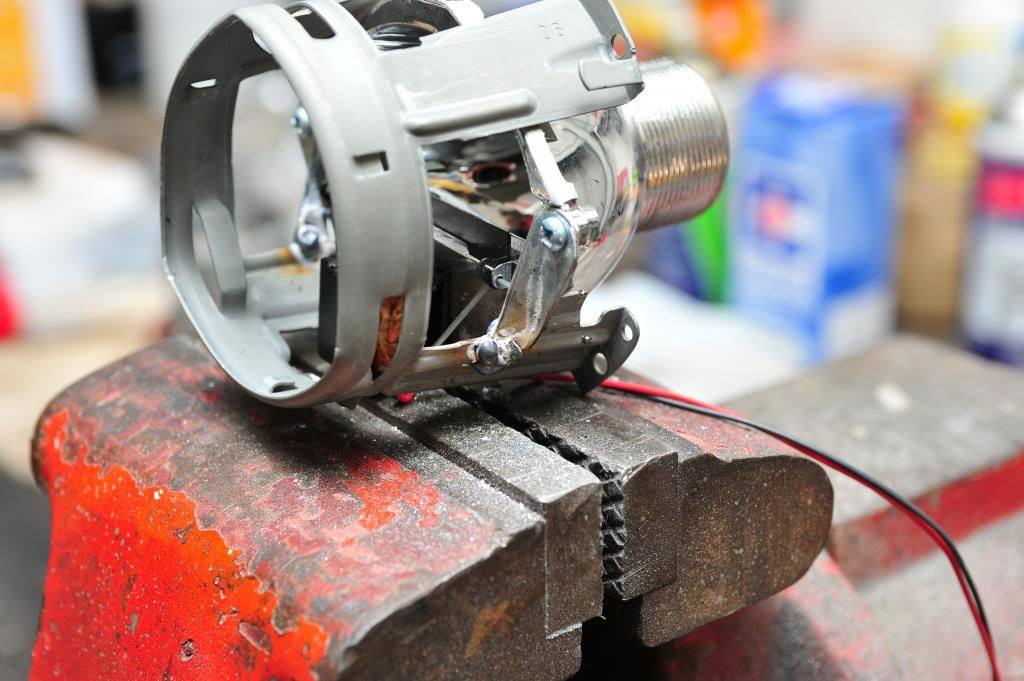 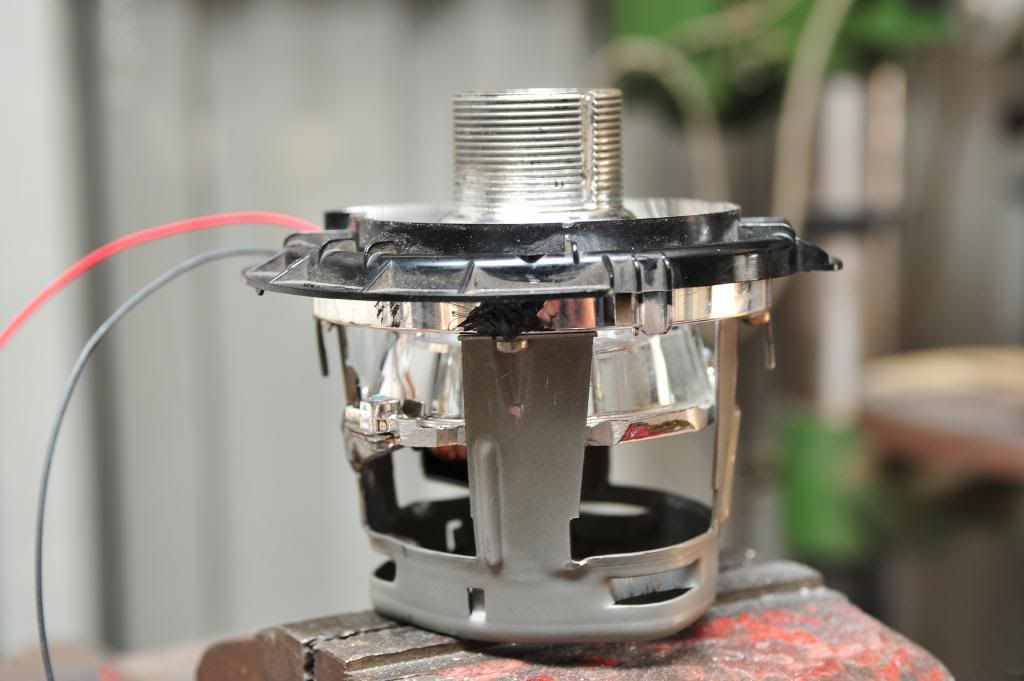 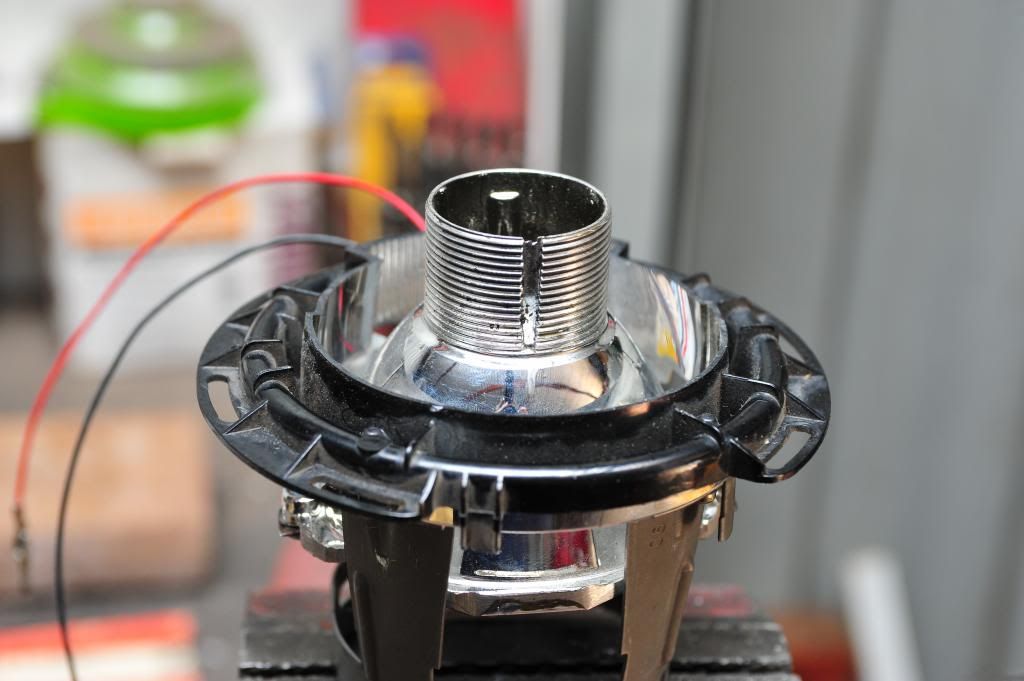 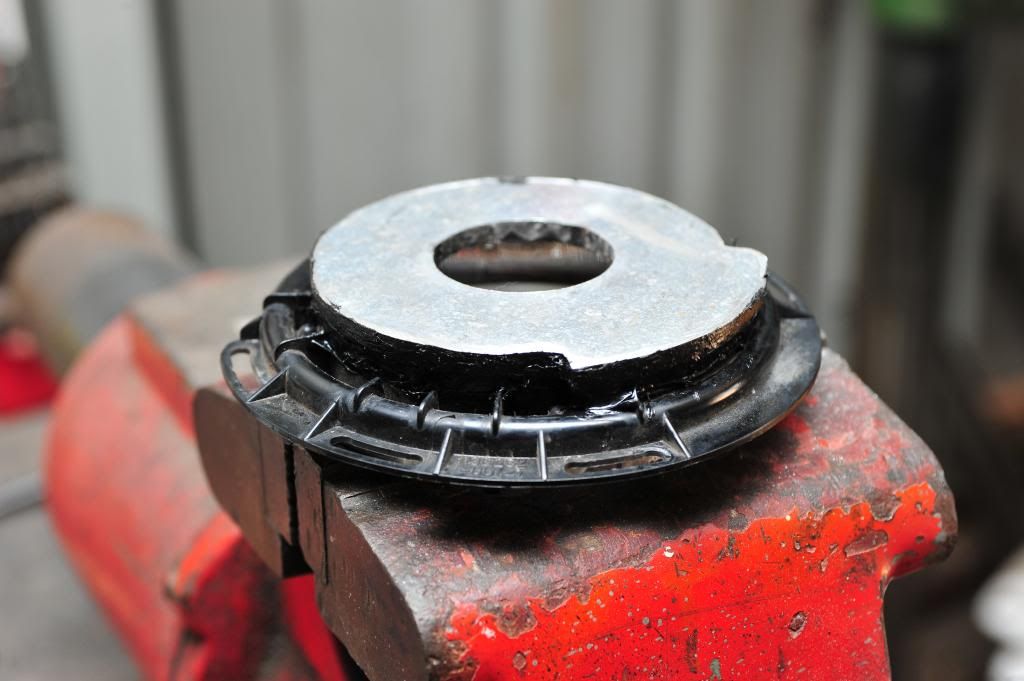 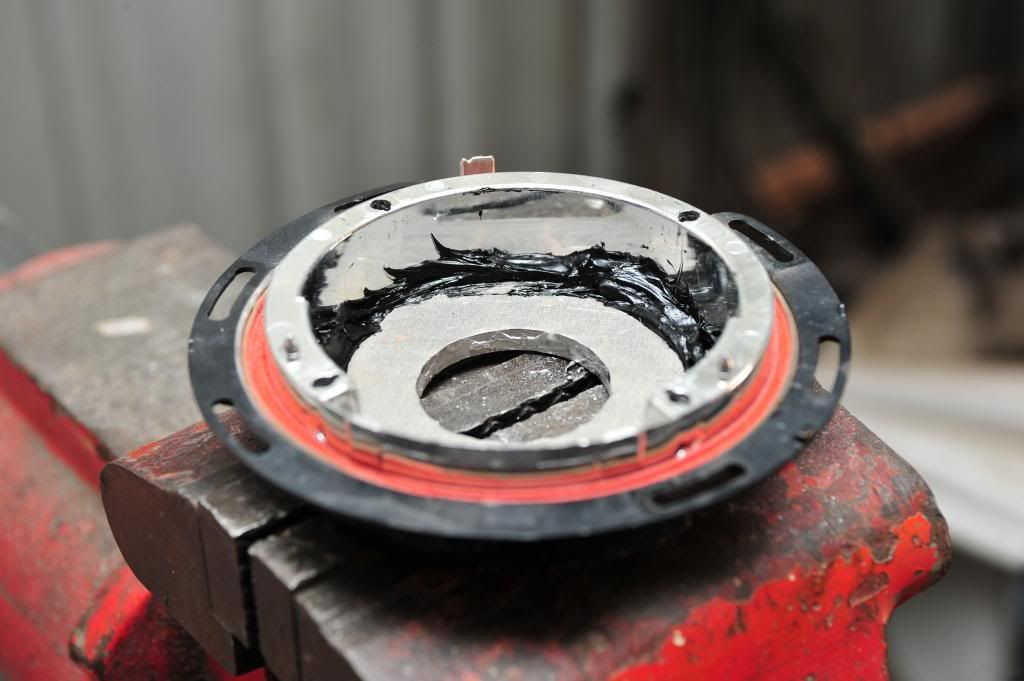 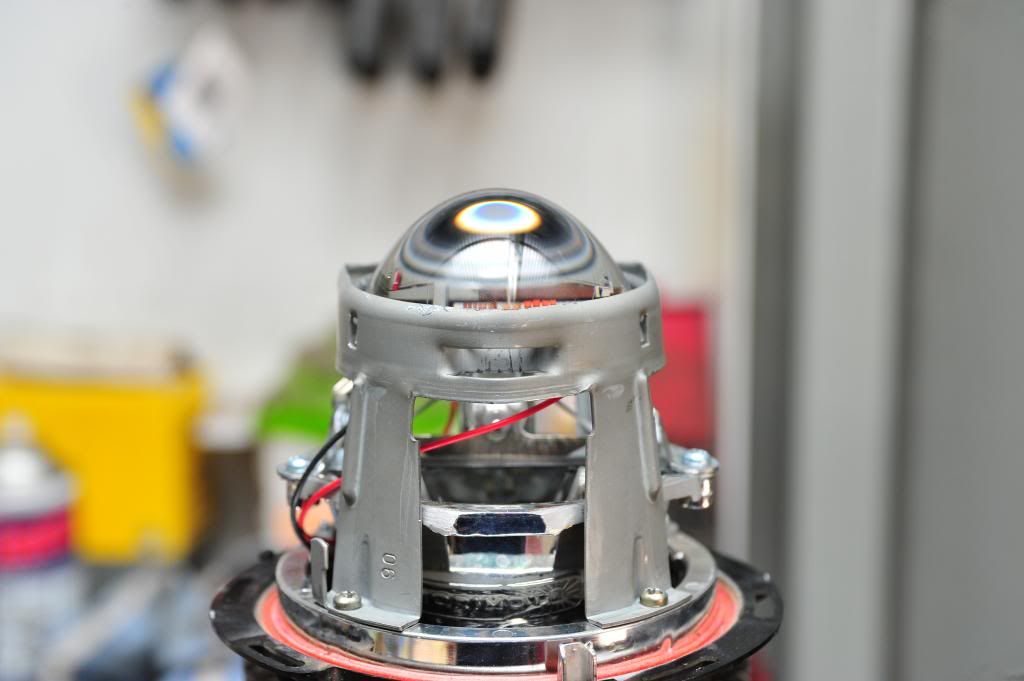 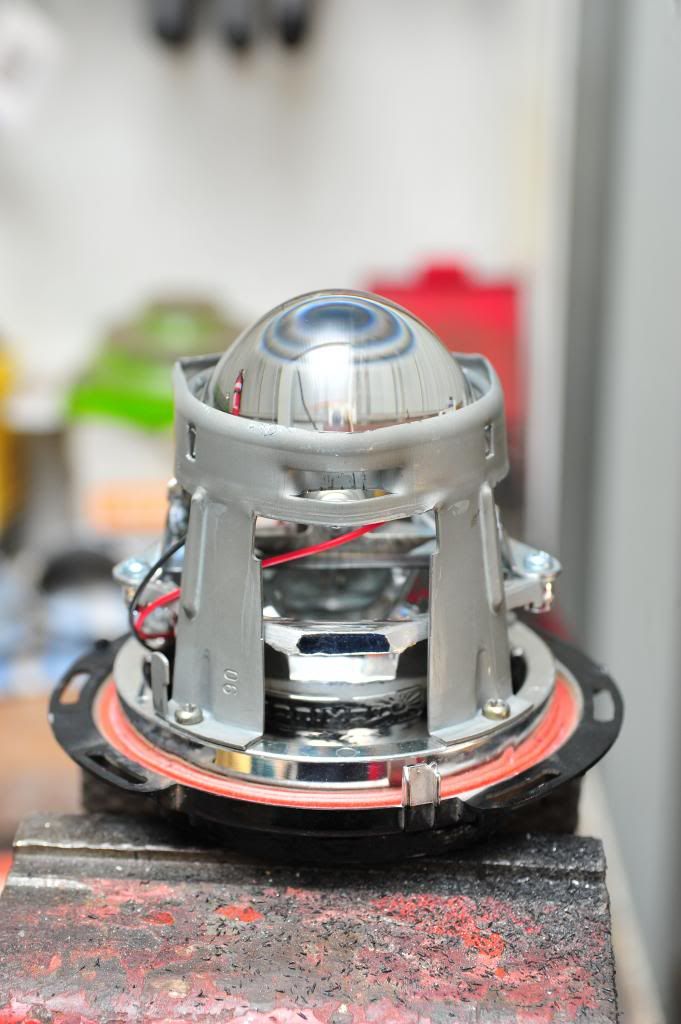 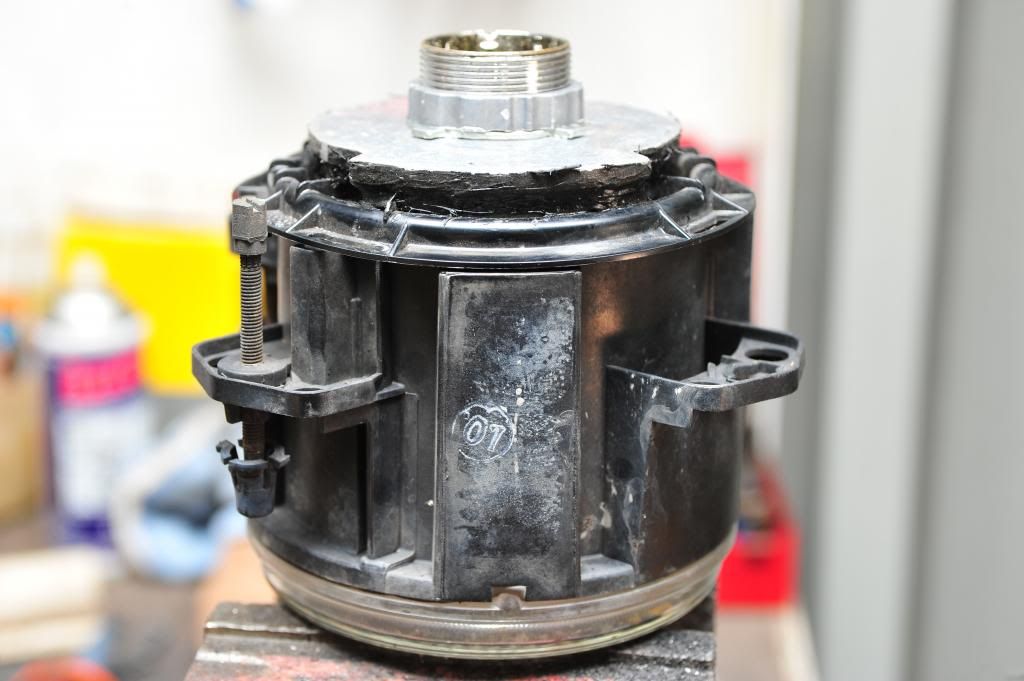 Hopefully once I get more Sikaflex and do the other one and find some fibreglass tubing and get them back together in and the beam pattern will be a bit more refined... Cheers, Tim
_________________ {DESCRIPTION} |
|||
| Top | |
|||
| snap0964 |
|
|||
|
Geez, seems like a lot of work Tim.
I fitted chinese G3 projectors I had inside the original XR reflector - removed the halogen magnifier. Mounts by zig zag brackets I made - HID projector butts up inside the factory reflector, so externally looks same. Had to cut the rear reflector and remount it inside out - the HID projector rear was too short. MAD has used miniH1's which he reckons fits straight in.
_________________ 96 XH Longreach 'S': LPG, Alarm, 3.23:1 LSD, Cruise, Trip Comp, ABS, Power Windows, Mid Series Dome Lt, Climate Ctrl |
|||
| Top | |
|||
| TimmyA |
|
|||
|
Snap,
Yeah labour of love... Like most things... You'd know how it is... More thinking about how the hell I was going to do it than actual work... Once I'd done one the second one took bugger all time to knock up... Parting the rear of the original reflector off took the longest because the plastic is so fragile and brittle... Sort of following what you're saying... These being that much short will free up some space for handle room and such which there isn't much of on the ED... Not too phased there... Plus as I said, apparently heat is a killer for HID's so being aluminium on the back intentions are it works like a heatsink... yeah I have heard/read about this... Trouble is the mini H1 projectors will not sustain a 55W HID bulb where the D2S will... Which is currently what I'm running presently... So that was the want for them... Did want the more awesome looking FXR type but there was no way in hell they were ever going to fit... Would like to see the insides of MAD's conversion because you have to use the front element that comes with the projector so that it has the right shape to work properly, ideally it has to sit in the factory spot so it looks right when assembled... And then the reflector has to the be places the right distance from that element... If you were to toss the whole steel frame from the inside of the lights then trying to make something to mount in the existing holes then hold onto the projector would be painful... This was easy for me and I knew from the get go it basically had to be contained within that steel frame... Cheers, Tim
_________________ {DESCRIPTION} |
|||
| Top | |
|||
| snap0964 |
|
|||
|
Yeah, the mainstream HID projectors are designed mainly to screw into a std halogen reflector - the ED/EF XR setups then are a PITA in that respect.
Once I got my brackets sorted out, it was pretty easy reproducing them, so the job is then much quicker. The units I have are an alloy body with chrome reflector - 35W elements, but I'd suspect 55w would probably be okay. Initial light up seems quick to me, IIRC reading in previous HID threads people saying about the lag. I've no need for the halogen brackets and magnifiers - so you can have them if you want.
_________________ 96 XH Longreach 'S': LPG, Alarm, 3.23:1 LSD, Cruise, Trip Comp, ABS, Power Windows, Mid Series Dome Lt, Climate Ctrl |
|||
| Top | |
|||
| Who is online |
|---|
Users browsing this forum: No registered users and 18 guests |