

|
| SWC |
|
||
|
{USERNAME} wrote: I must admit... I get a little hard every time I see that bonnet. In my mind the XB/XC coupe is still the hottest looking car Australia ever produced and the bonnet is one of the reasons why. This is Better You do not have the required permissions to view the files attached to this post. |
||
| Top | |
||
| SWC |
|
||
|
Or maybe this for the sedan boys,
You do not have the required permissions to view the files attached to this post. |
||
| Top | |
||
| BenJ |
|
||
|
Now you are just showing off!!!!
But I don't mind if you do a bit of self advertising of your skill, seeing as I benefit from your handiwork LOL. Cheers BenJ
_________________ {DESCRIPTION} - Current Ride |
||
| Top | |
||
| SWC |
|
||
|
{USERNAME} wrote: Now you are just showing off!!!! But I don't mind if you do a bit of self advertising of your skill, seeing as I benefit from your handiwork LOL. Cheers BenJ Hijack alert --- Hijack alert |
||
| Top | |
||
| DA22LE |
|
|||
|
{USERNAME} wrote: {USERNAME} wrote: Now you are just showing off!!!! But I don't mind if you do a bit of self advertising of your skill, seeing as I benefit from your handiwork LOL. Cheers BenJ Hijack alert --- Hijack alert {USERNAME} wrote: {USERNAME} wrote: I must admit... I get a little hard every time I see that bonnet. In my mind the XB/XC coupe is still the hottest looking car Australia ever produced and the bonnet is one of the reasons why. This is Better BEST..... 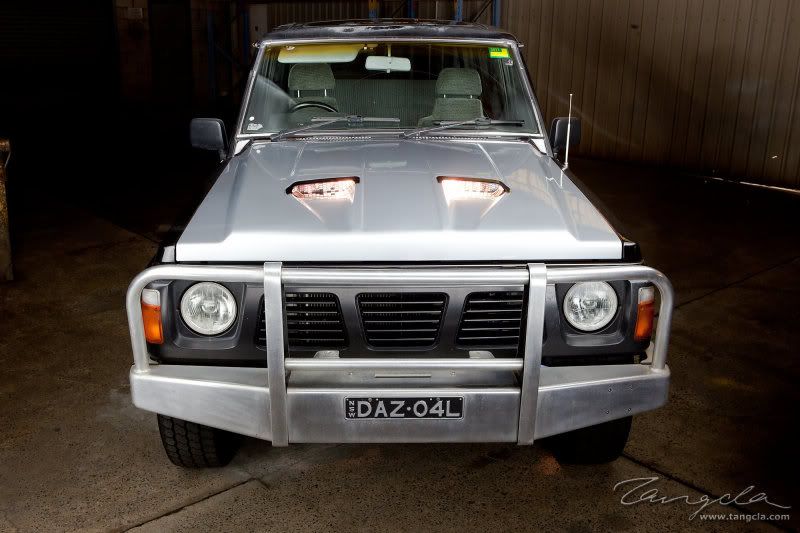 hahahaha.....DAZFAB...FTW........ I guess you'll be done for AFD BenJ???.......front bar looks pretty good.....obviously better with some gloss on it.....
_________________ BA XR8 Boss 260 |
|||
| Top | |
|||
| BenJ |
|
||
|
Body Kit Progress 2
I scored an early mark from work today by taking a couple of hours rec leave. I started adding some body filler to the bonnet. 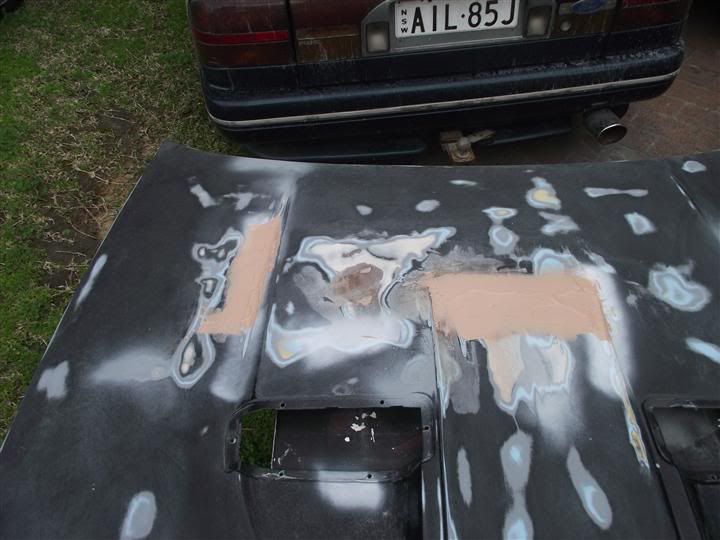 This was sanded and then a second skim layer was applied. 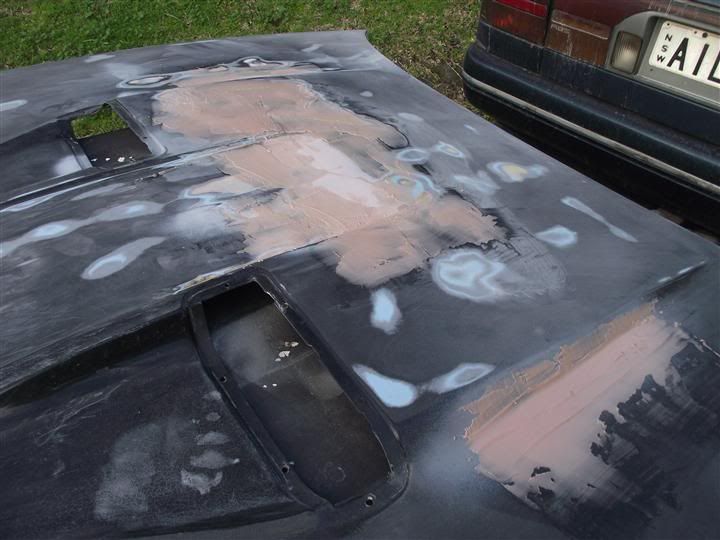 The levels are pretty good now. There are a couple more areas on the bonnet that will require cutting back and get the bog treatment as well as a small rust spot I found under the right hand vent and then it will be ready for the first layer of undercoat. I realised that I missed adding body filler to this area of the BA XR Bar. 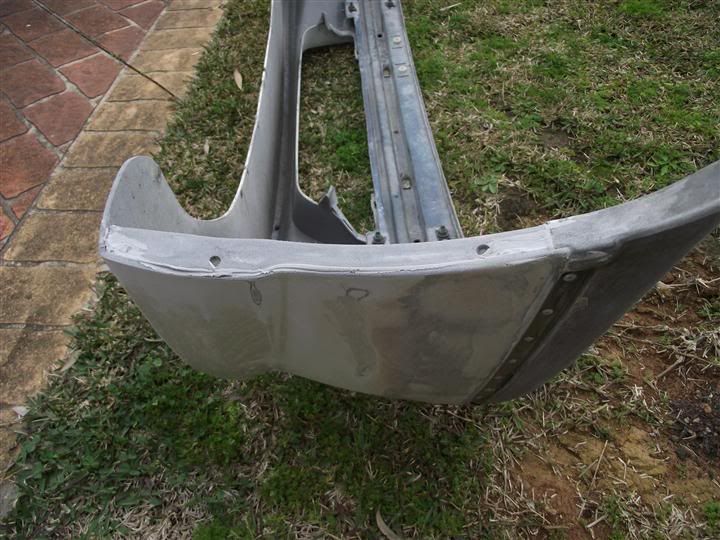 For a bit of background, the BA bar is longer from the front to the wheel arch, and gets trimmed to match the EB bar length and curve. This just leaves a thin trailing edge which is not all that strong. SWC fabricated a filler piece and using a polysumpthineratha glue and backed up with fibreglass added extra strength and from a visual perspective gave it that finished look. 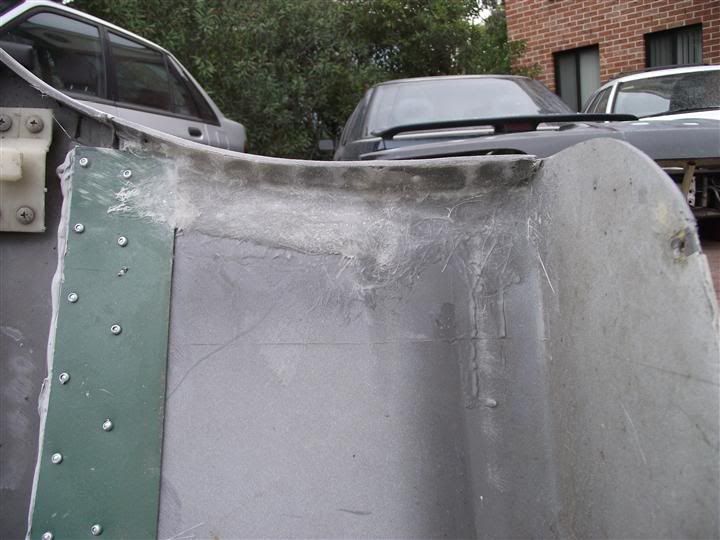 I then covered up SWCs fine work with bog. 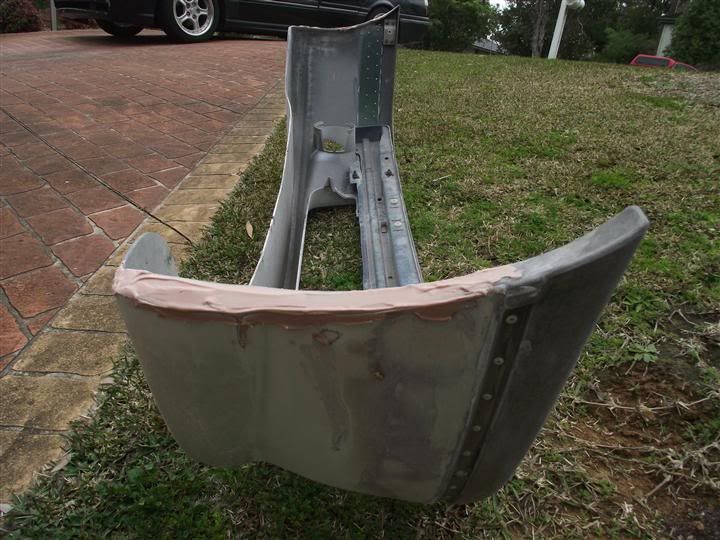 Then some quick work with my detail sander. 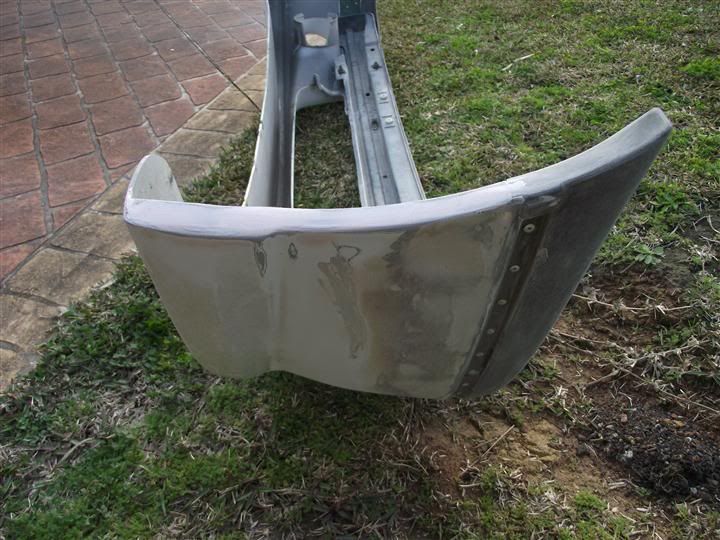 I have now wet sanded the entire bar using 400 grit. I noted the top of the EB bar felt a bit hairy after being sanded with the 60 grit detail sander, but after knocking it back with the 400 grit it is in much better shape. It is ready for some primer. Hopefully the weather will continue to play nice. Cheers BenJ
_________________ {DESCRIPTION} - Current Ride Last edited by BenJ on Sat Jul 02, 2011 11:13 pm, edited 1 time in total. |
||
| Top | |
||
| SWC |
|
||
|
You had to mention the weather, didn't you
|
||
| Top | |
||
| BenJ |
|
||
|
{USERNAME} wrote: You had to mention the weather, didn't you My bad. Stupid rain. At least you have a roof to work under. LOL. Cheers BenJ
_________________ {DESCRIPTION} - Current Ride |
||
| Top | |
||
| Matt_jew |
|
||
|
Dont talk to me about the f**k rain.
Just about finished my airbox and it crashed down. Not happy.
_________________ {USERNAME} wrote: More people paid for a ride in a VT commodore then an AU Falcon so the VT is superior.
Based on that fact my Mum is the best around! |
||
| Top | |
||
| BenJ |
|
||
|
Body Kit Progress 3
After the fog lifted this morning at around 10am, I was able to get some work done. I went ahead and filled in the body molds on the flares. Apart from the fact I got a bit over zealous with the sander and practically erased part of the molds, they were not quite lining up with the car and I was undecided on if I actually liked them. I of course also filled in the mold lines in the rear flares too. 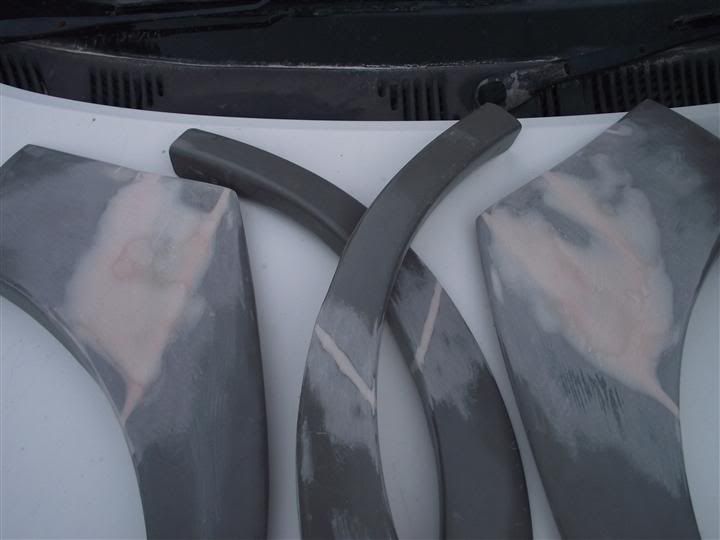 The plan is to install the NL clear indicators lower than the factory EB location where I had them positioned before. The idea is to line them up with the chrome strip which should visually bring the chrome strip into the flare, if you get my drift. This will require modding the guards to suit, but any larger hole would be covered by the std side strip if the flares ever needed to be ditched. I applied a bit more body filler to a couple of spots on the BA XR Bar and while it and the flares cured I spent a bit of time setting up my pressure reg, and filter in readiness to apply paint. When I replaced the Air Compressor I needed to find somewhere to mount the pressure reg. I found a suitable spot on the wall, cut my old air hose into two pieces and installed a semi permanent feed line to the pressure reg. After sanding the body filler on the flares and bar and then playing Taxi duty for my daughter, I thought it was time to lay down the first coat of primer on the bar. 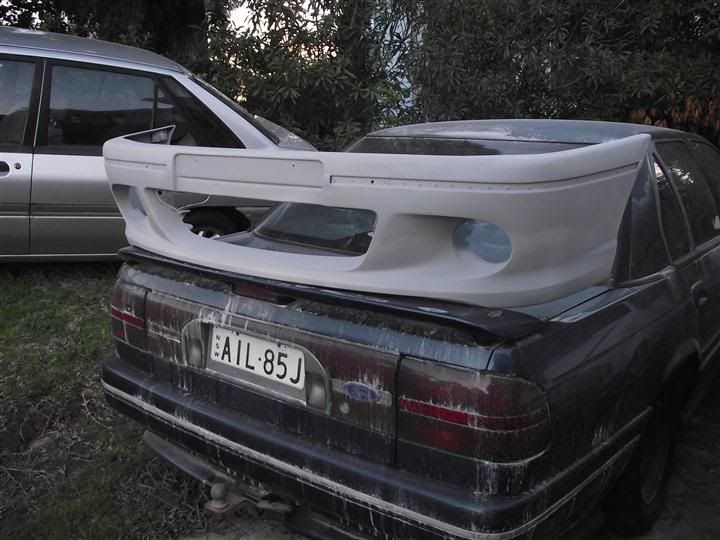 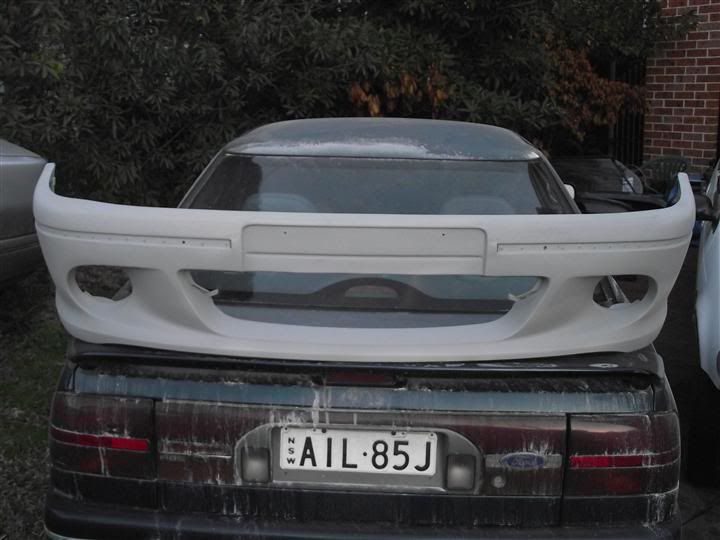 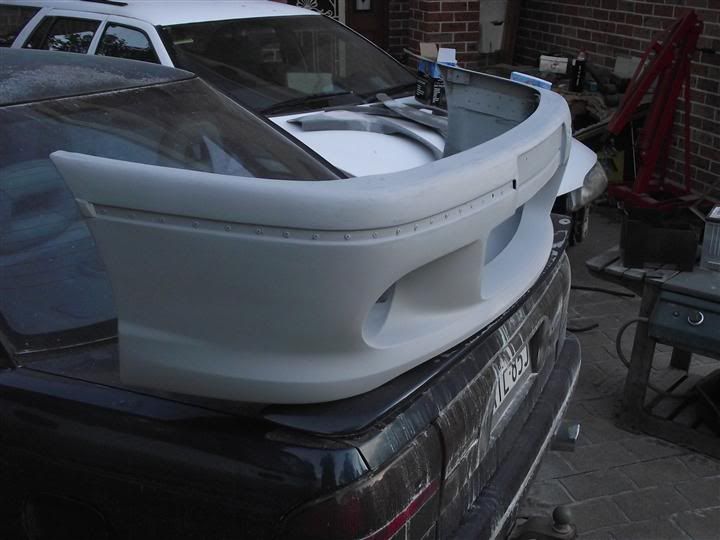 I am quite stoked with how good it is looking. Must resist urge to fast forward and paint it black tomorrow. Cheers BenJ
_________________ {DESCRIPTION} - Current Ride |
||
| Top | |
||
| SWC |
|
||
|
Well done mate, your learning, nice and steady.
|
||
| Top | |
||
| BenJ |
|
||
|
Body Kit Progress 4
Well SWC was right once again. He told me to use Plastic Primer on the top of the EB Bar, but did I listen? NOOOOOOOO, I did not. When I went out this morning to check the bar, I could see some of the primer had not adhered to the plastic top. It blew off with the air gun, so it wasn't much good. I decided to strip all the paint off the plastic top, and used the drill with a wire cup brush. This not only removed the paint, but also cut back the plastic some more, getting rid of more rotten material. 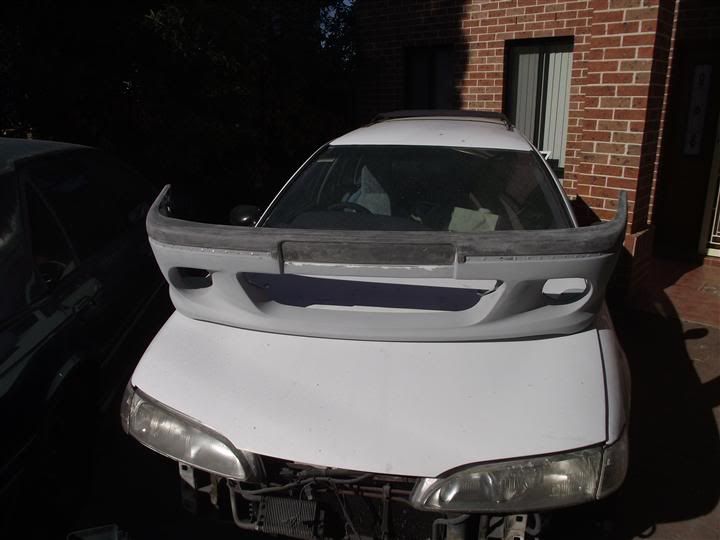 I wet sanded the entire bar with 400 grit and then realised I didn't have any plastic primer. Bugger! I went out later and got some from Supercheap and sprayed on two coats of the plastic adhesion primer. I gave the flares a quick rub over with 400 wet and dry before getting started on mounting the indicators. Here is the indicator mounted in it's new location in line with the chrome strip on the doors. 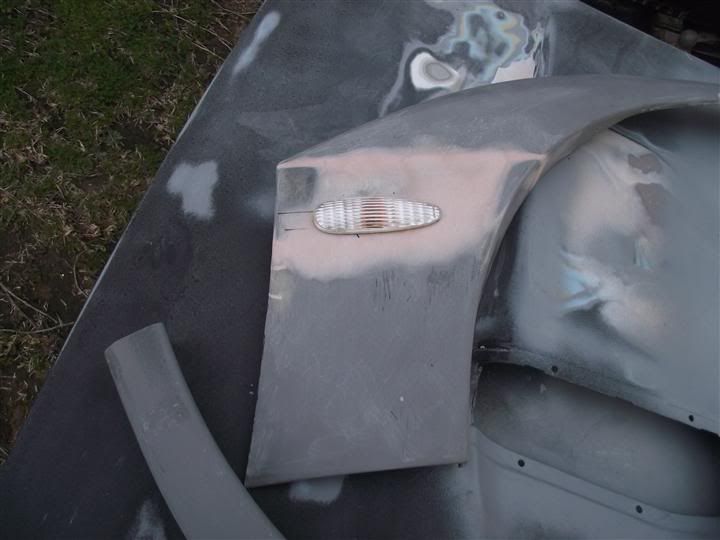 You can see here just how far down I moved the indicator when compared to the previous hole in the back. 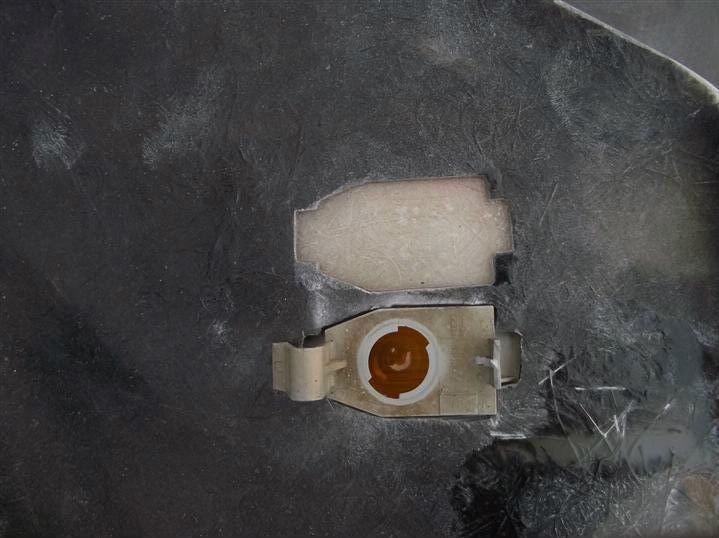 Moving the indicator down also required a bit of dremel work on the guard. At least the hole can be covered with or without the flares. 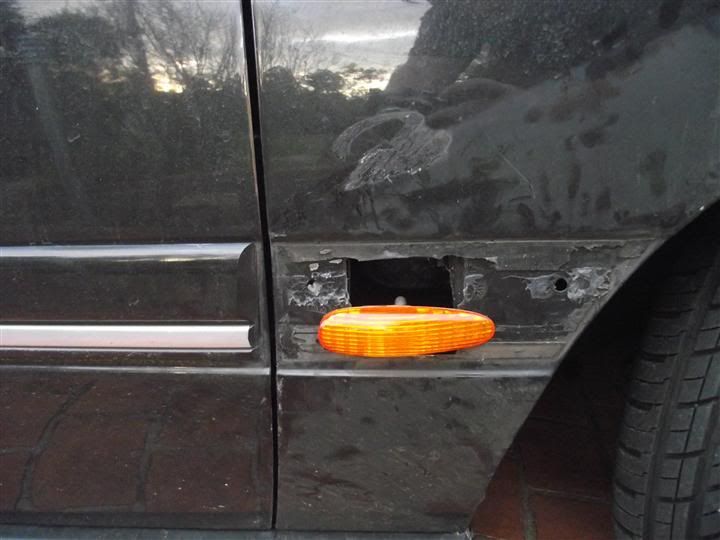 In between all of this the bonnet also got a bit of attention. I found a bit of rust bubbling under where the right hand vent mounted, so ground it out and covered it with some primer. It is coming along slowly, but is not my priority as the spare bonnet will do for All Ford Day. 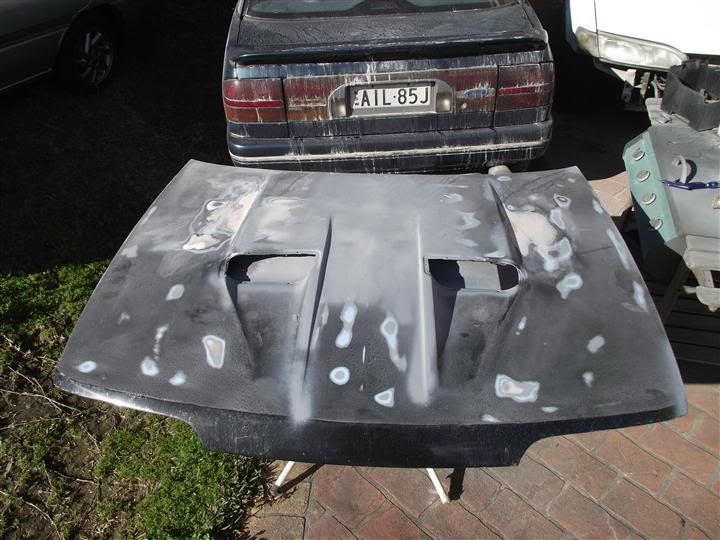 Cheers BenJ
_________________ {DESCRIPTION} - Current Ride |
||
| Top | |
||
| SWC |
|
||
|
{USERNAME} wrote: Body Kit Progress 4 Well SWC was right once again. He told me to use Plastic Primer on the top of the EB Bar, but did I listen? NOOOOOOOO, I did not. |
||
| Top | |
||
| TROYMAN |
|
||
|
{USERNAME} wrote: {USERNAME} wrote: Body Kit Progress 4 Well SWC was right once again. He told me to use Plastic Primer on the top of the EB Bar, but did I listen? NOOOOOOOO, I did not. ive never used plastic primer and ive never had an issue.. |
||
| Top | |
||
| SWC |
|
||
|
You never saw the top part of this bar
|
||
| Top | |
||
| Who is online |
|---|
Users browsing this forum: No registered users and 38 guests |