

|
| huggiebear |
|
|||
|
yeah i got my black from supercheap, seems good quality stuff too. i was expecting it to be s**t. but my belt cover, header tank and coolers came out perfect.
now i just need a way to strip the chrome off lol |
|||
| Top | |
|||
| BEAR80 |
|
|||
Age: 44 Posts: 683 Joined: 4th Mar 2010 Ride: BF Fairmont Ghia & TS Magna Location: central coast |
Those prowlers have turned out nice ben, can't wait to see em on the car
cheers bear |
|||
| Top | |
|||
| fairlane6970 |
|
|||
|
They almost look too nice now!
_________________
|
|||
| Top | |
|||
| Crazy6ltr |
|
|||
|
Dude, i have seen those rims on a White EB xr6 painted just like that and it is jizzmatic lol
It's gonna make ur car stand out thats for sure
_________________ Car got Crushed |
|||
| Top | |
|||
| FordFairmont |
|
||
Posts: 6113 Joined: 8th May 2007 |
imo should paint the inner rim black as well......... painting only the spokes will make the rim look 2" smaller.
eg. 
|
||
| Top | |
||
| dahayes |
|
||
|
they look pretty good either way but id have to agree ^^
|
||
| Top | |
||
| BenJ |
|
||
|
{USERNAME} wrote: imo should paint the inner rim black as well......... painting only the spokes will make the rim look 2" smaller. {USERNAME} wrote: they look pretty good either way but id have to agree ^^ I did trial that option via photoshop, and to some degree I concur that the wheels will appear to be slightly smaller in diametre, however by painting just the spokes, the dish appears to be deeper, which I prefer. ********************************************************************* Lucky for me, the weather was great this weekend, and I got couple of bits and pieces done. The two wheels copped a couple of coats of clear. Hopefully they will be on the car this afternoon. 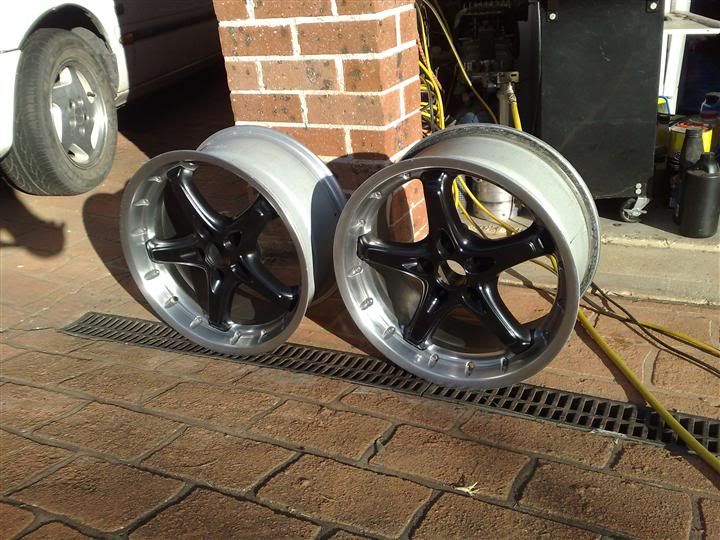 I will then have the other two wheels to get done. I want them on the car for the Sydney All Ford Day on the 25th July. ************************************************************ While I had the paint out, I also painted the rear door quarter window surrounds. They were quite faded, the drivers side had two odd dents in it, and i wanted to change the upper weather strip to the EF-EL type. The old surround and weather strip. 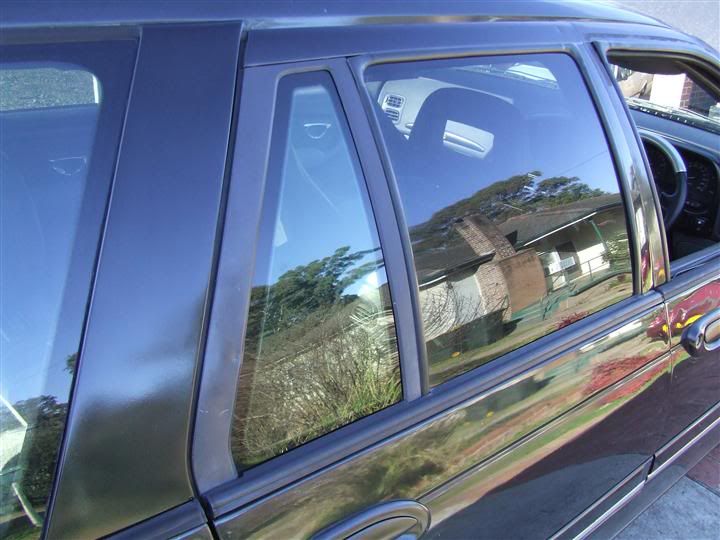 The EB weather strip has a different mold contour compared to the cleaner design of the EF-EL weather strip. However, you can't just change the strip on its own. They are fastened differently to the door, and the quarter window surround. The left surround is the EF-EL type, and the right is the EB. The differences are only visible along the bottom where the weather strip normally covers. 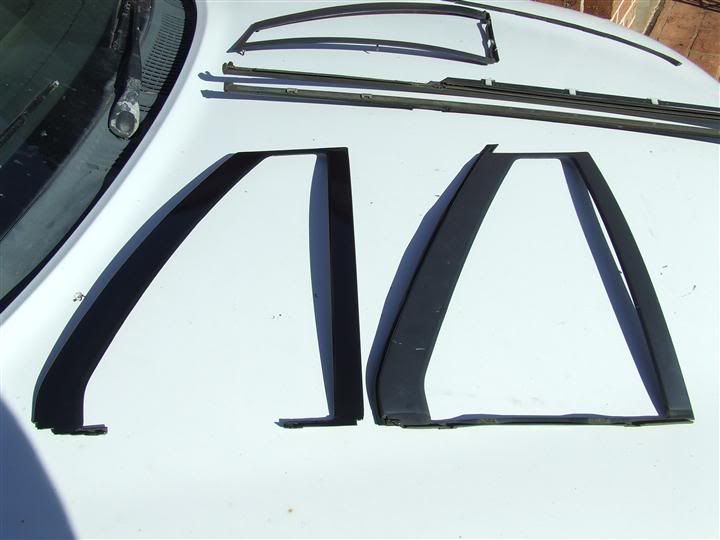 In addition, the top locator pins are in slightly different positions. 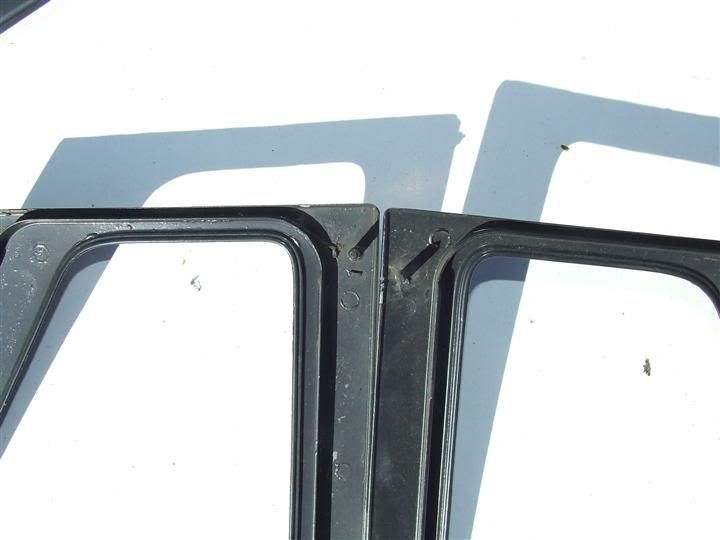 I snapped off the top pin on the EF-EL surround to allow it to fit the EB Door. The weather strips mount the same at the leading edge of the door. 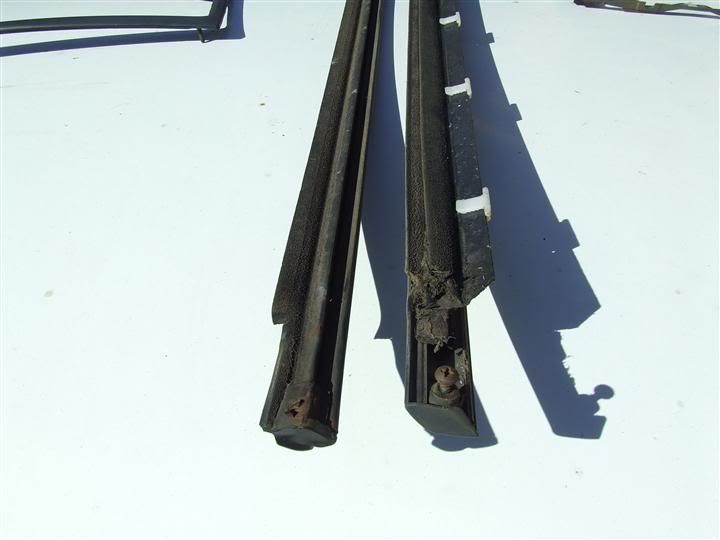 But on the trailing edge, the EF-EL uses a small bolt and nut, and the EB clips onto the surround. 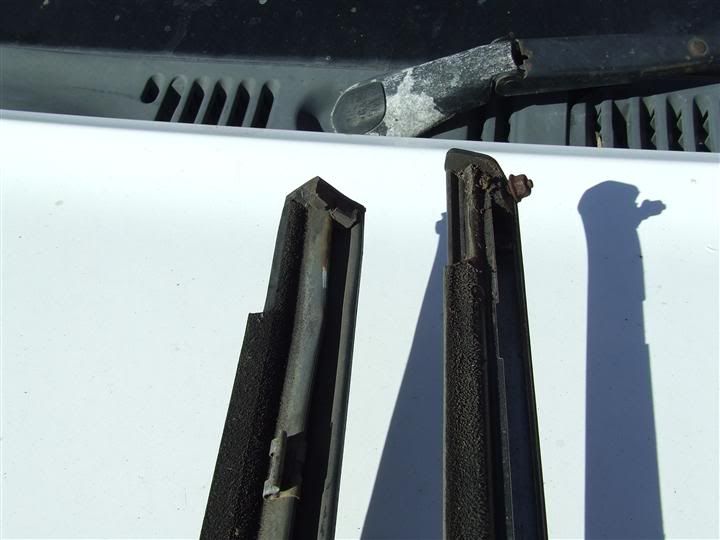 This meant I had to drill a hole in the door as the EB door doesn't have this. 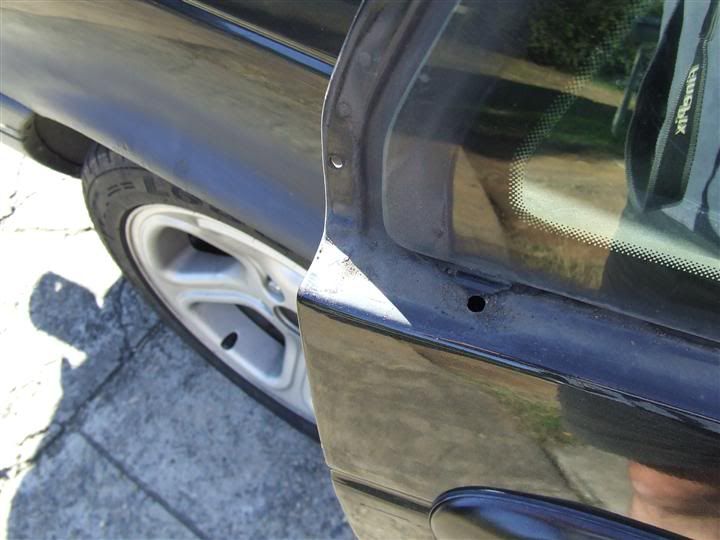 Hole drilled. 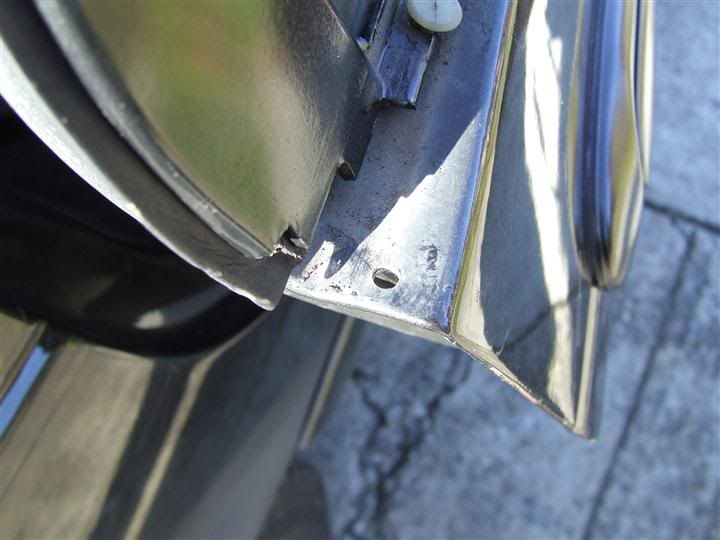 There is a rubber edge that sits between the surround and the trailing edge of the door frame. It is held on with double sided tape. 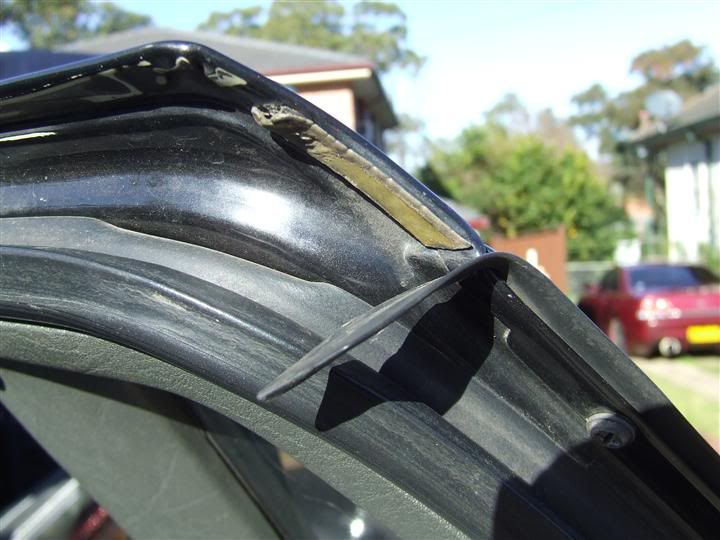 New double sided tape applied. 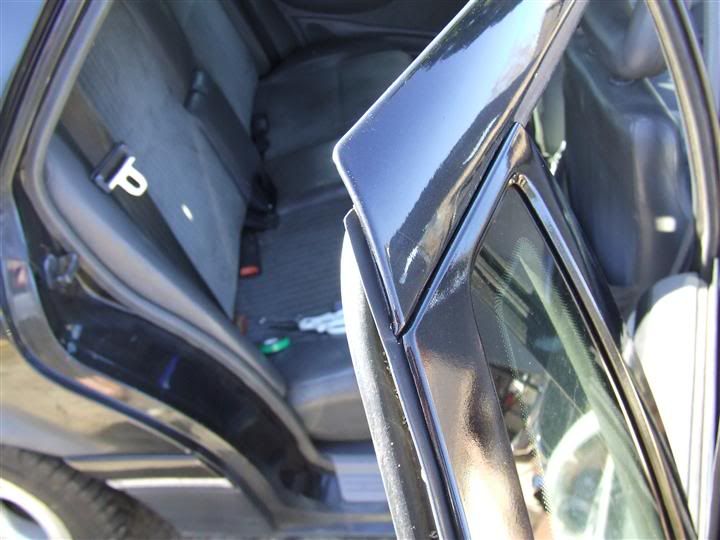 And the finished result. 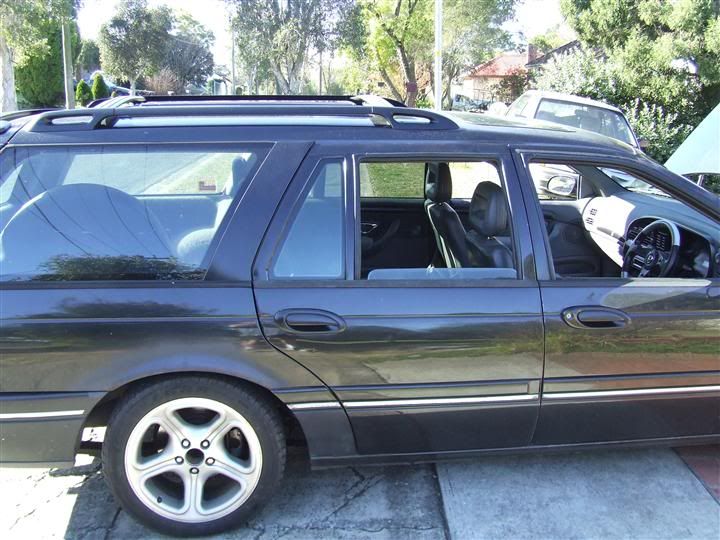 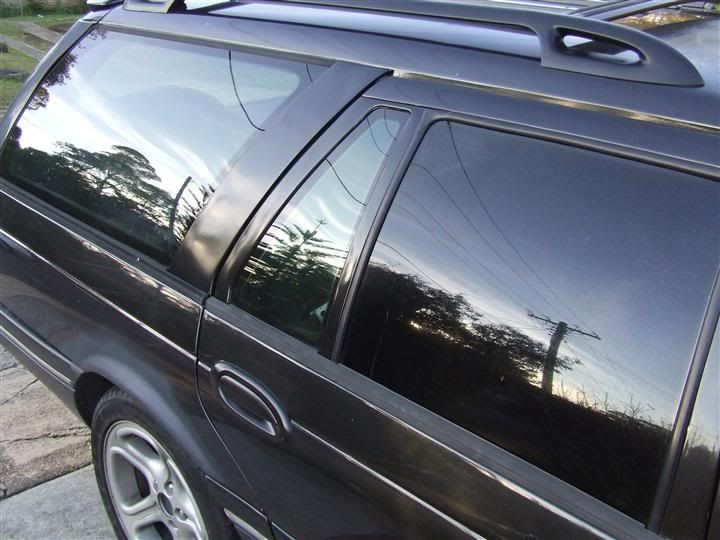 Looks like it has always been that way. LOL. When the clear has had a chance to cure for a week or two, I will cut and polish them. Oh, and does anyone have a good suggestion for a treatment for the weather strips? They look quite faded against the black paint. **************************************************************** Another area that has always been in need of some attention was the front door frames. Both sides had some serious flaws as a result of bad jobs removing double sided tape, and some of the clear lifting. I had put off doing anything with these areas, thinking that I would have painted the spare doors by now, but obviously that has not happened. My own fault LOL. So I decided to do something about them, just to clean up how they looked. The drivers door was the worst. 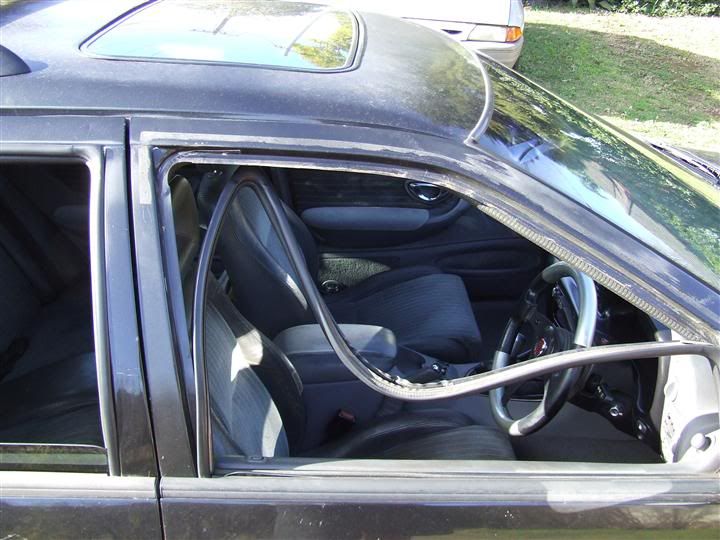 Frame sanded and masked up for some rattle can action. 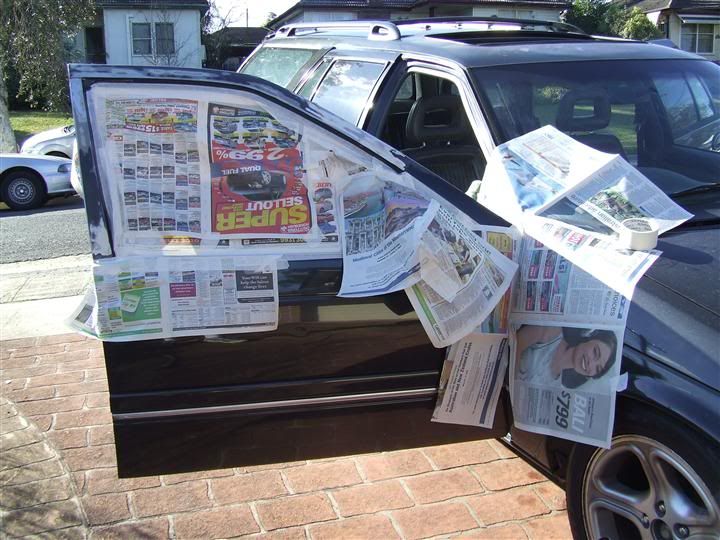 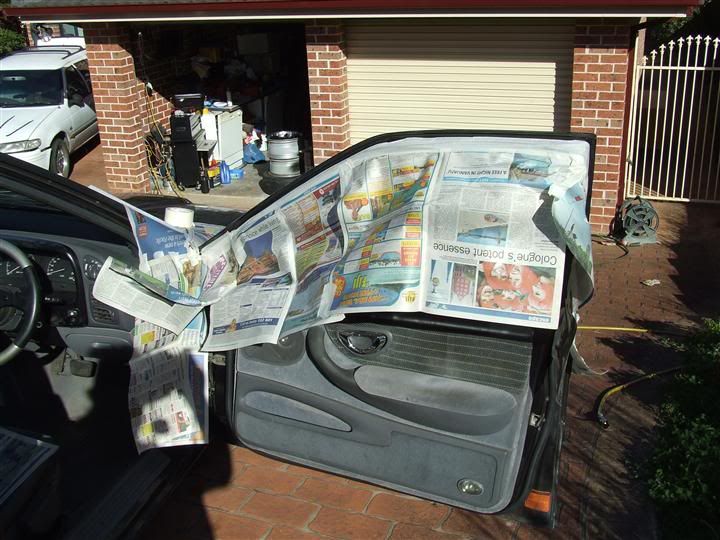 While not a perfect finish it certainly is presentable to the passer by. Here is a before and after comparison. 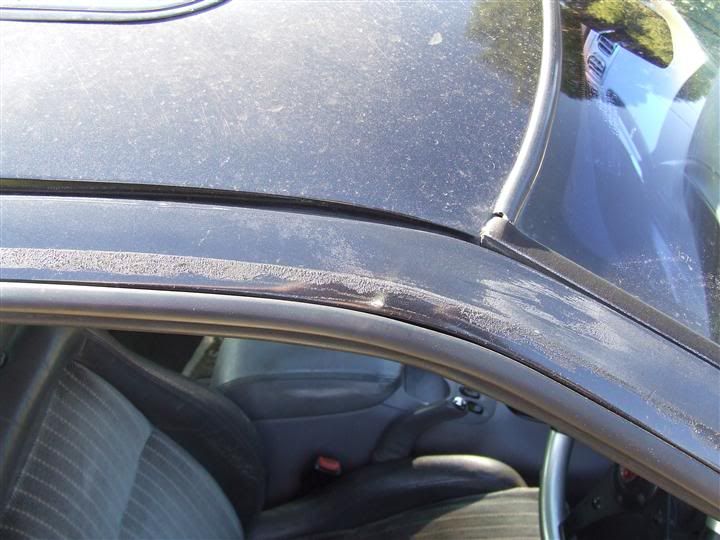 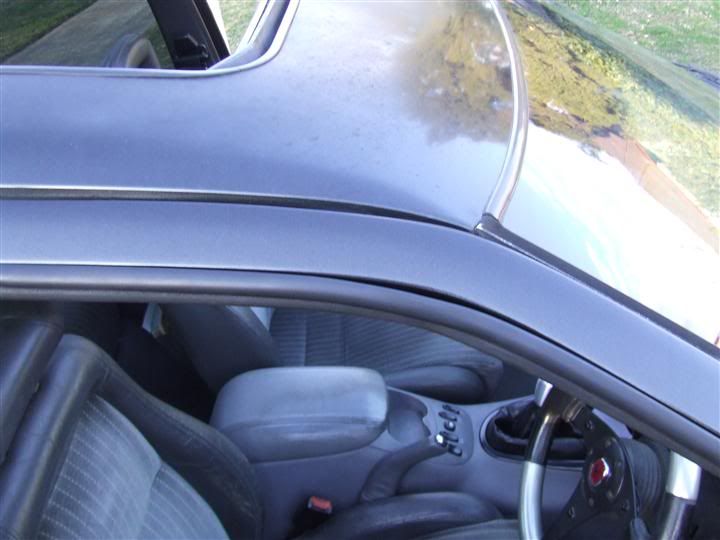 ********************************************************* You may recall that my new Ford Badge failed to stick to the grill, which required it's removal. I have been playing around with different options, and settle on this. 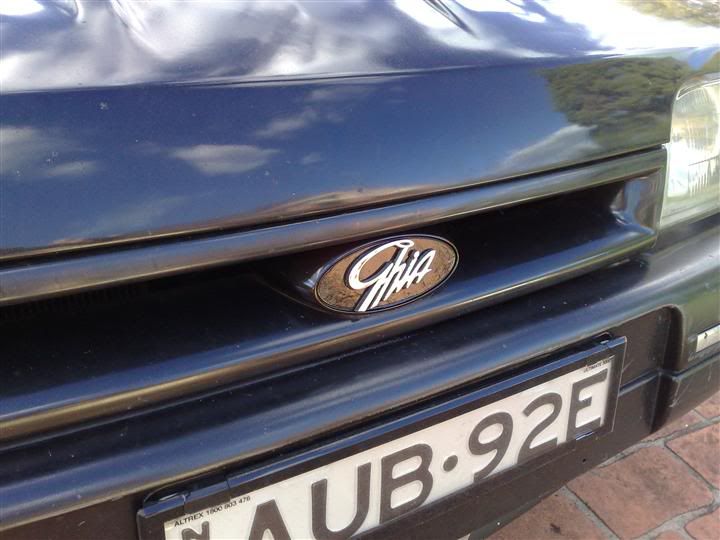 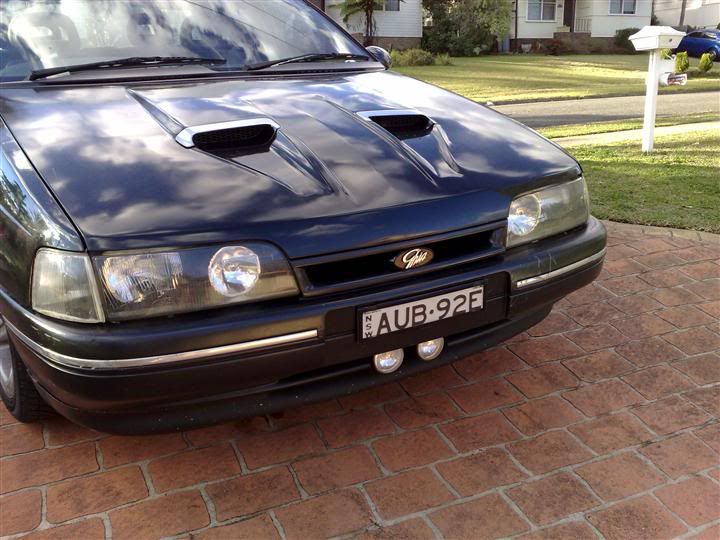 Quite fitting I think. Hopefully, tomorrow should bring some photos with the painted Prowlers on the wagon. Cheers BenJ
_________________ {DESCRIPTION} - Current Ride |
||
| Top | |
||
| BEAR80 |
|
|||
Age: 44 Posts: 683 Joined: 4th Mar 2010 Ride: BF Fairmont Ghia & TS Magna Location: central coast |
looking good ben
how do you remove the quarter windows mould and the weather strip mould???? cheers bear |
|||
| Top | |
|||
| tony.martin11 |
|
||
|
Hey Ben
 Who's EF with the old Ghia rims? OH yeah, the prowlers.... They look sweet  That actually looks quite nice... That is something nice and its nice and shiney Keep up the good work...............
_________________ BANNED USER |
||
| Top | |
||
| BenJ |
|
||
|
{USERNAME} wrote: looking good ben how do you remove the quarter windows mould and the weather strip mould???? cheers bear A quick inspection will reveal a small phips screw on the inside leading edge of the door. Take the screw out, wind the window down, and then gently, yank the front end of the strip upwards until it lifts. The slide a little towards the rear, and it should come free. The surround has 4 screws along the inside trailing quarter window frame. Once these are removed, you can gently lever the frame away from the door. There are two locator pins along the centre quarter window frame. Using a large flat blade screwdriver, you can insert the blade from the window edge, and lever the top pin part way and then the lower pin. Be careful as the frame is made of Alloy and will bend if you are not careful. The last bit is to remove the two white plastic push pin thingos that you would have seen when you removed the weather strip. Phew. Have fun. BenJ
_________________ {DESCRIPTION} - Current Ride |
||
| Top | |
||
| tony.martin11 |
|
||
|
{USERNAME} wrote: looking good ben how do you remove the quarter windows mould and the weather strip mould???? cheers bear They all screw in, look behind the grey plastic cover above the door trim (take it off) and also then there are (i think) two screws, one at either end holding the plastic strip on
_________________ BANNED USER |
||
| Top | |
||
| BenJ |
|
||
|
{USERNAME} wrote: Hey Ben Who's EF with the old Ghia rims? ........ Shhhhhhhh!!!!!!!!! It's a secret project. BenJ
_________________ {DESCRIPTION} - Current Ride |
||
| Top | |
||
| BEAR80 |
|
|||
Age: 44 Posts: 683 Joined: 4th Mar 2010 Ride: BF Fairmont Ghia & TS Magna Location: central coast |
{USERNAME} wrote: {USERNAME} wrote: looking good ben how do you remove the quarter windows mould and the weather strip mould???? cheers bear A quick inspection will reveal a small phips screw on the inside leading edge of the door. Take the screw out, wind the window down, and then gently, yank the front end of the strip upwards until it lifts. The slide a little towards the rear, and it should come free. The surround has 4 screws along the inside trailing quarter window frame. Once these are removed, you can gently lever the frame away from the door. There are two locator pins along the centre quarter window frame. Using a large flat blade screwdriver, you can insert the blade from the window edge, and lever the top pin part way and then the lower pin. Be careful as the frame is made of Alloy and will bend if you are not careful. The last bit is to remove the two white plastic push pin thingos that you would have seen when you removed the weather strip. Phew. Have fun. BenJ cheers for the info ben, i feel a painting frenzy comming on cheers bear |
|||
| Top | |
|||
| jonathon |
|
|||
|
excellent eb wagon just have a quick question where did you get the ghia badge from as i need to track one down the the ef fairmont ghia i have.
cheers Jonathon
_________________ Owning 1 of 84,847 ebII. |
|||
| Top | |
|||
| BenJ |
|
||
|
I bought a couple off Ebay a while ago. They come up every now and then. Also check cars at the wreckers, but I find badges are one of the first things to go.
Cheers BenJ
_________________ {DESCRIPTION} - Current Ride |
||
| Top | |
||
| Who is online |
|---|
Users browsing this forum: No registered users and 38 guests |