

|
| smiley235 |
|
|||
|
{USERNAME} wrote: {USERNAME} wrote: F**k phongus, my perceived view of your mechanical knowledge just increased 10 fold, nice write up so far! hahaha thanks cam phong =P~ well I managed to get the tensioner back in alright on my old car, give me buzz if you need a hand.
_________________ 178.3 rwkw
|
|||
| Top | |
|||
| phongus |
|
|||
|
DAY 2
Okay, I got lazy yesterday so I started on a bit of work this morning... Got the rocker gears out, the camshaft and removed the head. In the last post I had already removed the numerous amounts of bolts that hold the rocker gears in place, but I couldn't be f**k removing the rocker gears so I left them for the second day. Make sure you block the oil return holes so that parts won't fall through it and you lose bits and pieces...you should use lint free cloth/material which is recommended by Gregory's. I don't have any so I used whatever I had lying around, in this case, a free-give-away T-shirt. (don't do what I do, it may not be wise and may damage your motor...I'll soon find out if I have done so Once all the bolts were undone, I removed the rocker gears off the head. The head has these protruding rings that slide into the underside of the rocker gear assembly. This means you can't move it side to side to remove the rocker gear assembly. What I did was just lever it from the back end of the head since it sprung up and was already off the head. So I levered the front end so that it was level and it just popped off. Once removed the assembly was placed on an old t-shirt. I posted pictures, since they do tell a thousand words 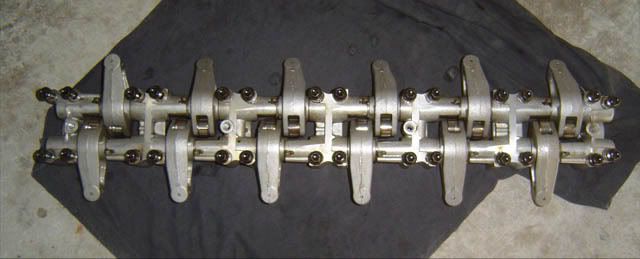

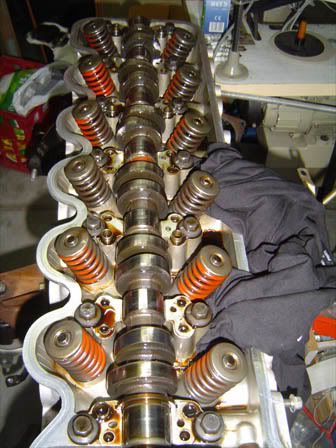 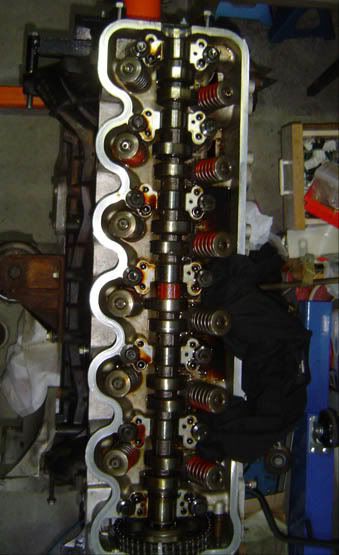
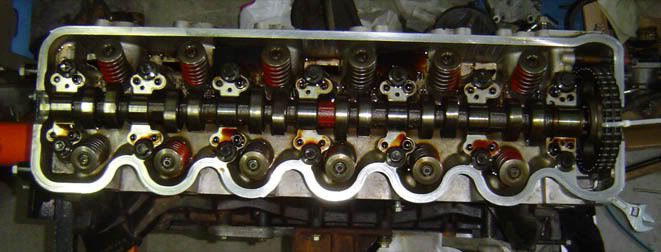
You can now see the camshaft, and it just easily lifts out. There were no bolts or anything that held it in place, but it is held it by a bit of pressure. The left over oil has caused it to kind of stick to the head, so I had to lever it off with a screw driver (being careful not to damage the head). Before I levered it off the head I had to make sure there was a certain step I should do before removing the camshaft. Only thing mentioned was to lift it off evenly, so I levered it off on either side off the cam and it popped out. Sorry I forgot to take the photo of the camshaft itself, but we all know how they look like right? I did however take a photo of the head without the camshaft, after I took half of the head bolts out, oops lol. You can see them in the next step. Now it was time to remove the head itself. There are 14 bolts that hold the head in. You can see them in the picture below which are circled in blue. I have numbered each bolt as to how the head bolts should be removed. At first you will need to just crack the bolts so that it is easier to undo. Start from 1 and then go in a spiral motion to loosen up all the bolts. Starting from the end inwards. It is very hard to do unless you have a long breaker bar/T-bar or have a lot of elbow grease. I have limited strength and I only had a short length T-bar, but I got around the problem by using the Engine stand "rotating stick" and just shoving it on the end of the T-bar handle to extend it, which gave me another meter of leverage making it much easier to undo the bolts. 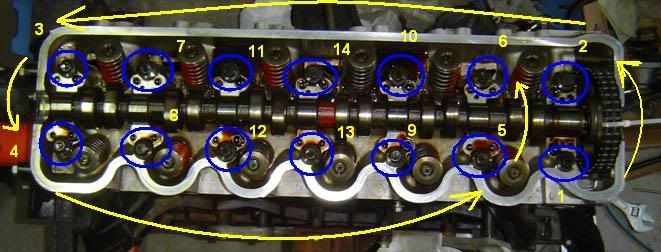
When all the bolts were loosened up, I used the socket with my hand and undid each bolt in the spiral motion until all the bolts were really loose and not touching the head anymore. That's when I removed all the bolts randomly and took them out of the head. 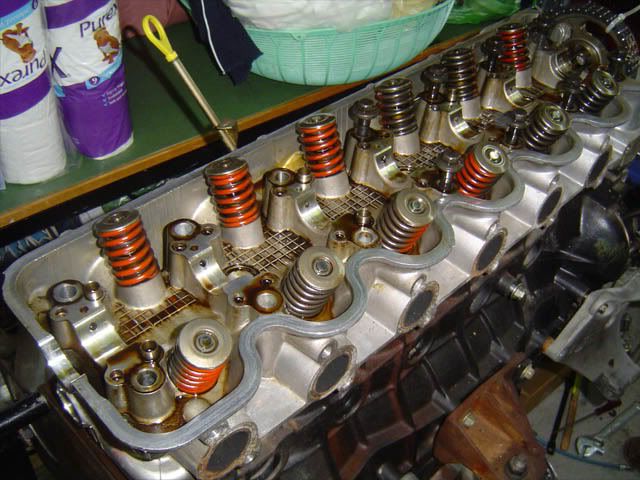
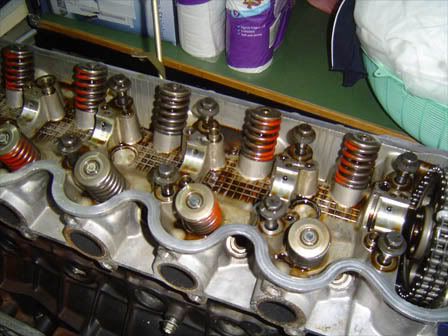
The above pictures shows the head without the camshaft and also with half the bolts already off the head. When all the head bolts were off. I read the Gregory's and it just told me to lift the head off with an assistant...in this case my dad. But since the head is basically glued onto the block, I had to use a flat head screw driver to lever at some points...making sure I didn't use any mating surfaces for leverage. Only required leverage at one point and the head basically came off with a bit of heaving. Once off I just put it aside and that was it for the 1 hour of work. Pictures below of the block and the head. 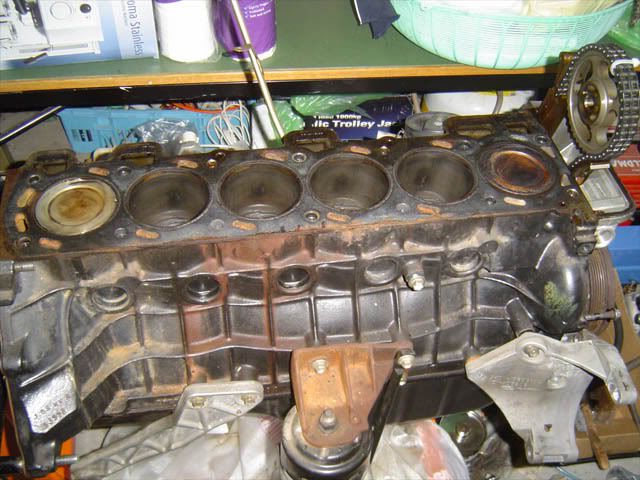
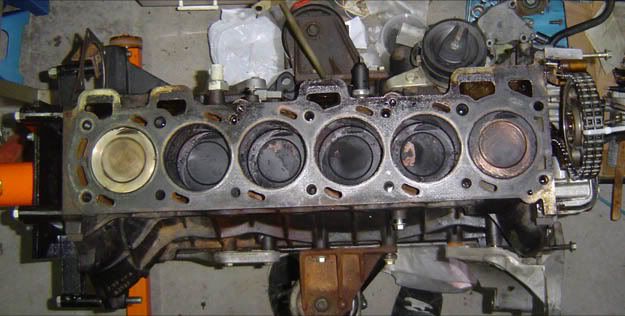
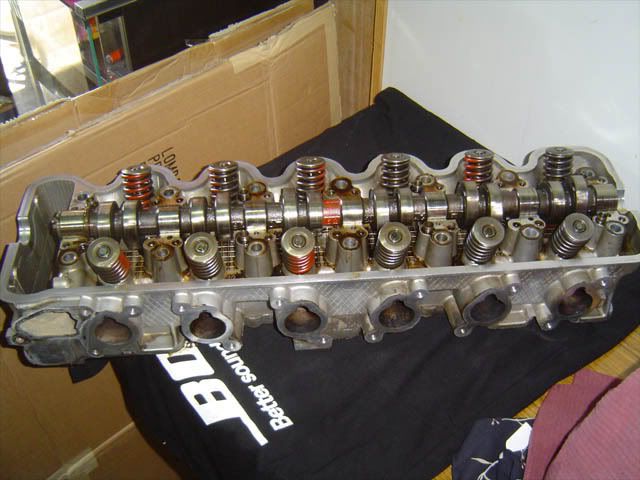
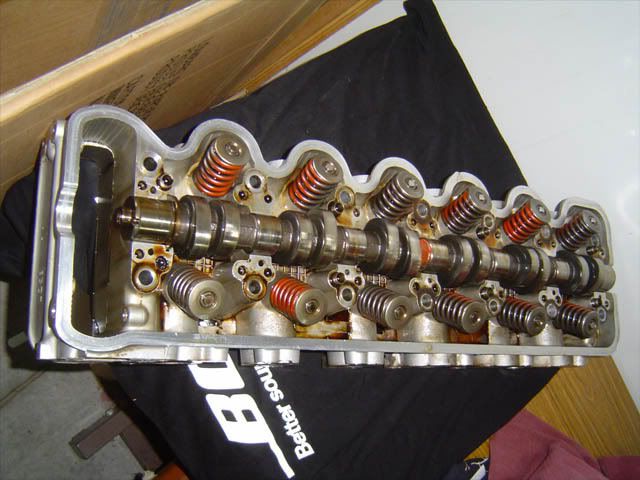
Well that's it for today. Next day I will prep the block and also send the head out to my mechanic so he can get it resurfaced, pressure tested and something to do with valves. Hope it helps. phong =P~
_________________ phongus = Post whore 2006 |
|||
| Top | |
|||
| twase |
|
|||
|
looks like pot 6 got a free steam clean.
_________________ BF Fairmont Ghia Series II update. |
|||
| Top | |
|||
| phongus |
|
|||
|
{USERNAME} wrote: looks like pot 6 got a free steam clean.
I wiped it with a rag and all the oil on it came off. The oil on it wasn't caked on or dry BTW At this stage you just clean the block yeah? what can I use to get all the gunk out and also get the carbon off the piston tops. phong =P~
_________________ phongus = Post whore 2006 |
|||
| Top | |
|||
| BuNtEr |
|
||
|
you can use a small round wire brush you put in a drill to de coke the pistons.
Way to do that is to bring up each piston to the top and do it that way, be careful not to touch the edges of the bore. and use a air gun to blow away the s**t that comes off i also use to put rags in the other bors to stop s**t going in them.
_________________ BANNED |
||
| Top | |
||
| MoNGooSE |
|
|||
|
Just posting to watch this thread. Good job boys. I was planning on taking pics and doing a write up myself when my head gasket blew but circumstances meant I barely had time to go to the crapper let alone take pretty pictures
_________________ EF GT6 - 129.4rwkw - Feautured in Street Fords Issue #77 |
|||
| Top | |
|||
| phongus |
|
|||
|
{USERNAME} wrote: you can use a small round wire brush you put in a drill to de coke the pistons.
Way to do that is to bring up each piston to the top and do it that way, be careful not to touch the edges of the bore. and use a air gun to blow away the s**t that comes off i also use to put rags in the other bors to stop s**t going in them. According to the Gregory's, I shouldn't rotate the engine when the head is off phong =P~
_________________ phongus = Post whore 2006 |
|||
| Top | |
|||
| FordFairmont |
|
||
Posts: 6113 Joined: 8th May 2007 |
{USERNAME} wrote: [According to the Gregory's, I shouldn't rotate the engine when the head is off
phong =P~ Done that before and broke the plastic timing chain guide. |
||
| Top | |
||
| phongus |
|
|||
|
{USERNAME} wrote: {USERNAME} wrote: [According to the Gregory's, I shouldn't rotate the engine when the head is off phong =P~ Done that before and broke the plastic timing chain guide. In that case I won't rotate it phong =P~
_________________ phongus = Post whore 2006 |
|||
| Top | |
|||
| FordFairmont |
|
||
Posts: 6113 Joined: 8th May 2007 |
Why clean it? We just sprayed some wd40 liberally, wiped it and whacked the head back on. Pulled 138kw @ wheels couple weeks later, running fine !!!
|
||
| Top | |
||
| Krytox |
|
|||
|
{USERNAME} wrote: Why clean it? We just sprayed some wd40 liberally, wiped it and whacked the head back on. Pulled 138kw @ wheels couple weeks later, running fine !!!
Why? Its a known contributor for pinging. Either use some Oven Cleaner, let it sit and dig in for an hour or so and then scrub it off. Nothing beats a nice water spray when the cars running!
_________________ Carefree, we may not be number one, but we're up there. |
|||
| Top | |
|||
| 3x-puursui7 |
|
||
|
i think with #6 cyl being freshly oilled like u said it could possibly valve stem seals thats bout the first thing i could think of that would only affect the one cylinder. or even overfuelling on second thoughts as that would disperse the caked on oil over time
_________________ mmmmmmmmmmm 220 manual goodness! |
||
| Top | |
||
| phongus |
|
|||
|
{USERNAME} wrote: i think with #6 cyl being freshly oilled like u said it could possibly valve stem seals thats bout the first thing i could think of that would only affect the one cylinder. or even overfuelling on second thoughts as that would disperse the caked on oil over time
hmmm, going to send the head off over the week sometime, whenever I can be stuffed getting it to the mechanic after work. So soaking piston in WD40 is a no no. I'll just stick to just scrubbing. Can I use a rag that has WD40 sprayed on it to wipe the gunk out of cylinders 2, 3, 4 and 5, or would it be the same as soaking in WD40? I don't want to wreck this project anytime soon phong =P~ EDIT: By the way...wire brush on piston = bad yeah?
_________________ phongus = Post whore 2006 |
|||
| Top | |
|||
| phongus |
|
|||
|
DAY 3
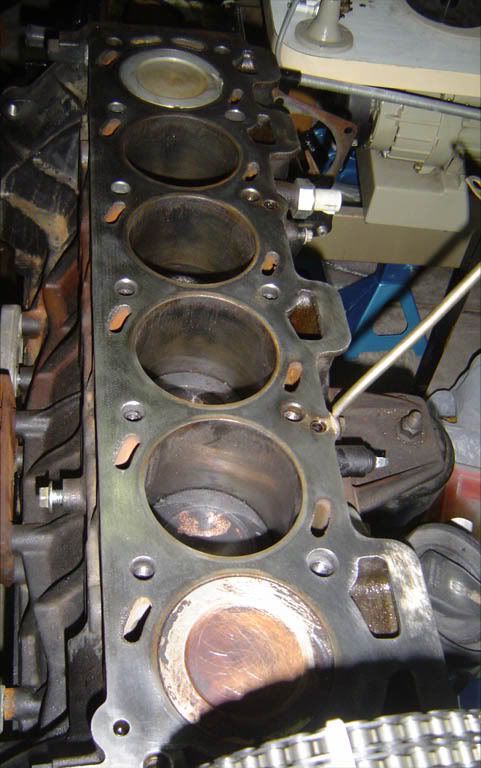
Alright, got home from work and thought I'd start on cleaning the surface of the block. Went into the garage to find that my dad had attempted some work. Found on 2 of the pistons that little wire type scratch marks were present...on the pistons that were on the bottom, rather the top ones. lucky he stopped or else he may have scratched the sides of the cylinder Anyways... I used one of those round/circle wire brushes which can be attached to a cordless/power drill to do the job. Attached it and got into it. At first I thought, putting the head bolts back in would save me from cleaning up the crap inside the holes later on...but they just got in the way, so I removed them and continued on. While "wire brushing", I took extra care around the cylinders/bores (dunno what it is Got all the dirt off and I noticed that some areas had been welded...I guess the head was done previously...and probably not too long ago. Also noticed that the head bolts that were used were AU head bolts with the thicker head and longer thread. Now I am just waiting to borrow my cousins air compressor to blow out all the crap in the head bolt holes and cylinders. Took some snaps...not sure if it is finished yet, but I'll check it again on the weekend if it still needs more cleaning. phong =P~ 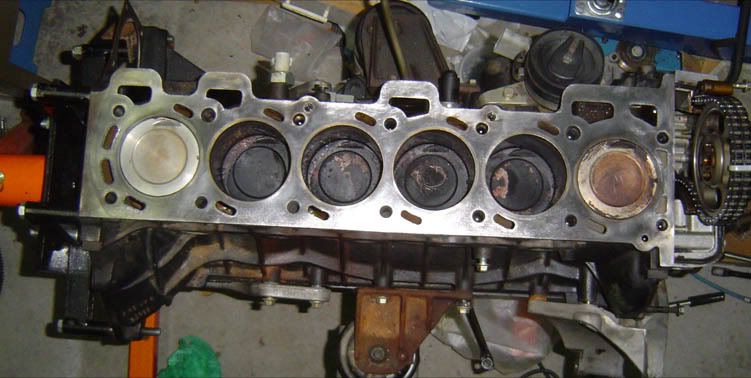
_________________ phongus = Post whore 2006 |
|||
| Top | |
|||
| Krytox |
|
|||
|
Make sure you remove all the s**t out of the oil gallery holes!
Would have been an idea to block them off instead of the bolt holes. If you don't clean them or prime up the blocks oil galleries prior to head install, all the metallic/carbon s**t will make it to the lifters and also the tensioner and 'could' resolve in premature wear.
_________________ Carefree, we may not be number one, but we're up there. |
|||
| Top | |
|||
| Who is online |
|---|
Users browsing this forum: No registered users and 3 guests |