

|
| syco26 |
|
||
|
Here are the steps I took for Dismantling the cluster
Step 1 - Here is the first piece you remove - there are two clips on the bottom and three on the top (marked with the red arrows) - you just push the clip in and out - I found it easier to get all on one side pushed out the hold pressure on it and clip the other side out. Don't rush and try and skip layers - just remove one layer at a time till you get to the base. 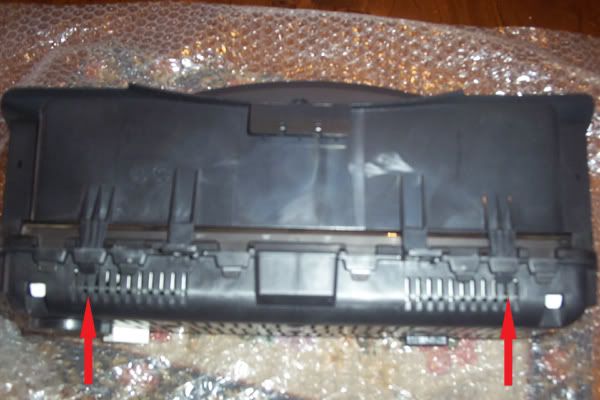
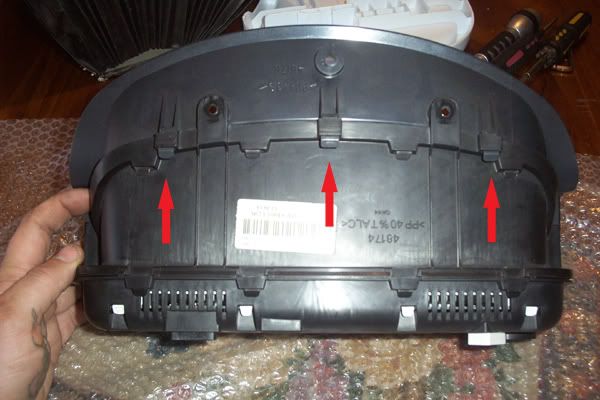
Step 2 - Second layer is the "glass" screen - there are four clips on the bottom and four on the top (marked with the red arrows) - you just push the clip in and out - I found it easier to get all on one side pushed out the hold pressure on it and clip the other side out. 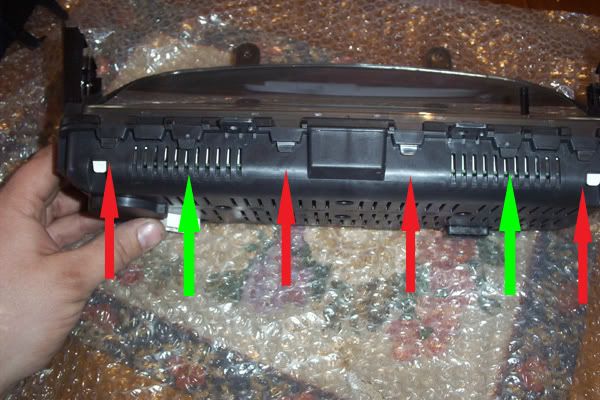
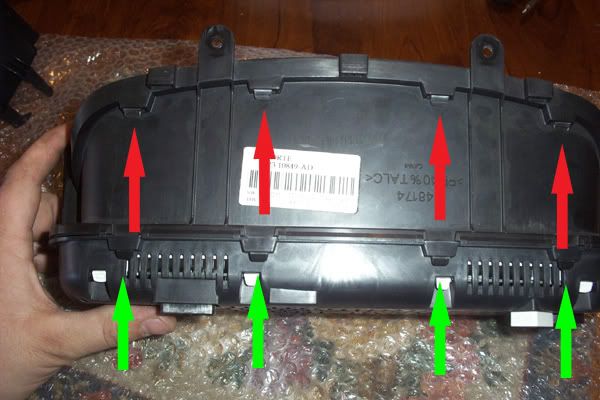
Step 3 - Third layer is the "spacer" layer - there are two clips on the bottom and four on the top (marked with the green arrows) - you just push the clip in and out - I found it easier to get all on one side pushed out the hold pressure on it and clip the other side out. 

Step 4 - In this picture you can see the Dash dim and trip buttons - just observe the way they come out and you should be able to put them back in quite easily. 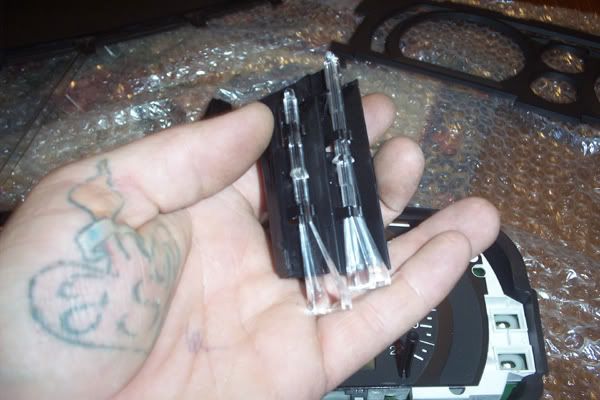
Step 5 - Fourth layer is the "housing" layer - there are two clips on the bottom and four on the top (marked with the red arrows) - you just push the clip in and out - I found it easier to get all on one side pushed out the hold pressure on it and clip the other side out. 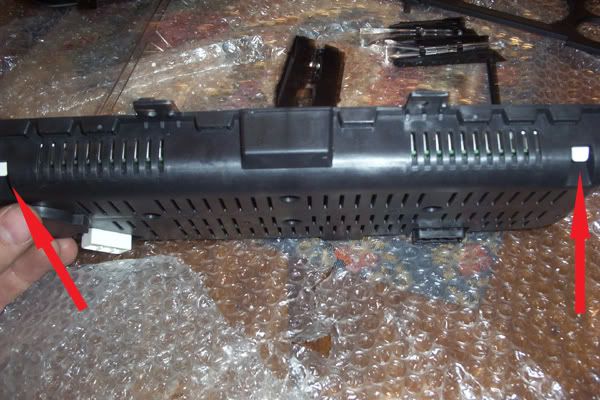
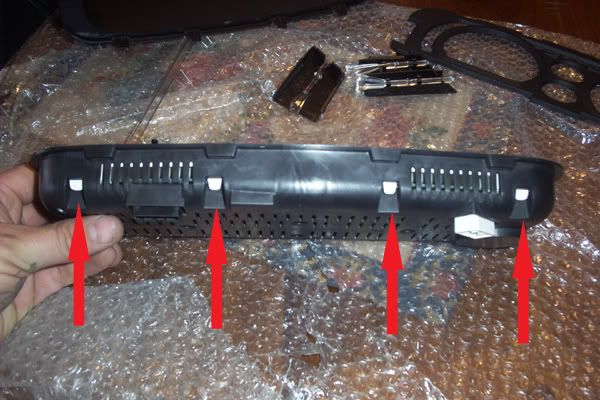
Step 6 - Removing the buttons is quite scary at first as they feel like they will break but they don't - I just gabbed them close to the facia and pulled up while kinda pushing down with my knuckles- they feel like they aren't going to come off then all of a sudden they just pop off. 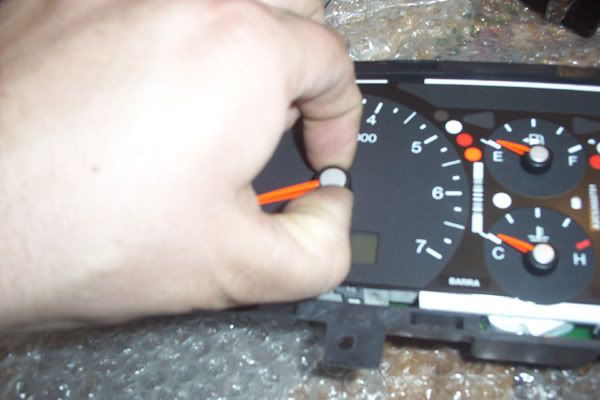
Step 8 - Remove the facia by pulling it up at the edges gently - you will notice it is clipped onto the board around the tacco and speedo holes - comes up pretty easy. Step 8 - The last step to get right down the the circuit board is to remove the lcd clips marked in red - if you flip the white houseing over you can see four little metal clips which you unclip and the white plastic will come away from the circuit board - the lcd's also come off so make sure you put them up the right way Sorry I didn't get a photo of the back of it or once completely apart. 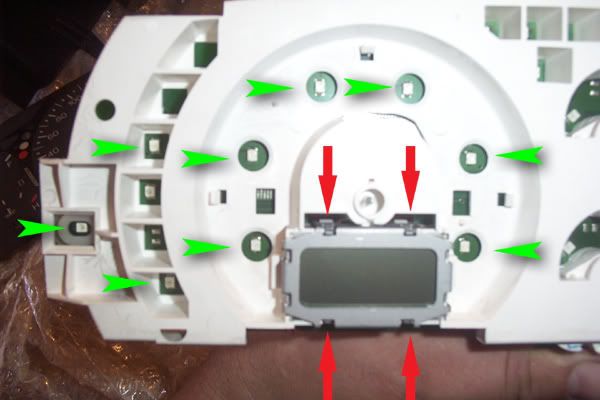
The green arrows are pointing toward the LED's I hope this helps some one out there needing to remove and dismantly there cluster and if you have any questions at all post it here or e-mail me. {DESCRIPTION} |
||
| Top | |
||
| horis |
|
|||
|
quick question y you pull it all apart any way mods in mind
_________________ 95 ef montfor sale pm for info, 88 hilux mud truck |
|||
| Top | |
|||
| MilleniumFalcon |
|
|||
|
Cant wait til your next tutorial on your mods to your cluster
Good work syco26. |
|||
| Top | |
|||
| markwright |
|
|||
|
yeh its easy as
i did this at work (1st year apprentice) while i was supposed to be sorting warranty ther was an XR cluster (odo stopped clocking) which has got fancy sporty looking s**t but otherwise the same. so if u got an xt u can swap the gauge frame bits and the "colour" plate thing and yeah. probly not worth it with just an xr one but the G220's and like turbo ghia territorys have realllly nice lookin ones. meh, was better than working haha
_________________ DF LTD 4L |
|||
| Top | |
|||
| xpression |
|
|||
|
{USERNAME} wrote: yeh its easy as
i did this at work (1st year apprentice) while i was supposed to be sorting warranty ther was an XR cluster (odo stopped clocking) which has got fancy sporty looking s**t but otherwise the same. so if u got an xt u can swap the gauge frame bits and the "colour" plate thing and yeah. probly not worth it with just an xr one but the G220's and like turbo ghia territorys have realllly nice lookin ones. meh, was better than working haha XR faces wont fit on stock clusters as the increments are different. Where u working? |
|||
| Top | |
|||
| markwright |
|
|||
|
centreford in perth
aw damn that true? i wasnt exactly positive but it looked same so i just assumed the differences were cosmetic only. what do you mean by increments? not too knowledgable as yet. only 4 months in and not on tools yet
_________________ DF LTD 4L |
|||
| Top | |
|||
| xpression |
|
|||
|
nah its fair, theres gotta be someone in the workshop who can do the bits that keep the workshop together.
You'd be working with that looser who drives the blue AU thats crashed in the front LH corner then yeh? and Marie? I work with marie's bf at range ford |
|||
| Top | |
|||
| markwright |
|
|||
|
hahahaha holy crap. yeah richard or well.. d**k.. is him. small world ay.
yeah im the first year who ISNT the service managers step son. so here it is a liiiiiitttle bit unfair lol. but yeh ill be sure to tell d**k that even fordmods knows of his dumness. (he fell through the ford ceiling at MITA aswell) u heard of timmy typhoon then?
_________________ DF LTD 4L |
|||
| Top | |
|||
| Who is online |
|---|
Users browsing this forum: No registered users and 41 guests |