

|
| ToranaGuy |
|
|||
|
That index BenJ = Brilliant!
I just used it to look over your sunroof install again. Yep, i picked myself up an EB Fairmont parts car with a fully functional sunroof (still have the white ED GLI in the front yard tho I was thinking about using the hole in the roof, once the sunroof is removed, to trace it onto some cardboard to use as a cutting template. Still gotta think about it a little more. Keep up the good modding man, your an inspiration! Cheers ToranaGuy
_________________ I am the ToranaGuy!|74 Lh Torana Turbo|78 Hz PanelVan|86 Mighty Boy Ute|93 EB2 Ghia,GT Mockup,5spd,LPGI,Full Leather|2 x EB Xr8 5spd's|{DESCRIPTION}|{DESCRIPTION}|{DESCRIPTION}| |
|||
| Top | |
|||
| FRD-PWR |
|
||
|
Thanks mate.
Also my heater doesnt work in my car it only blow's up on the windscreen. any possible solutions? thanks again. |
||
| Top | |
||
| huggiebear |
|
|||
|
{USERNAME} wrote: Thanks mate. Also my heater doesnt work in my car it only blow's up on the windscreen. any possible solutions? thanks again. do a search using the search function at the top of your screen, you will find its vacuum related, so a hose will have come undone, check the 2 black and 1 green are connected in the engine bay passenger side, come out next to the window washer bottle |
|||
| Top | |
|||
| BenJ |
|
||
|
It may seem that I have been a bit quiet for a couple of weeks, but, alas, it is not true.
I have been working away feverishly on a number of projects. ***************************************************** Many moons ago, I touched up the C Pillars with a spot of Satin Black paint. If you don't recall you can refresh your memory by {DESCRIPTION}. I always intended to do a proper job of the C Pillars, but the original ones on the wagon are suffering from plastic rot, and were not worth painting. So being the resourceful young man (cough) that I am, I picked up a spare set off an EL Wagon for the princely sum of $15 delivered via your friend and mine, Ebay. These have sat around in my office for a number of weeks while I worked up the motivation to actually paint them. And this week, that actually happened!! PICS!!!! The first photo shows the crappy state of the C Pillars I replaced. 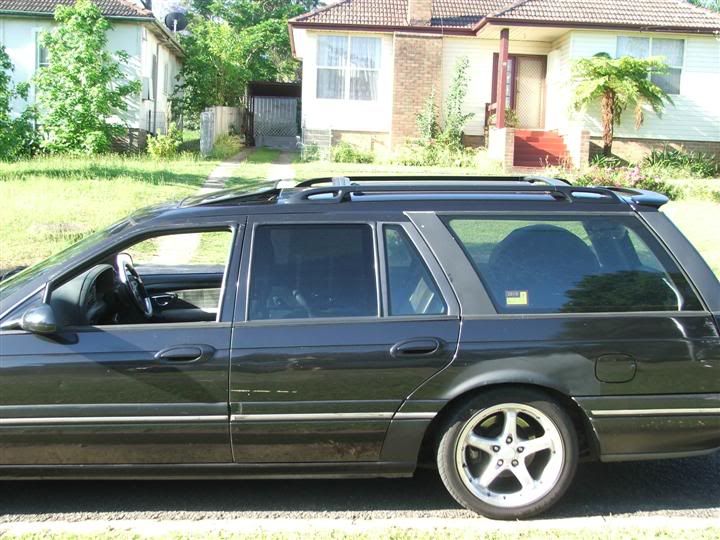 The new painted ones look much nicer, even if it is me saying it LOL. 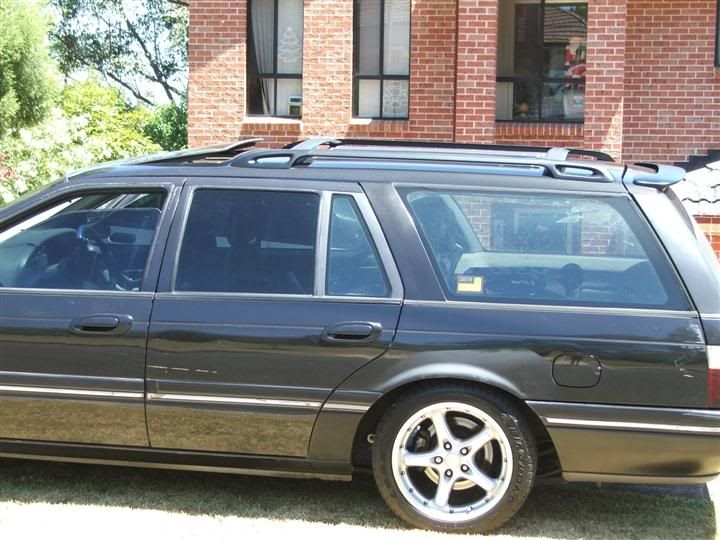 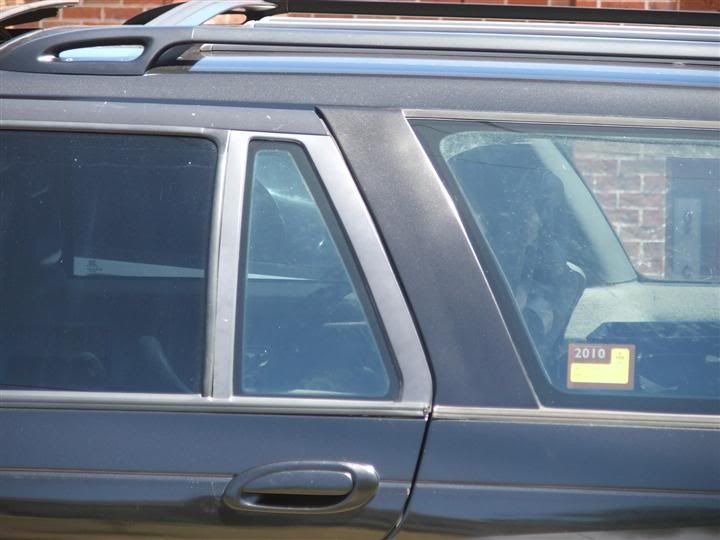 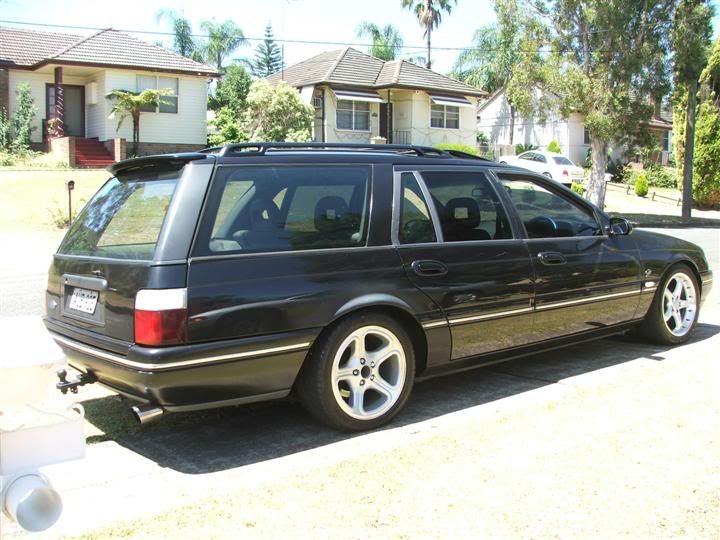 MMMMM Black Pearl has a very nice sparkle in the sun. *************************************************** Those of you with sharp eyes, or at least eyes that actually pay attention to a thread, will have noticed something amiss in the last photo. Thats right! You got it. That wheel does not belong on there!!!!! Well, actually, that is my spare wheel. And the reason it is currently on the wagon is because of this. Look closely now. 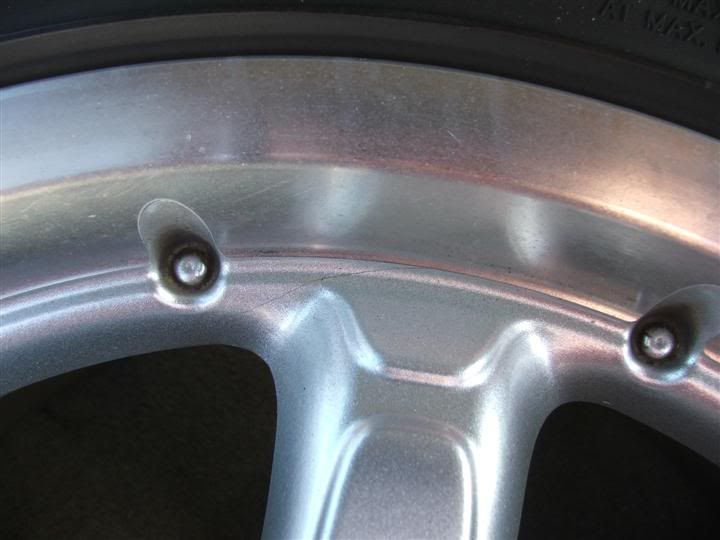 Did you see it? Perhaps a closer look will help. 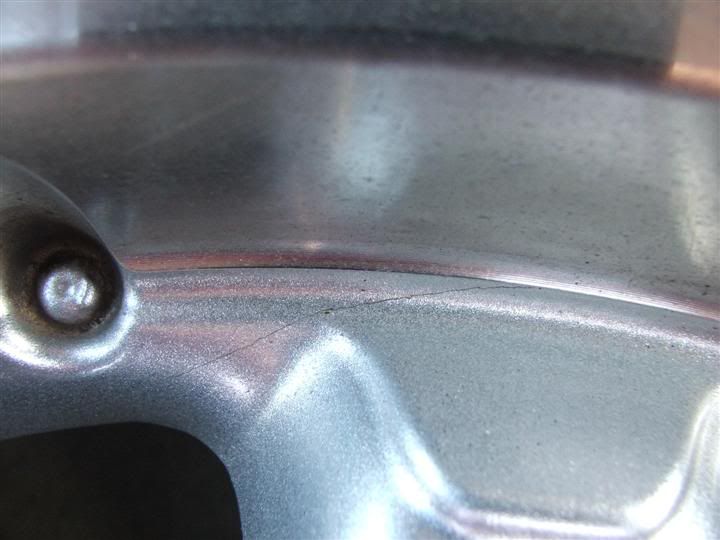 A lovely hairline crack. Wonderful!!! NOT!!!!!! Luckily I have found a fabulous fellow member who is prepared to sell me a replacement. So for a few weeks the spare will stay on. Good thing it is the correct size etc. Good forward planning on my part. hehe. While we are on the subject of wheels, I grabbed these recently. 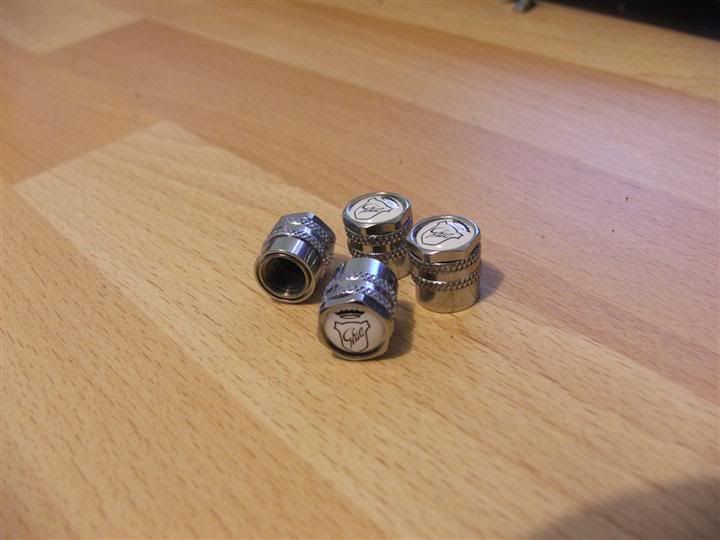 A nice little touch, subtle, but effective. ************************************************************** A couple of weeks ago, my very good friend, and Ford Modder Collaborator, Snap, was up for a visit. You may recall that REALLY HOT Saturday we had here in Sydney? Well, Snap spent half of the day rolling around in his overalls under the back of the Wagon, welding on sedan sway bar mounting brackets. He just did not like my carefully placed, artistically angled, U Bolt for the rear swaybar. So, many thanks once again Snap. In case you forgot, some reminder shots. 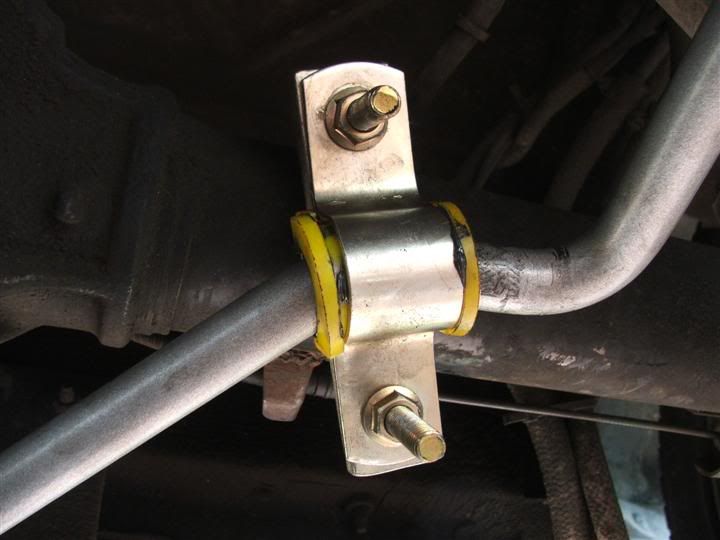 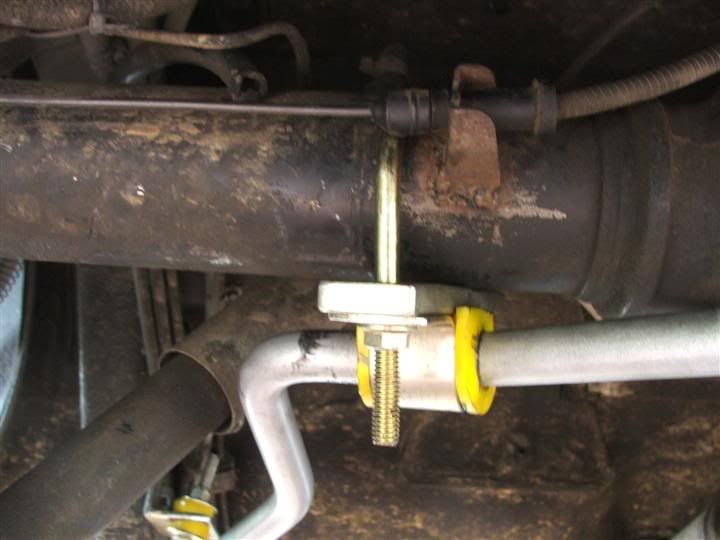 The sedan bracket waiting to be installed. 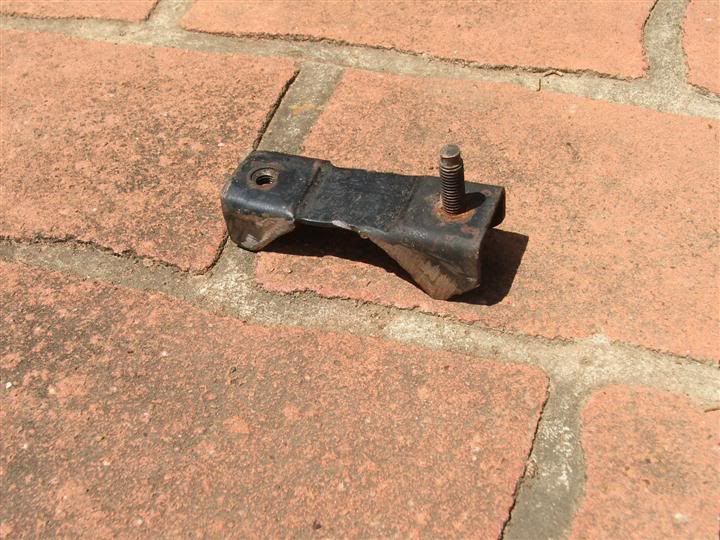 Fixed!! 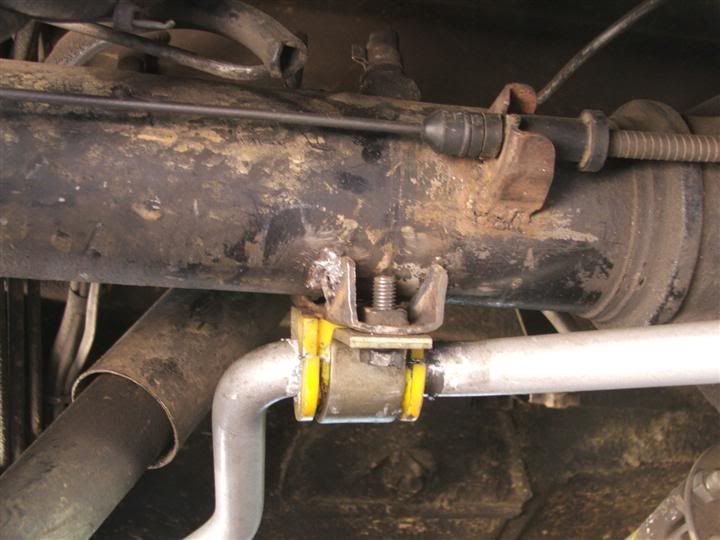 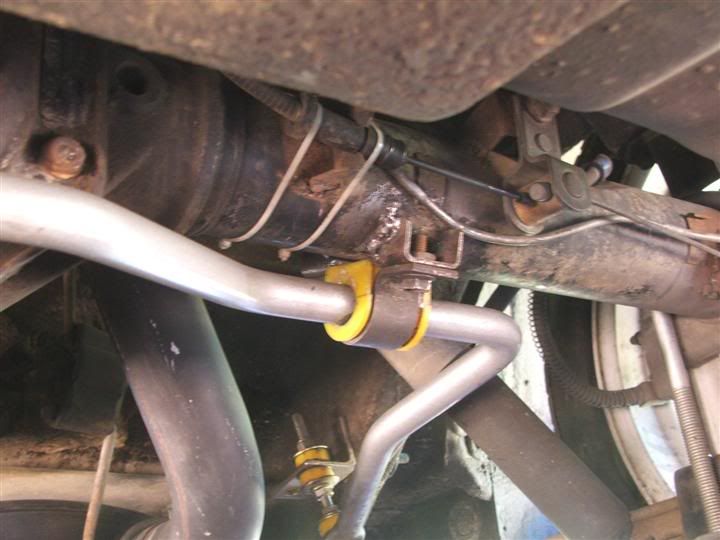 I will add some paint one day . . . . . . ************************************************************** And finally, the other little project I have been working on involved grabbing some unwanted bits off a certain Gold EA, a battery drill, a wire wheel, and some black paint. Cleaned up. 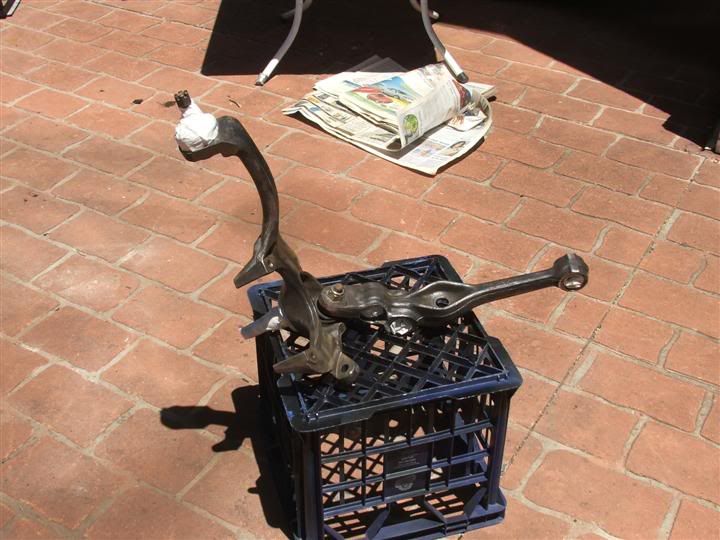 Painted with Gloss Black Engine Enamel. 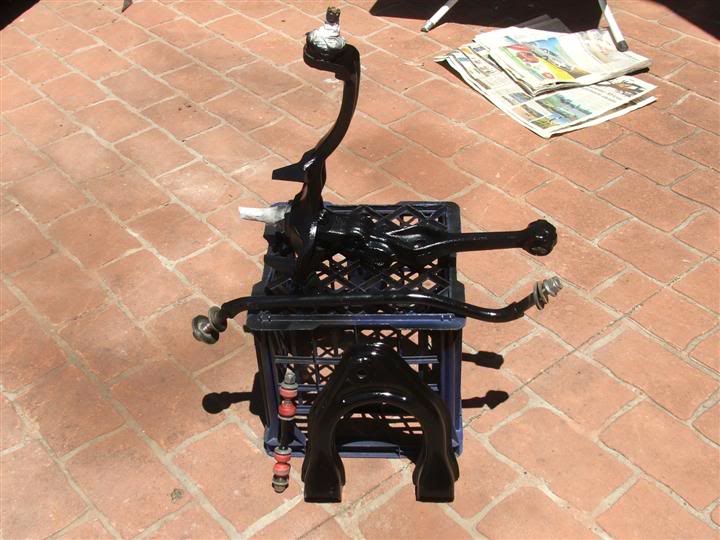 Add in some new Urethane bushes and we end up with a refurbished front end. Troyman was kind enough to donate the uprights with near new balljoints, upper and lower control arms and radius rods from his Gold EA before it was carted off to the wreckers. While the front end is apart, I will replace the EB Sway Bar Links with the pictured EL links, as the EL ones are MUCH thicker. That will be needed when I fit this. 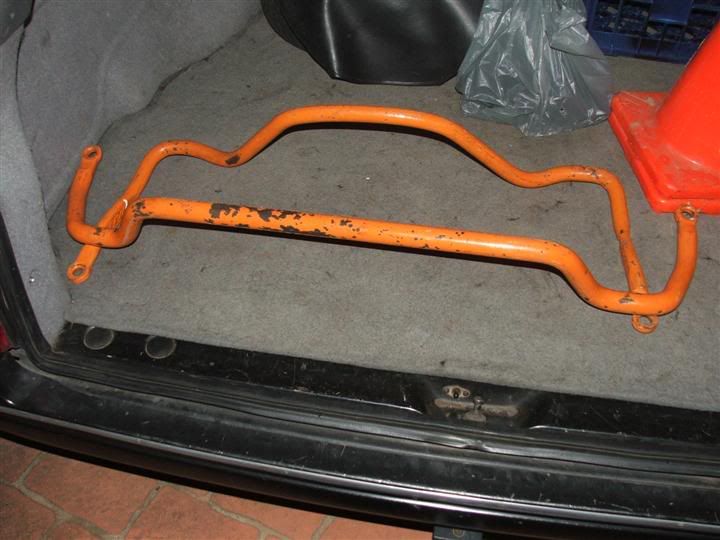 A 30mm Kmac Front Sway Bar. I picked up the bars tonight from Shellharbour, a nice '3 hour tour', after seeing them on Ebay today with a Buy It Now of $30. A few clicks of the mouse later, and they were mine. I will clean it up, add some nice black paint, and fit it soon. Need to get some correct sized D Bushes first. The current 27mm Pedders bar will find a new home on my Wife's ED Ghia Sedan, along with the Rear 25mm Kmac bar, and some EL XR Springs and Shocks. ************************************************ Well, I hope that makes up for the lack of updates. Should have more stuff to say tomorrow night if all goes well. Cheers BenJ
_________________ {DESCRIPTION} - Current Ride |
||
| Top | |
||
| Papa Smurf |
|
||
|
The C pillar trims look very nice Ben. We have spares from the ED machine for Cam's car too just need to get them off before it goes on it's last journey.
It is good you have a friend with a Welder and knowledge. |
||
| Top | |
||
| KWIKXR |
|
|||
|
Mate, that C pillar came up mint, ties in much better with the rest of the paintwork now. Shame to hear about the rim cracking though, i was quite fond of those rims, but now i have read that they are quite prone to cracking has put me off them slightly - still i reckon they are one of CSA' best designs yet, they suit your wagon very very well..
The Kmac front swaybar looks very sturdy indeed, i would love a larger sway bar up front (and rear for that matter), i've also currently got a pedders 27mm front one on mine. Should turn out nicely with a new lick of paint. Keep up the good work BenJ |
|||
| Top | |
|||
| huggiebear |
|
|||
|
those valve caps look awesome. mine arrived the other day, glad to see you didnt pay the extra 10 bucks for the tool whick you can do the same job with a shifter. apparently the XR6 ones look good, a friend of mine bought them but i havnt seen them yet
shame about the wheel, the trims look great now you need to do the rear door 1/4 window surround and the D pillar covers the same |
|||
| Top | |
|||
| snap0964 |
|
|||
|
{USERNAME} wrote: It is good you have a friend with a Welder and knowledge. Unfortunately, the MIG's a bit big to transport around - so it's all povo ARC welding So arc welder + limited space = not a crash hot job, but they won't come adrift in a hurry. Should've kept the sedan brackets for mine
_________________ 96 XH Longreach 'S': LPG, Alarm, 3.23:1 LSD, Cruise, Trip Comp, ABS, Power Windows, Mid Series Dome Lt, Climate Ctrl |
|||
| Top | |
|||
| psyolent |
|
||
|
plus upside down while you're at it welding = burnt arms and never fun
|
||
| Top | |
||
| Papa Smurf |
|
||
|
{USERNAME} wrote: Unfortunately, the MIG's a bit big to transport around - so it's all povo ARC welding So arc welder + limited space = not a crash hot job, but they won't come adrift in a hurry. Should've kept the sedan brackets for mine I can see where it would have been a b**ch of a job to do but the end result is the important part. It was good of you to give up your time to do so anyway. |
||
| Top | |
||
| DA22LE |
|
|||
|
{USERNAME} wrote: So arc welder + limited space = not a crash hot job, but they won't come adrift in a hurry. Gasless mig FTW....wonder who one of them.... 30mm sway bar is massive....Should handle pretty good now eh?? Cheers
_________________ BA XR8 Boss 260 |
|||
| Top | |
|||
| BenJ |
|
||
|
ashcook, Papa Smurk, KWIKXR, huggiebear
Thanks guys. I will let the clear coat go for a few weeks before it gets a cut and polish. By then I might have got my spare quarter window trims painted too. {USERNAME} wrote: plus upside down while you're at it welding = burnt arms and never fun LOL, Snap has a few burn marks now as a memento. {USERNAME} wrote: I can see where it would have been a b**ch of a job to do but the end result is the important part. It was good of you to give up your time to do so anyway. Yes, a b**ch of a job indeed. I am always grateful to Snap for the time and effort he puts in towards the Wagon. Without him, the wagon would not be what it is today. {USERNAME} wrote: 30mm sway bar is massive....Should handle pretty good now eh?? I can't believe how heavy the damn thing is. It certainly feels chunky. Hopefully I will have it in before Christmas. Cheers BenJ
_________________ {DESCRIPTION} - Current Ride |
||
| Top | |
||
| BenJ |
|
||
|
Well, it has been a hot, tiring but mostly productive day. Sort of.
After running my Wife and Daughter into Parramatta this morning, I got started on the car at around 11am. Started off badly when I remembered I broke my el Cheapo trolley jack last night. DAMN!! I hate using scissor jacks. Sooo much effort involved. Got stands under the front so both wheels are off the ground to remove any tension from the sway bar. Then got started on the right hand side. All the bad bits removed. 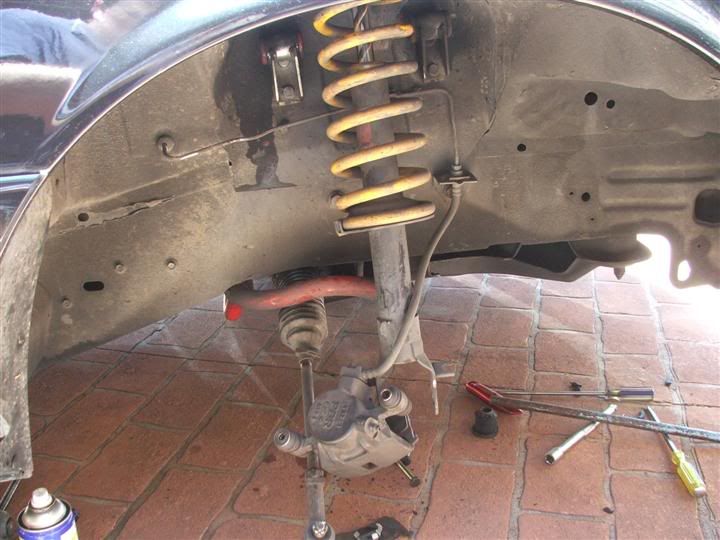 And a couple of hours later. 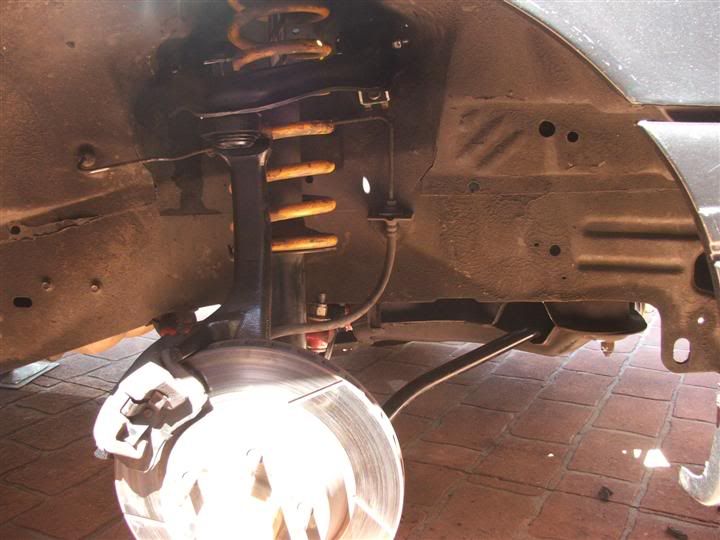 Took a bit to get the Radius Rod bush out of the Chassis, but got there in the end. I also ended up taking the Camber Kit out to assist with reassembly, and added in a couple more shims while I was at it. Went for a quick test drive after the right hand side was put back together, and I am happy to report the creaks, groans, and squeaks are now gone from the drivers side. As it was now 3.30pm I went and got some Lunch, and then had to go back to Parramatta to get the Ladies. Am now too buggered to start the Left Side. Will look at that next Saturday. For interests sake, here is a photo of the EB and EL sway bar links next to each other. 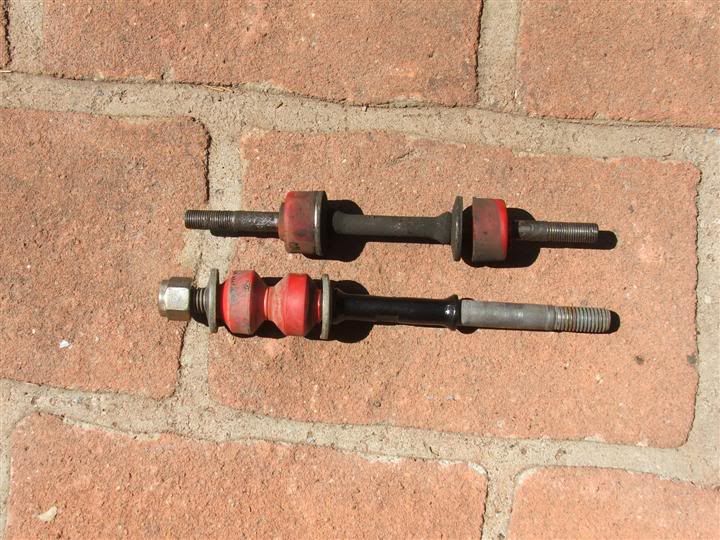 As you can see the EL one, on the bottom, is much thicker. An easy upgrade for you boxcar owners out there. Cheers BenJ
_________________ {DESCRIPTION} - Current Ride |
||
| Top | |
||
| ToranaGuy |
|
|||
|
Nice work BenJ!
I take it the thicker link has less chance of flexing giving the car a flatter ride? I might have to score myself some next time i'm at the wreckers. Cheers ToranaGuy
_________________ I am the ToranaGuy!|74 Lh Torana Turbo|78 Hz PanelVan|86 Mighty Boy Ute|93 EB2 Ghia,GT Mockup,5spd,LPGI,Full Leather|2 x EB Xr8 5spd's|{DESCRIPTION}|{DESCRIPTION}|{DESCRIPTION}| |
|||
| Top | |
|||
| BenJ |
|
||
|
Correct. And not to forget that when I got the Wagon, I found that one of the original EB sway bar links had actually snapped.
BenJ
_________________ {DESCRIPTION} - Current Ride |
||
| Top | |
||
| Who is online |
|---|
Users browsing this forum: No registered users and 8 guests |