

|
| Mont5.0 |
|
|||
|
{USERNAME} wrote: The primary reason for making the power steering pump bracket is because I don't have a BA Power Steering Pump, but have a couple of spare E Series ones. Ash, good thing you mentioned the bonnet clearance for the p/s pump. I will have to check into that. Cheers BenJ heres one for 45 bucks on ebay http://cgi.ebay.com.au/Falcon-BA-BF-4-0 ... ccessories nice engine stand by the way! |
|||
| Top | |
|||
| BenJ |
|
||
|
{USERNAME} wrote: {USERNAME} wrote: The primary reason for making the power steering pump bracket is because I don't have a BA Power Steering Pump, but have a couple of spare E Series ones. Ash, good thing you mentioned the bonnet clearance for the p/s pump. I will have to check into that. Cheers BenJ heres one for 45 bucks on ebay http://cgi.ebay.com.au/Falcon-BA-BF-4-0 ... ccessories nice engine stand by the way! LOL, yep, I always knew the stand would come in handy one day. I have that BA Pump on my watch list. Cheers BenJ
_________________ {DESCRIPTION} - Current Ride |
||
| Top | |
||
| Mont5.0 |
|
|||
|
This is a massive step forward Ben J using B series power- good luck to you
|
|||
| Top | |
|||
| Mont5.0 |
|
|||
|
{USERNAME} wrote: The primary reason for making the power steering pump bracket is because I don't have a BA Power Steering Pump, but have a couple of spare E Series ones. Ash, good thing you mentioned the bonnet clearance for the p/s pump. I will have to check into that. Cheers BenJ Just had a quick squiz and measure, from the top of the cap on the power steering pump sits 110mm below the top of the head. Just thought you may like to know. |
|||
| Top | |
|||
| ToranaGuy |
|
|||
|
{USERNAME} wrote: Nice work Benj the eb is coming along nicely! Not really if your over 25 & get it engineered. Cheers ToranaGuy
_________________ I am the ToranaGuy!|74 Lh Torana Turbo|78 Hz PanelVan|86 Mighty Boy Ute|93 EB2 Ghia,GT Mockup,5spd,LPGI,Full Leather|2 x EB Xr8 5spd's|{DESCRIPTION}|{DESCRIPTION}|{DESCRIPTION}| |
|||
| Top | |
|||
| BenJ |
|
||
|
BA DOHC 5 - Progress
Front Dress Complete 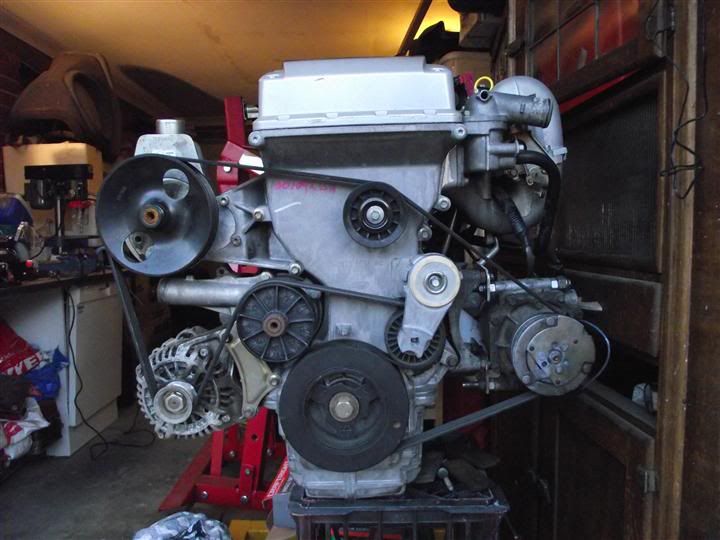 I acquired an alternator from an AU, which bolted up, giving me the last component needed. The serpentine belt used here is from the EF-EL. The BA belt tensioner has about 5mm more movement to allow the belt to be slid on. While I could use the EF-EL belt, I will see if I can source one that is 10mm longer for daily use. ************************************************************** Having exhausted my non existent supply of suitable material to fabricate brackets from, I had two ideas. One was to visit Pick N Payless and grab some lower leaf spring support plates, and the other was to have a look around at Bunnings. Bunnings was closer, and I found several suitable candidates in the building area. 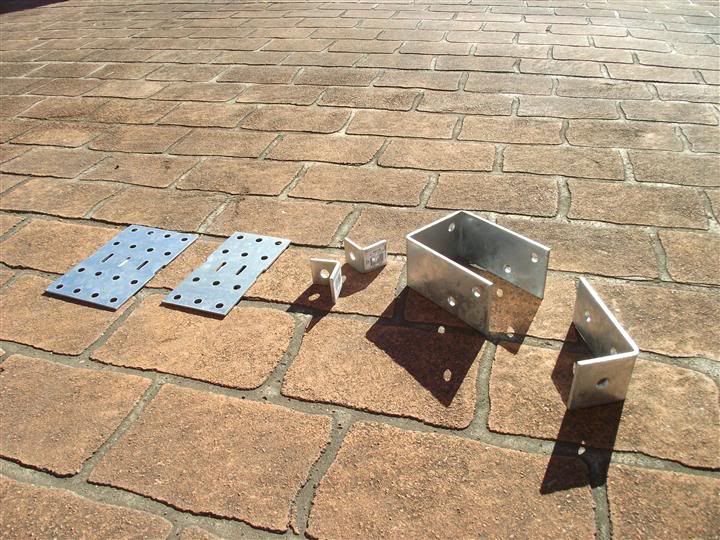 The components on the right are all 5mm thick and the two plates are 3mm thick. The big U shaped bracket (designed to go on the bottom of a post) is around the $8 mark, just to give you an idea on how cheap these are as donor parts. Now for some fabricating fun. Power Steering Pump Brackets As I need to remake the power steering pump bracket and lower the pump 10mm, I started there first. I cut one long side of the U shaped bracket and then using my first attempt as a template I was able to plan the new bracket. 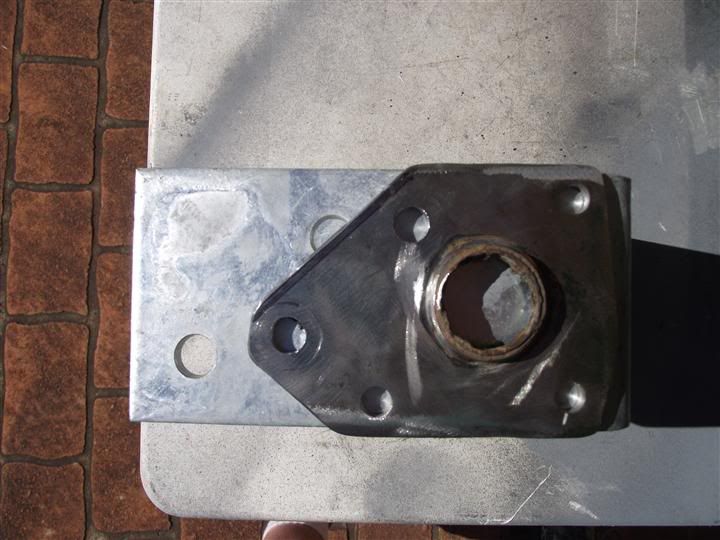 After much action with the angle grinder, bench grinder and drill press I ended up with this. 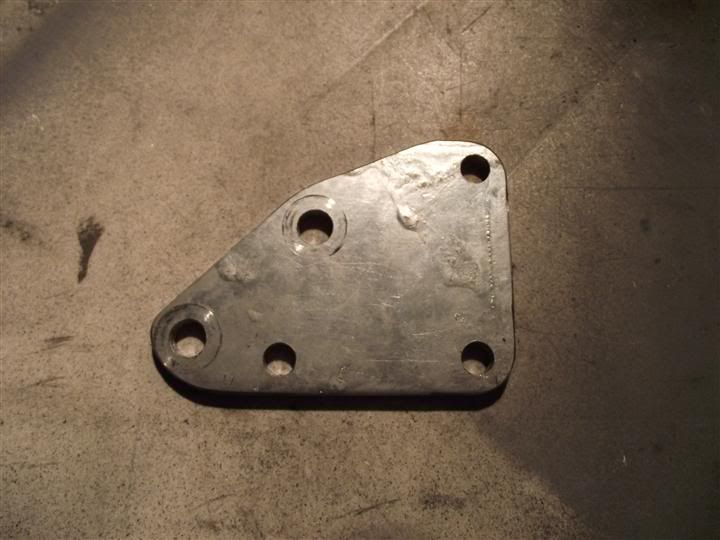 And mounted to the BA Bracket. 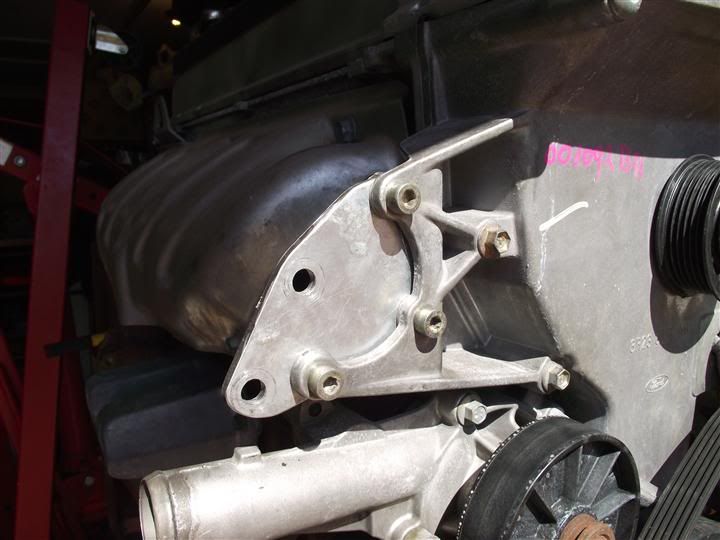 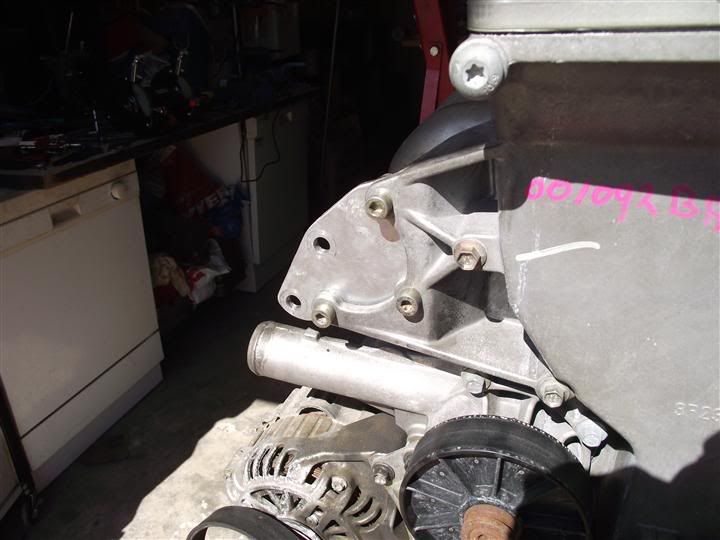 Now I could bolt the pump in place and start on the rear support bracket. Not having a welder to hand, I had to be a little inventive. 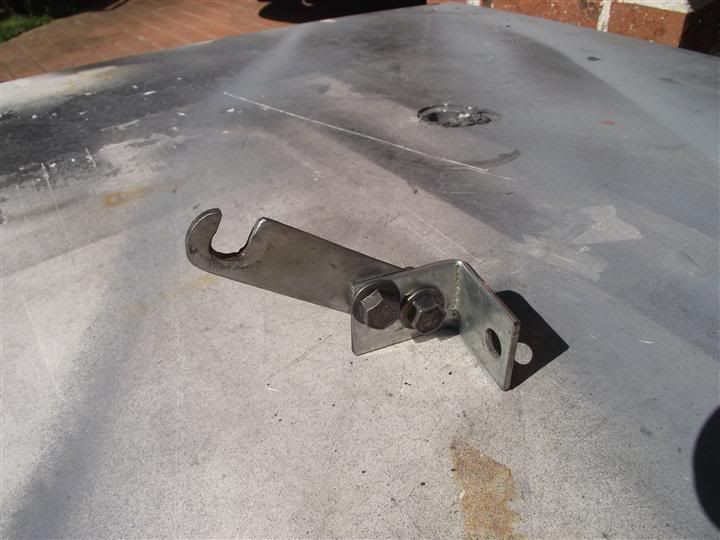 This photo shows how the rear bracket attaches to the block. 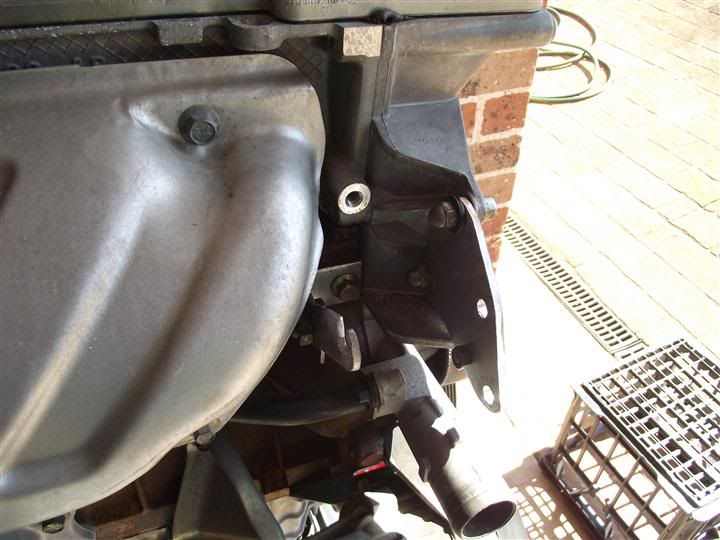 A couple of pics of the pump bolted in place. 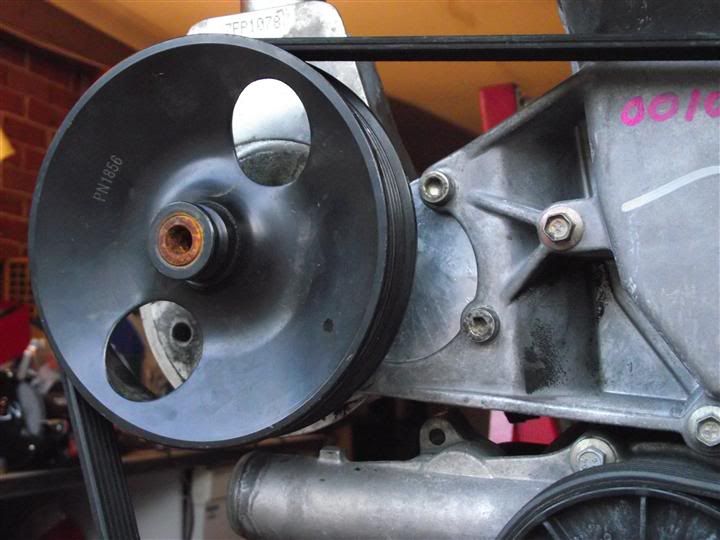 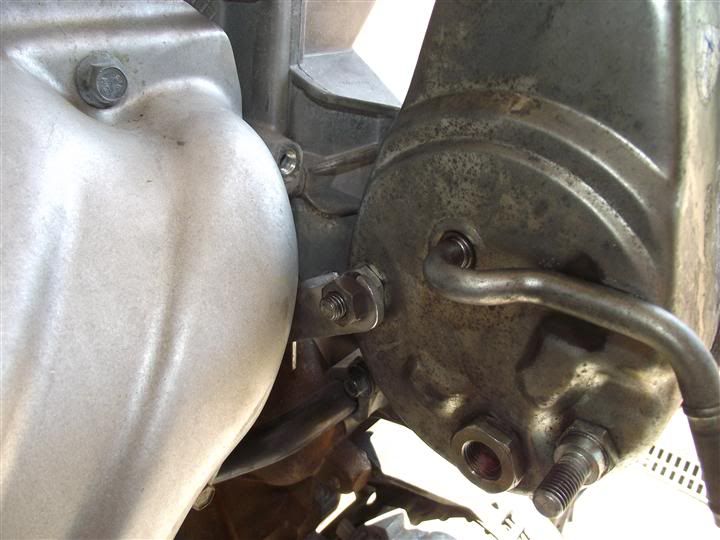 There is approx 3mm clearance from the serpentine belt to the timing case cover. Hopefully the belt won't shake that much under use. I can't lower the EL pump any further than it currently is. 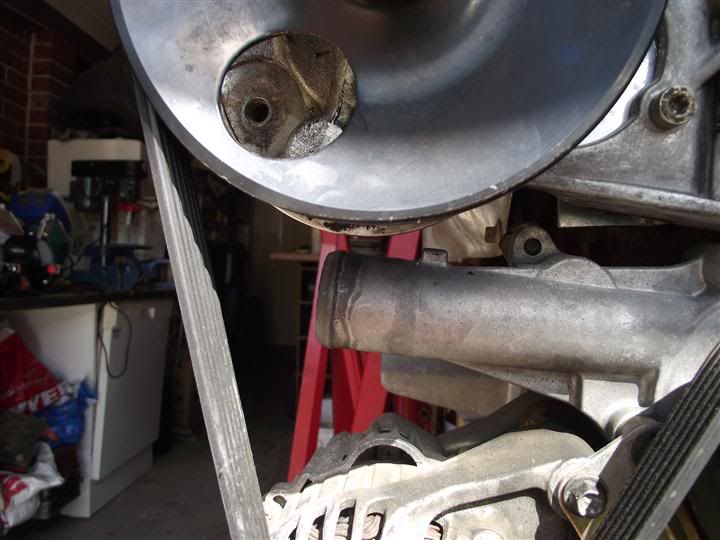 As you can see there is only just enough room now for the radiator hose and clamp to slide in. Air Conditioning Pump Bracket Now that I was able to run a belt across the pulleys, I could now work out how to locate the bolt holes in the adaptor plates. Through a fair bit of trial and error, educated guessing and a try-it-and-see approach, I marked and drilled the bolt holes. I then shaped the plates a bit and bolted it all together. The shaped plates. 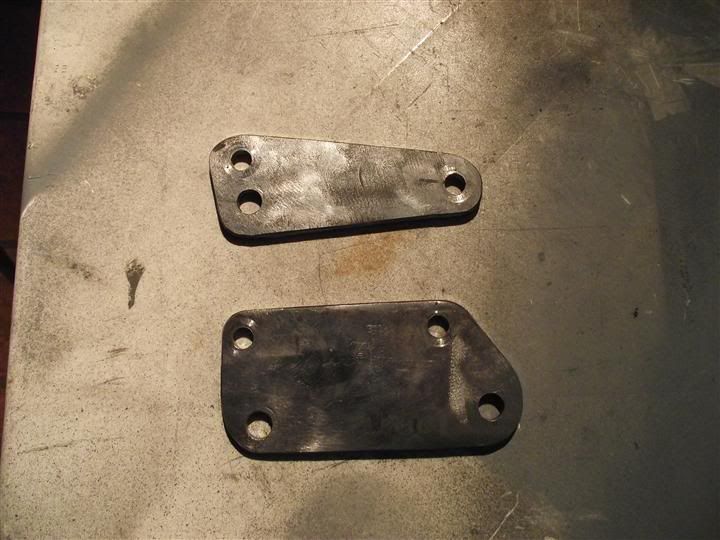 Due to needing clearance for produding bolt heads I useds oversize nuts as spacers to give me the required room. The bottom forward bolt head that attaches the plate to the BA Bracket, was also ground down 2mm, as it was protruding to far and hitting the side of the pump. The bolts are standard EL A/C pump bolts, and I will cut them a bit shorter, or source new replacement bolts. 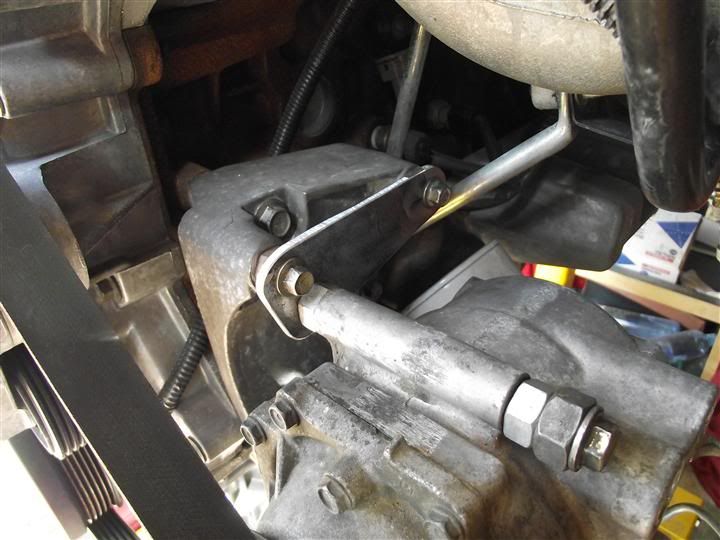 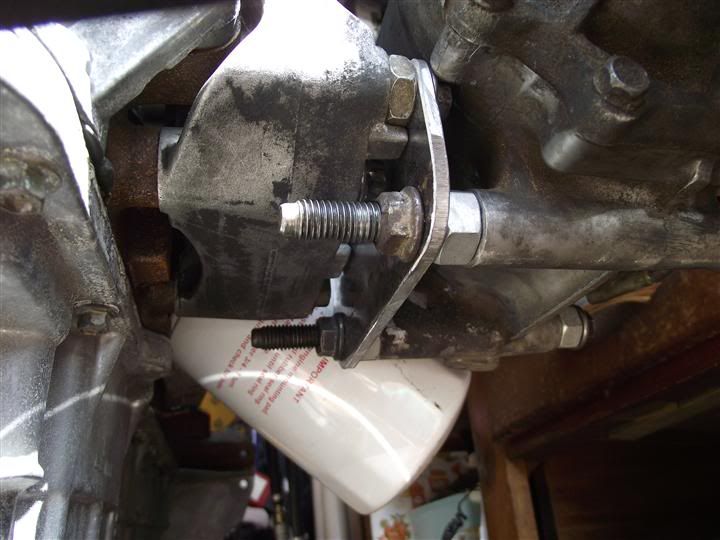 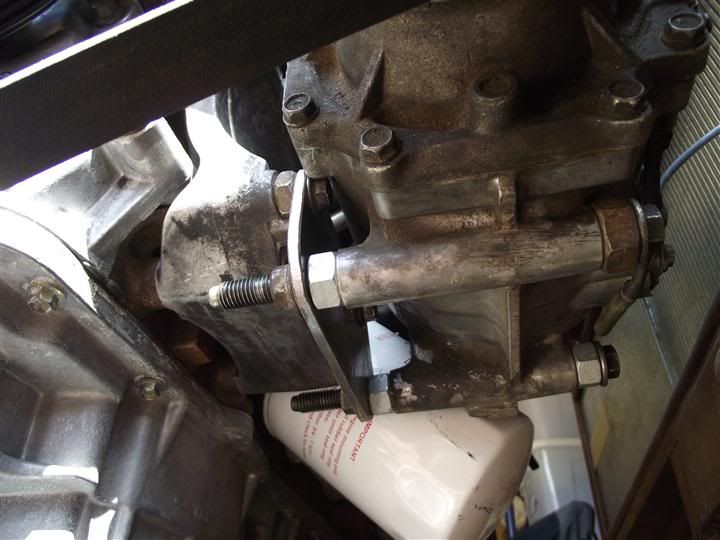 I was a bit concerned that the pump may now be too far away from the engine and could possibly foul on the chassis, but it lines up with the outside edge of the BBM. 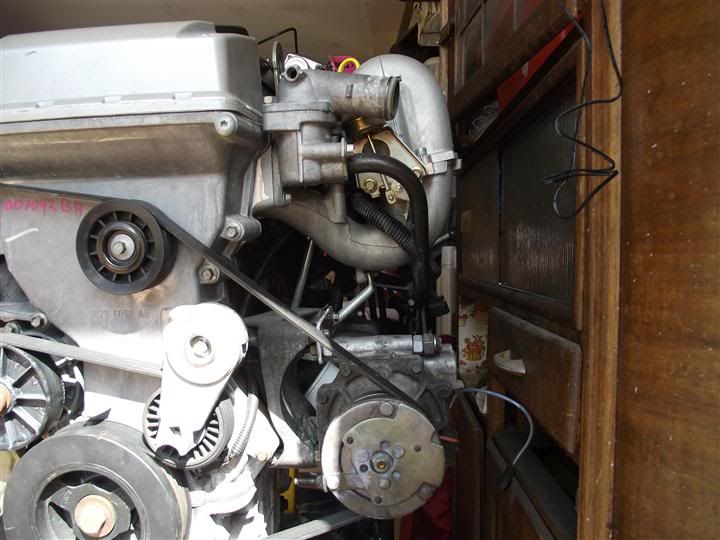 I guess we will see when I go to drop it in the EF. SWC is coming over tomorrow and can critique my handiwork. Next thing to look at is the heater pipes. Cheers BenJ
_________________ {DESCRIPTION} - Current Ride Last edited by BenJ on Sun Oct 30, 2011 11:47 am, edited 1 time in total. |
||
| Top | |
||
| ToranaGuy |
|
|||
|
WOW! That's juse sexy dude!
I really should make my modified alternator bracket to fit the EF/EL alternator into a EA-ED neater. Cheers ToranaGuy
_________________ I am the ToranaGuy!|74 Lh Torana Turbo|78 Hz PanelVan|86 Mighty Boy Ute|93 EB2 Ghia,GT Mockup,5spd,LPGI,Full Leather|2 x EB Xr8 5spd's|{DESCRIPTION}|{DESCRIPTION}|{DESCRIPTION}| |
|||
| Top | |
|||
| Paulmac |
|
||
|
Toranaguy,
If you're going to use the Ea-Ed belt, here's a piece of ancient history. eb2-ed-i6-alternator-upgrade-t57831-20.html?highlight=alternator Looking good Ben and our gas car's going, Near new engine and a 327 LSD! Hope to soon be ready for Sydney run. Talk to you later this week. Cheers, Mac
_________________ What goes around, comes around. |
||
| Top | |
||
| gusbus |
|
||
|
hey benji...with the heater hoses theres um a guy on here that did it...u use the usual ef/el heater hose thing on the bbm side and join the other side at the back of the block with a rubber hose...bit confusing but hard to explain.....search.. ba motor into 5 speed eb or bf turbo into 5 speed ed.. it has the pics there for it.. hope it helps
|
||
| Top | |
||
| ToranaGuy |
|
|||
|
{USERNAME} wrote: Toranaguy, If you're going to use the Ea-Ed belt, here's a piece of ancient history. eb2-ed-i6-alternator-upgrade-t57831-20.html?highlight=alternator Looking good Ben and our gas car's going, Near new engine and a 327 LSD! Hope to soon be ready for Sydney run. Talk to you later this week. Cheers, Mac Hey mac, Been there, done it already, page 2 in my build thread! Then i tapped a m12 thread into the top mount hole, and fit a m10 thread insert. Original factory bolt tensions & holds on as per factory. One day i will make neater bracket for it, or do a serp belt conversion lol. Gusbus -> To get back on topic, I think the guy end up using a combination of the el & ba heater pipes & welding them together. Cheers ToranaGuy
_________________ I am the ToranaGuy!|74 Lh Torana Turbo|78 Hz PanelVan|86 Mighty Boy Ute|93 EB2 Ghia,GT Mockup,5spd,LPGI,Full Leather|2 x EB Xr8 5spd's|{DESCRIPTION}|{DESCRIPTION}|{DESCRIPTION}| |
|||
| Top | |
|||
| bbqburner |
|
|||
|
Here's were my A/C pump sits. I think your's might be alittle to low.
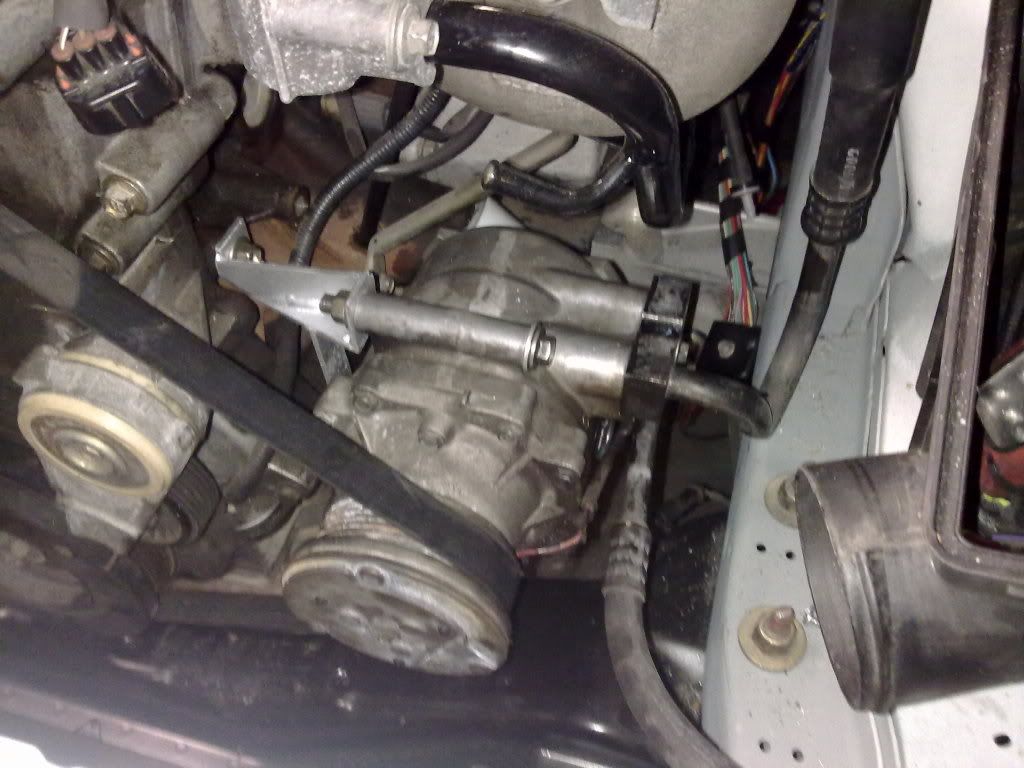 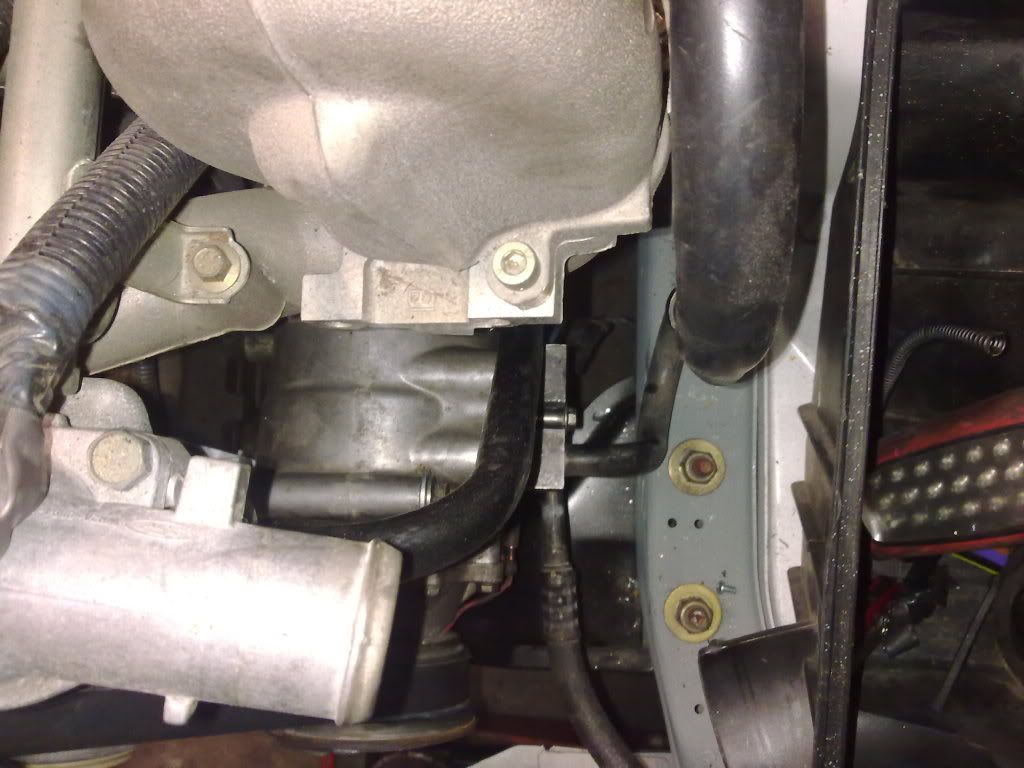 There's about 20mm between the bottom of the pipe and the chassis rail. 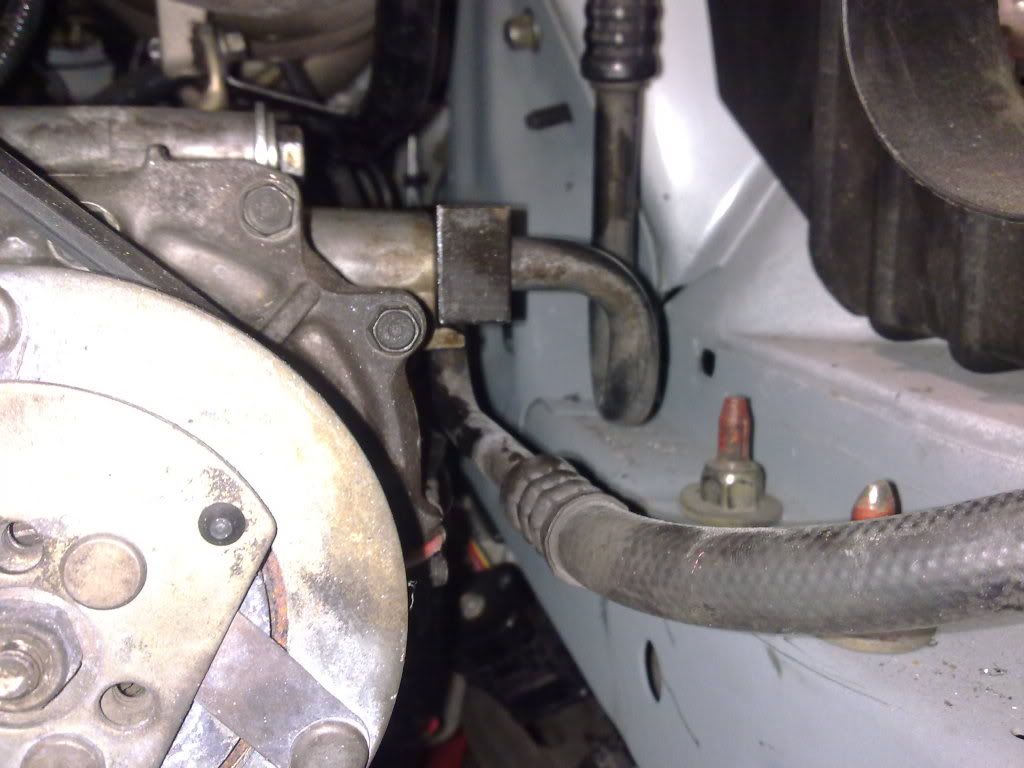
_________________ I enjoy the symphony of mechanical harmony, |
|||
| Top | |
|||
| SWC |
|
||
|
Thats close. Do you think there is enough clearance. Just asking as i am sure you have looked into this.
Amended, you are correct, passenger side lifts. Last edited by SWC on Sat Sep 04, 2010 9:47 pm, edited 2 times in total. |
||
| Top | |
||
| BenJ |
|
||
|
Cool, thanks for the pics.
I agree. SWC suggested moving it closer to the block last week, and I am going to remake the A/C pump mount. Looking at your pics, I might see if I can raise mine a bit higher than yours too, just to be sure. Cheers BenJ
_________________ {DESCRIPTION} - Current Ride |
||
| Top | |
||
| bbqburner |
|
|||
|
{USERNAME} wrote: Thats close. Remember engine lifts from Drivers side. Do you think there is enough clearance. Just asking as i am sure you have looked into this. It's the passanger side that lifts isn't it?. Looking at the front of the motor the cranks turn clockwise, and the motor will torque up anticlockwise yea? {USERNAME} wrote: Cool, thanks for the pics. I agree. SWC suggested moving it closer to the block last week, and I am going to remake the A/C pump mount. Looking at your pics, I might see if I can raise mine a bit higher than yours too, just to be sure. Cheers BenJ I have 20mm between the chassis and the lower A/C pipe, I hoping thats enough.
_________________ I enjoy the symphony of mechanical harmony, |
|||
| Top | |
|||
| SWC |
|
||
|
{USERNAME} wrote: {USERNAME} wrote: Thats close. Remember engine lifts from Drivers side. Do you think there is enough clearance. Just asking as i am sure you have looked into this. It's the passanger side that lifts isn't it?. Looking at the front of the motor the cranks turn clockwise, and the motor will torque up anticlockwise yea? Amended: you are correct, passenger side lifts so you should be safe as houses with that clearance as long as a mount doesn't collapse. Well done. Last edited by SWC on Sat Sep 04, 2010 9:49 pm, edited 1 time in total. |
||
| Top | |
||
| Who is online |
|---|
Users browsing this forum: No registered users and 6 guests |