

|
| Matt_jew |
|
||
|
BenJ wrote: EVL098 wrote: That is why crimp connectors are crap and only belong on trailer lights if at all. Good to hear you had a win. Now let me be clear here. I never ever used those fold over connectors that join two wires together. I always used bullet or spade type connectors. These are usually good solid connections, however for a tinkerer like myself, after the ECU has been pulled out too many times it puts a strain on those crimped wires. LOL. I am only prepared to be called a goose up to a certain point hahahaha Cheers BenJ Wasnt actually calling you a goose. I will come up with another reason for that just give me time............... I am just not a fan of crimp connectors at all. As you said with movement etc they do get strained and do funky things. I solder everything , but that can also have its drawbacks with no flexability in the joint. Yes I agree those evil scotch locks are best left to an apprentice so they can crimp their dreadlocks.
_________________ xr6turnip wrote: More people paid for a ride in a VT commodore then an AU Falcon so the VT is superior.
Based on that fact my Mum is the best around! |
||
| Top | |
||
| frankieh |
|
|||
|
BenJ wrote: Now, for those of you who are not aware of what is involved to install this $3.75 o-ring, here is a quick run down. Remove all the LPG gear from over the extractors. Undo the 13mm bolt that holds the metal heater pipe near the front of the block. Undo the top right hand 19mm bell housing bolt to allow the metal heater pipe to be pulled back. Replace o-ring and reverse above procedure. Now this sounds simple enough, but that F*$^#@N bell housing bolt is almost impossible to get to. In the end I had to custom bend a 19mm ring spanner to be able to get some purchase on the bolt head, but I won. I had this exact same problem tonight, but thankfully not the 4 hours bit.. I undid the single 13mm bolt under the extractors.. didn't remove anything that I didn't already have out. (power steering pump).. and put some hand pressure back on the pipe.. it went back far enough that I just got it out without undoing the bell housing bolt. (I'd rather have taken off the water pump than get my big a** hand down the back of the engine.) When I put the pipe with it's lovely new O ring in.. I pulled it as hard as possible back against the water pump and tightened the 13mm bolt back up.. it's totally rigid and doesn't leak. so I'm particularly happy that I wasn't forced to pull that bell housing bolt out. |
|||
| Top | |
|||
| fairlane6970 |
|
|||
|
ausedwagon wrote: thought u might like this... as somewhat if a black vs white lol  Does this make yours Micheal Jackson to his Paul McCartney as in the old song?
_________________
|
|||
| Top | |
|||
| evxr6 |
|
|||
|
frankieh wrote: BenJ wrote: Now, for those of you who are not aware of what is involved to install this $3.75 o-ring, here is a quick run down. Remove all the LPG gear from over the extractors. Undo the 13mm bolt that holds the metal heater pipe near the front of the block. Undo the top right hand 19mm bell housing bolt to allow the metal heater pipe to be pulled back. Replace o-ring and reverse above procedure. Now this sounds simple enough, but that F*$^#@N bell housing bolt is almost impossible to get to. In the end I had to custom bend a 19mm ring spanner to be able to get some purchase on the bolt head, but I won. I had this exact same problem tonight, but thankfully not the 4 hours bit.. I undid the single 13mm bolt under the extractors.. didn't remove anything that I didn't already have out. (power steering pump).. and put some hand pressure back on the pipe.. it went back far enough that I just got it out without undoing the bell housing bolt. (I'd rather have taken off the water pump than get my big a** hand down the back of the engine.) When I put the pipe with it's lovely new O ring in.. I pulled it as hard as possible back against the water pump and tightened the 13mm bolt back up.. it's totally rigid and doesn't leak. so I'm particularly happy that I wasn't forced to pull that bell housing bolt out. Hey guys, I'm gonna replace my water pump tomorrow. How is the O ring fitted on the pipe? Is it seated in a lip? Just want to know what to expect. Thanks, Evan
_________________ Current ride: MY03 Liberty RX Wagon |
|||
| Top | |
|||
| BenJ |
|
||
|
Hi Evan.
Yes, there is a lip and a groove for the o-ring to sit in. Use a small amount of silicone and smear it around the o-ring after it is on the pipe before slipping it in the hole. I am in Seven Hills if you get stuck. Cheers BenJ
_________________ BenJ's EB T5 DOHC Ghia Wagon - Current Ride |
||
| Top | |
||
| evxr6 |
|
|||
|
Sweet!
Thanks, BenJ.
_________________ Current ride: MY03 Liberty RX Wagon |
|||
| Top | |
|||
| BenJ |
|
||
|
Body Kit - EB GT Flares
This mod is all SWC's fault. SWC modded and fitted some EB GT Flares to Mrs SWC's EL Wagon. I liked the finished result and started to keep an eye out for a set. Usually the Flares are combined with the rest of the EB GT kit, but one day I got lucky and scored fibreglass Flares and Sideskirts for a very reasonable $100 from a seller in Sydney. Quite happy to have copies as they are going to receive some attention from the dremel. The Flares sat in the garage for quite a few weeks before I could arrange to visit SWC and fit into his busy schedule. We did a bit of a deal, and in exchange for my assistance in installing a new diff in his sedan, SWC showed me the basics of making the flares fit how I wanted them to. I learnt a lot watching him start the two left side Flares. I was able to get stuck into it and over the next few free days had all four flares trimmed and screwed into place. Here is a photo from during the trial fitment phase. 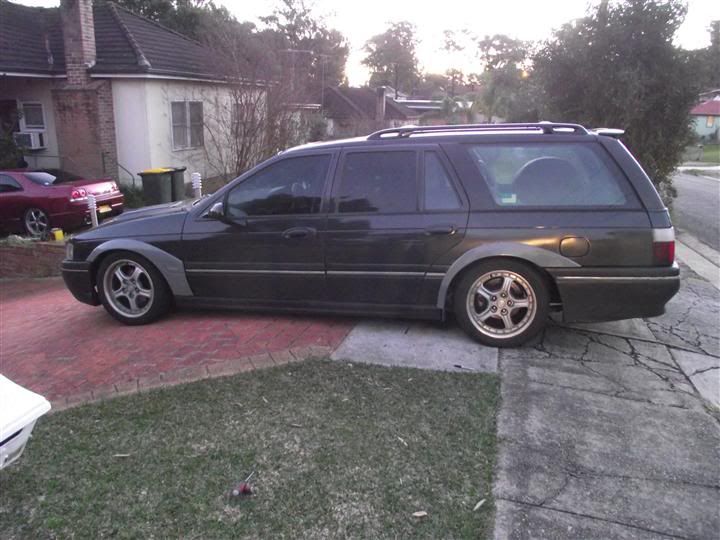 Once I was satisfied with the basic fitment I moved on to installing the side indicators. I didn't want to use the standard EB indicator and wanted to keep my NF style lenses. Here are a couple of the steps I followed. Mark where the lens base will be located 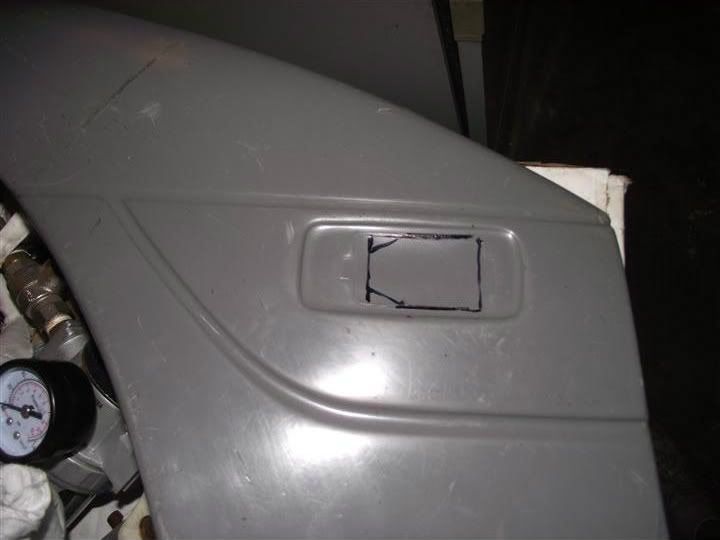 Use a dremel and carefully cut out the the marked area allowing for the clips. I keep all my old used cut off wheels as the smaller diameter ones are useful in this sort of scenario. I also used a square file for the finishing adjustments. 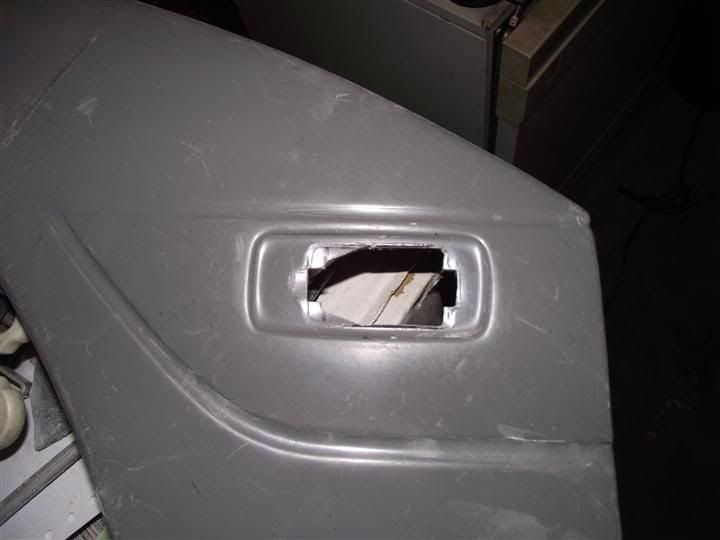 Install the test lens. 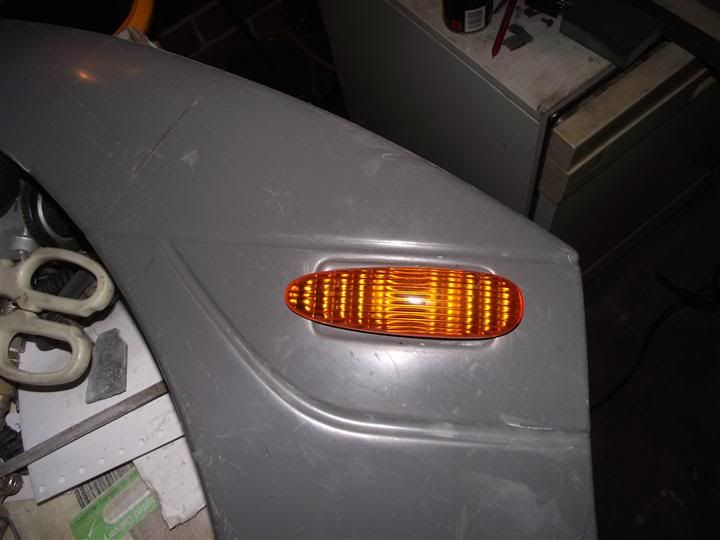 This is how well it fits. 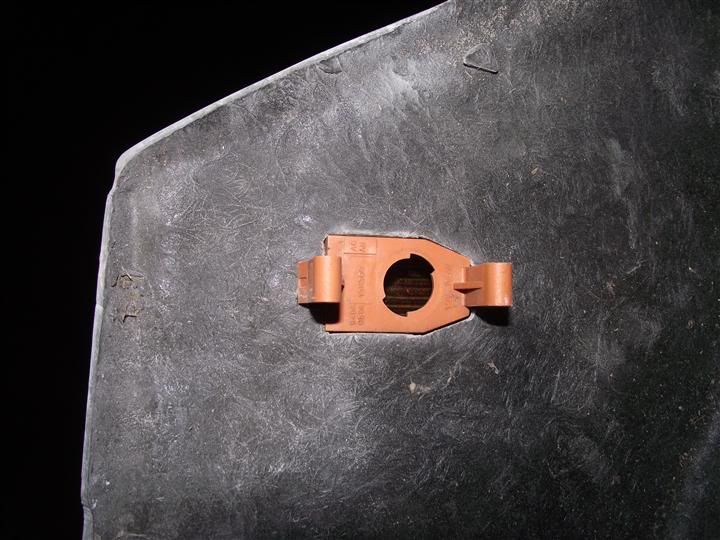 When fitting the flare with the lens installed to the car, I did need to clearance the std bracket in the guard as the retaining clips were fouling. While I was at it I cut and shut the EF/EL bulb holder onto the the EB wiring. The next step is to recess the lens into the flare approx 2mm for a cleaner look. The rectangular recess will be filled and smoothed. Then all four flares need a bit of fibreglass work followed by final fitment and filling any gaps against the panels. SWC has the gear for that part. BA XR Front Bar In the middle of the fun fibreglass fiddling, SWC dropped by for a trial fitment of the BA XR Bar. 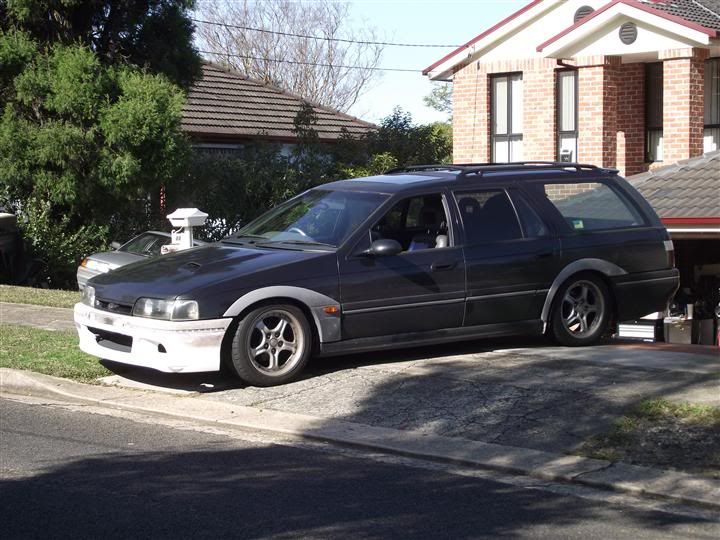 A bit closer 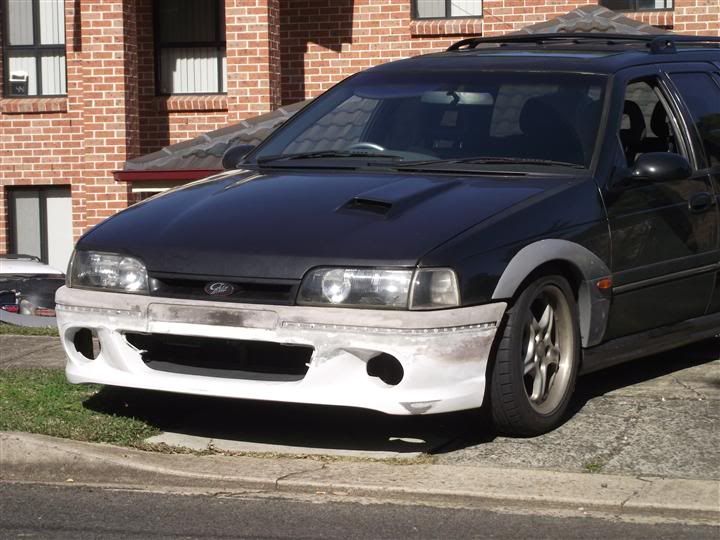 With dodgy Photoshop work 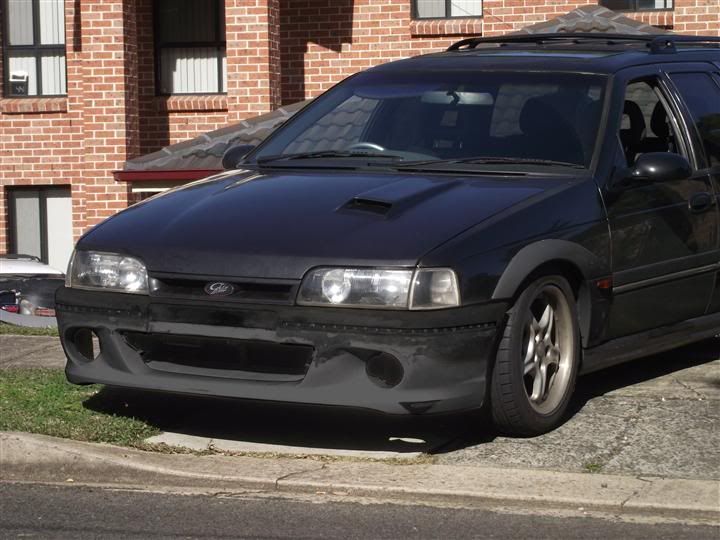 Very pleased with the BA XR Bar and I think it will add very nicely to the overall feel of the Wagon. Cheers BenJ
_________________ BenJ's EB T5 DOHC Ghia Wagon - Current Ride |
||
| Top | |
||
| bradley4567 |
|
||
|
very nice, i always get excited when i recieve and email telling me your thread has been updated
_________________ ef falcon daily driver |
||
| Top | |
||
| ausedwagon |
|
|||
|
bradley4567 wrote: very nice, i always get excited when i recieve and email telling me your thread has been updated +1 looking good. i will need to make sure my next trip north will be past to say hi again.... and get new photos
_________________ 94 White ED Wagon |
|||
| Top | |
|||
| EBI347 |
|
|||
|
i noticed the bllinker shape in the flare is a AU clear shape ...need some i think i got some in my box of stuff???
_________________ MY CAR PLZ TAKE A LOOK forums/xtt909-update-t66227.html |
|||
| Top | |
|||
| ToranaGuy |
|
|||
|
Nice work BenJ - Looks like there was some good weather for it too. Wish I could score some of that down here, I have a set of EB GT flares that really should get some repair work done on them & fit them onto my EB Ghia......
Keep at it man, looking great! Cheers ToranaGuy
_________________ I am the ToranaGuy!|74 Lh Torana Turbo|78 Hz PanelVan|86 Mighty Boy Ute|93 EB2 Ghia,GT Mockup,5spd,LPGI,Full Leather|2 x EB Xr8 5spd's|FS [VIC]: Wrecking - Eb XR8 - Parts available |Build Thread|Ebay Items - Ford Parts| |
|||
| Top | |
|||
| BenJ |
|
||
|
Thanks for the kind words fellas.
XTT909, I also have some clear AU blinkers, but decided to go with the NF/NL shape just to be difficult LOL. Cheers BenJ
_________________ BenJ's EB T5 DOHC Ghia Wagon - Current Ride |
||
| Top | |
||
| ringastinga |
|
||
|
fairlane6970 wrote: ausedwagon wrote: thought u might like this... as somewhat if a black vs white lol  Does this make yours Micheal Jackson to his Paul McCartney as in the old song? slip grey between black and white You do not have the required permissions to view the files attached to this post. |
||
| Top | |
||
| EBI347 |
|
|||
|
ringastinga wrote: fairlane6970 wrote: ausedwagon wrote: thought u might like this... as somewhat if a black vs white lol  Does this make yours Micheal Jackson to his Paul McCartney as in the old song? slip grey between black and white
_________________ MY CAR PLZ TAKE A LOOK forums/xtt909-update-t66227.html |
|||
| Top | |
|||
| Esteven8 |
|
|||
|
ringastinga wrote: fairlane6970 wrote: ausedwagon wrote: thought u might like this... as somewhat if a black vs white lol  Does this make yours Micheal Jackson to his Paul McCartney as in the old song? slip grey between black and white
_________________ dc_todd wrote: Cheap pads squeal like cheap hookers, and you can take that to the bank. Au Fairmont Ghia My (Old) 95 EF Wagon |
|||
| Top | |
|||
| Who is online |
|---|
Users browsing this forum: No registered users and 80 guests |