

|
| Macca |
|
|||
|
Have you thought about using a BA bell housing and hydraulic clutch setup, get rid of those rubbish clutch cables, they only went to cables and stayed on with them because they are cheap, not because they are the better setup.
_________________ 93 Ford Maverick LWB automatic petrol guzzler (gets stuck where Deli doesn't, big pumpkins |
|||
| Top | |
|||
| BenJ |
|
||
|
{USERNAME} wrote: Would you end up getting the BA bulge? It would clear, but not sure on what you wants. Cheers Russ. Russ, the XB GT bonnet on the wagon should clear the engine as it sits, but if I ever need to remove and stick on a stock one, I would like the stock one to fit as well. {USERNAME} wrote: Have you thought about using a BA bell housing and hydraulic clutch setup, get rid of those rubbish clutch cables, they only went to cables and stayed on with them because they are cheap, not because they are the better setup. Hey Macca. Yes, I have thought about it, but the parts are a bit thin on the ground, and quite expensive. I already have the BA hydraulic clutch pedal and reservoir, so it is a possibility if the right parts come my way. For now, I will work with what I have to hand. Cheers BenJ
_________________ {DESCRIPTION} - Current Ride |
||
| Top | |
||
| fezlane |
|
|||
Age: 58 Posts: 434 Joined: 18th Jul 2009 Ride: NL FAIRLANE BA TURBO POWERED Location: ballarat |
hAVE YOU CONSIDERED A HIGH SERIES BONNETT HAVE DONE A TRIAL FIT MYSELF AND YOU DO GET THE CLEARANCE WITH THESE.
STEVE |
|||
| Top | |
|||
| BenJ |
|
||
|
My Wagon is an EB so unfortunately, there is no high series bonnet.
As stated, the XB GT bonnet already on my wagon is higher than a standard bonnet. However, I also want standard bonnets to fit in case I need to take the XB GT bonnet off. Cheers BenJ
_________________ {DESCRIPTION} - Current Ride |
||
| Top | |
||
| fezlane |
|
|||
Age: 58 Posts: 434 Joined: 18th Jul 2009 Ride: NL FAIRLANE BA TURBO POWERED Location: ballarat |
yeah didn't even think of that. Good luck will be watching.
|
|||
| Top | |
|||
| gusbus |
|
||
|
also with the bonnet clearence check the top left corner on the ecu... in my el it hits the bonnet so may need to modify that as well
gus |
||
| Top | |
||
| BenJ |
|
||
|
{USERNAME} wrote: also with the bonnet clearence check the top left corner on the ecu... in my el it hits the bonnet so may need to modify that as well gus Thanks for the heads up. I will check the clearance. Cheers BenJ
_________________ {DESCRIPTION} - Current Ride |
||
| Top | |
||
| REW93N |
|
|||
|
I saw a guy at AFD 2011, he had a barra in an EL XR6 without modifying the bonnet at all.
He has a bit of a d**k though. I think he said he modified the sump or something to be more slimline? Im not sure... I honestly don't remember, but I do remember he did have the stock EL XR bonnet on there.
_________________ Blue blooded. |
|||
| Top | |
|||
| BenJ |
|
||
|
A point to remember is that the EB and EF/EL bonnets are quite different in their profile and the support structure underneath.
Cheers BenJ
_________________ {DESCRIPTION} - Current Ride |
||
| Top | |
||
| ToranaGuy |
|
|||
|
Yet again you blow my mind Ben! Keep up the good work dude!
Cheers ToranaGuy
_________________ I am the ToranaGuy!|74 Lh Torana Turbo|78 Hz PanelVan|86 Mighty Boy Ute|93 EB2 Ghia,GT Mockup,5spd,LPGI,Full Leather|2 x EB Xr8 5spd's|{DESCRIPTION}|{DESCRIPTION}|{DESCRIPTION}| |
|||
| Top | |
|||
| BenJ |
|
||
|
BA DOHC 11 - Wiring Progress
10 hours or so over the last 3 nights and I have this to show for it. 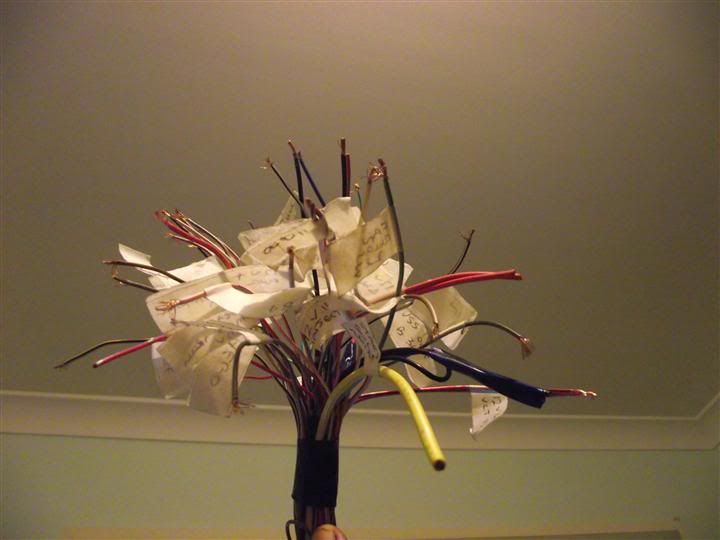 Purty aint it? That is the tail end of the BA Body Loom, with all of the wires identified and tagged. The next phase is to group those wires into bundles by source/location. That is, wires that need to connect to somewhere in the engine bay will be bundled, and wires that connect to the Passenger/ECU area etc. Then I can plan routes and once sorted, make the wires into looms etc. For wires needing to pass through the firewall on the passenger side, I will use existing wires in the EB loom that are no longer required instead of running more additional cable. I hope that makes sense. Cheers BenJ
_________________ {DESCRIPTION} - Current Ride |
||
| Top | |
||
| fezlane |
|
|||
Age: 58 Posts: 434 Joined: 18th Jul 2009 Ride: NL FAIRLANE BA TURBO POWERED Location: ballarat |
Hi Ben
Absolutely awesome electrics do my head in so i really admire your work.So the loom you are working on at the moment goes from ecu into body to control dash etc. How did you determine which wire does what job? Keep up the good work. Steve |
|||
| Top | |
|||
| SWC |
|
||
|
{USERNAME} wrote: BA DOHC 11 - Wiring Progress 10 hours or so over the last 3 nights and I have this to show for it.  Purty aint it? That is the tail end of the BA Body Loom, with all of the wires identified and tagged. The next phase is to group those wires into bundles by source/location. That is, wires that need to connect to somewhere in the engine bay will be bundled, and wires that connect to the Passenger/ECU area etc. Then I can plan routes and once sorted, make the wires into looms etc. For wires needing to pass through the firewall on the passenger side, I will use existing wires in the EB loom that are no longer required instead of running more additional cable. I hope that makes sense. Cheers BenJ When you heatshrink that lot you will need another engine bay to fit it in |
||
| Top | |
||
| BenJ |
|
||
|
BA DOHC 12 - Engine Mounts, Bonnet Clearance
During the week I removed the BARRA from the ED in anticipation of bolting a T5 up to it. Many thanks to Troyman for the box. This morning, after playing Taxi for the Ladies of the house, I got to work. The T5 was missing a shifter, but I had the std one still in a box. A quick smear of silicone and it was bolted in place. I then realised the gearbox mount was not on the T5 so I 'borrowed' the one off the auto box out of the ED. Not long after it was all bolted up. There is no flywheel, clutch pack, or spigot bearing in place. This will allow me to still start the engine while making sure it is located where it should be securely. 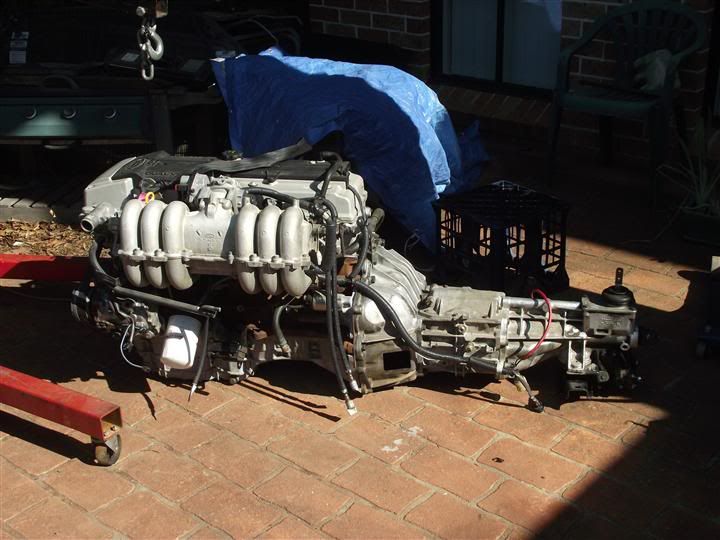 Then I started on the Engine mounts. Using my drill press, the dremel and some files, I slotted the holes to allow the engine to sit approx 10mm lower. After a quick test fit, I painted the fresh metal to prevent any corrosion. 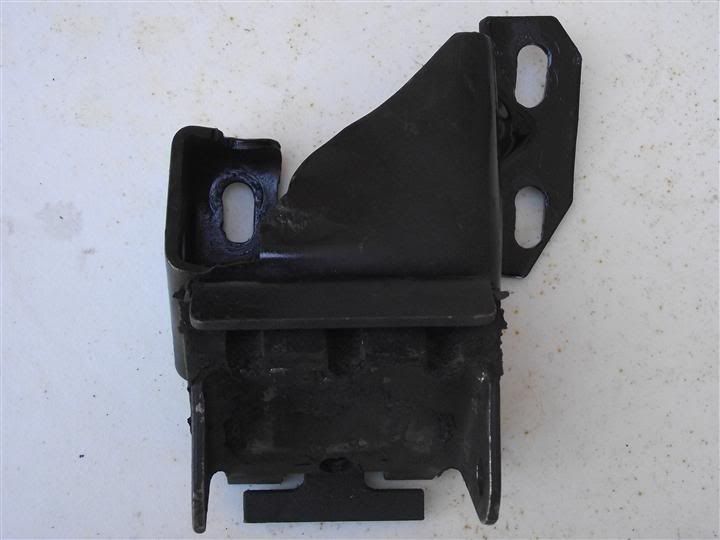 More Taxi duties interrupted me, and after I got back the engine with T5 was slotted back into the ED Ghia. 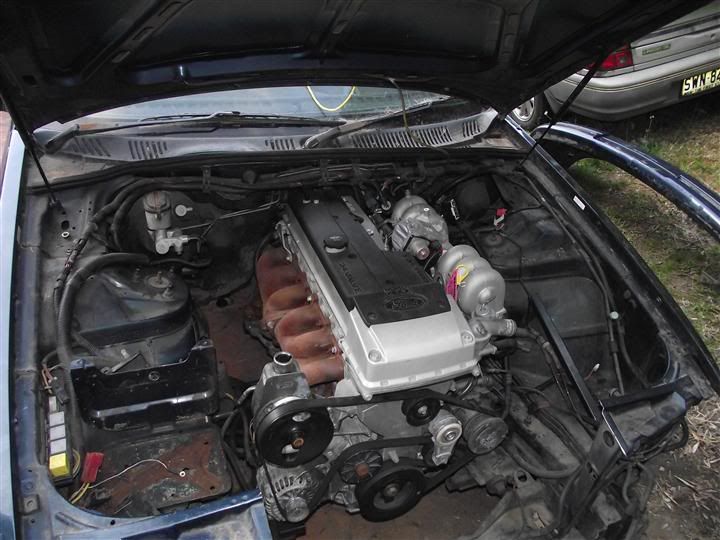 And of course the big test was to see if the bonnet would shut, and how much clearance was there if it did. I used a couple of pieces of blue tack and I am pleased to report there is approx 4mm of clearance to the bonnet brace. 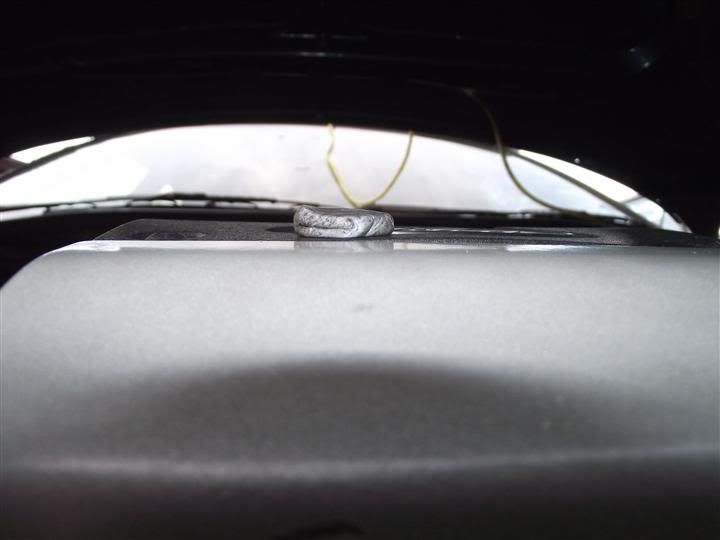 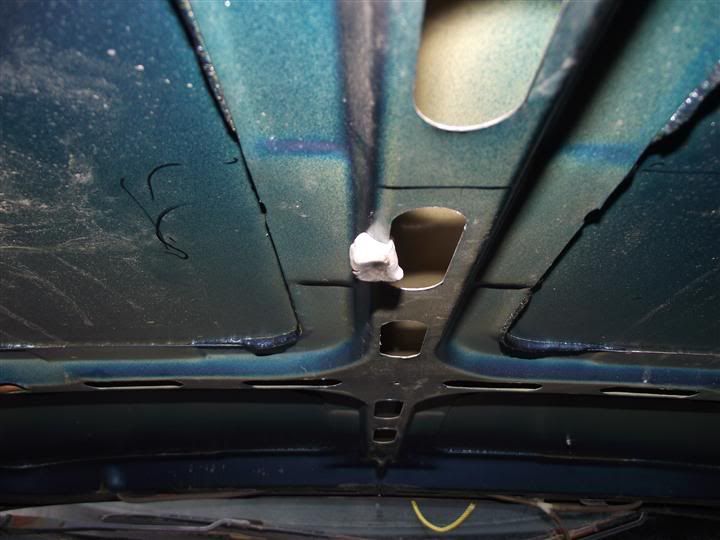 Lowering the engine to clear the bonnet also means the sump sits lower in the car. I am pleased to find the main cross member is still lower than the sump. You can just make it out in this photo. 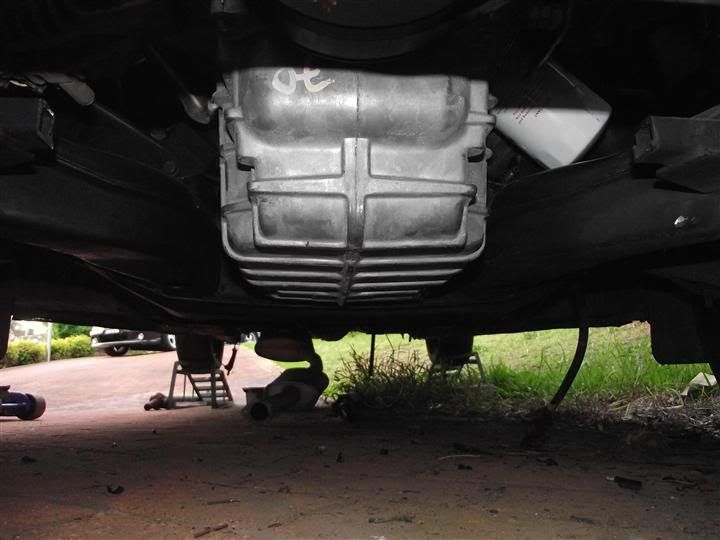 Now the engine is located at the final position, I can assess the front support bar of the K Frame. I have just cut out the centre section in the ED for clearance, but I can use it as a guide to see how far I will need to move the bar forward on my spare K Frame. 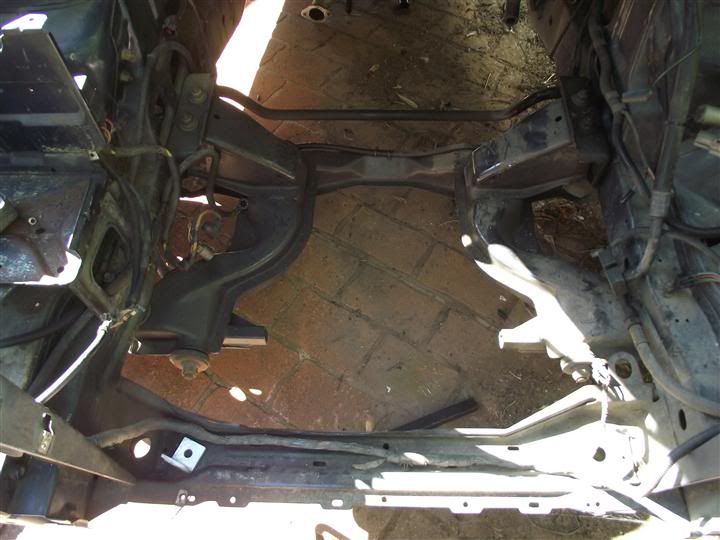 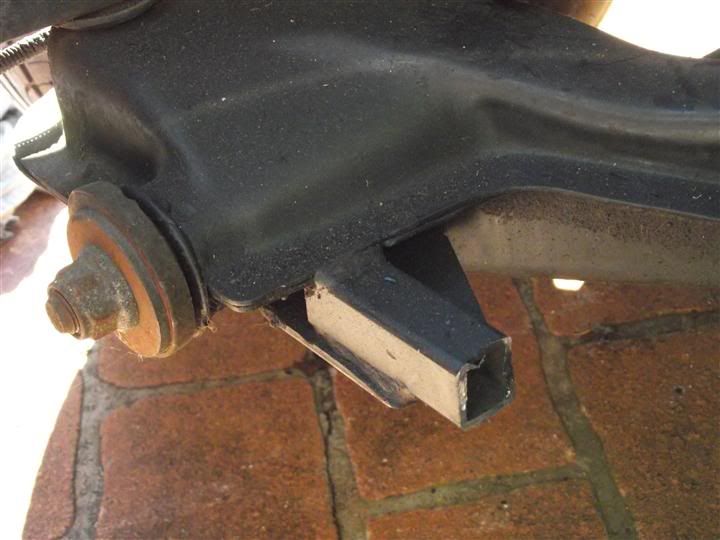 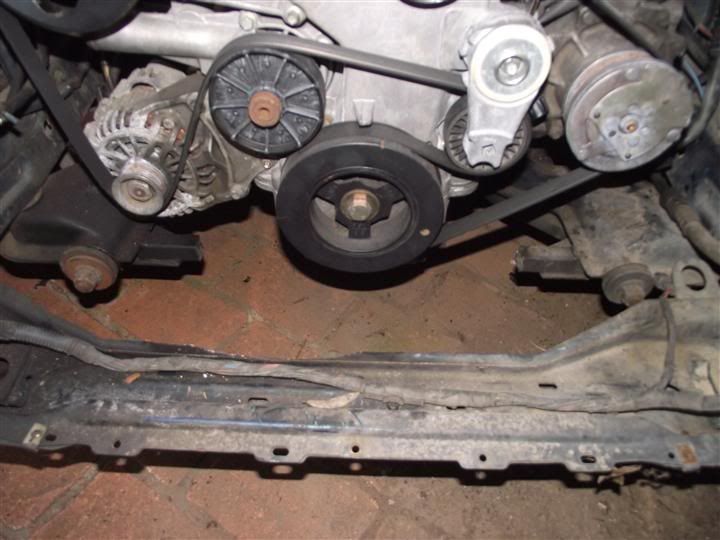 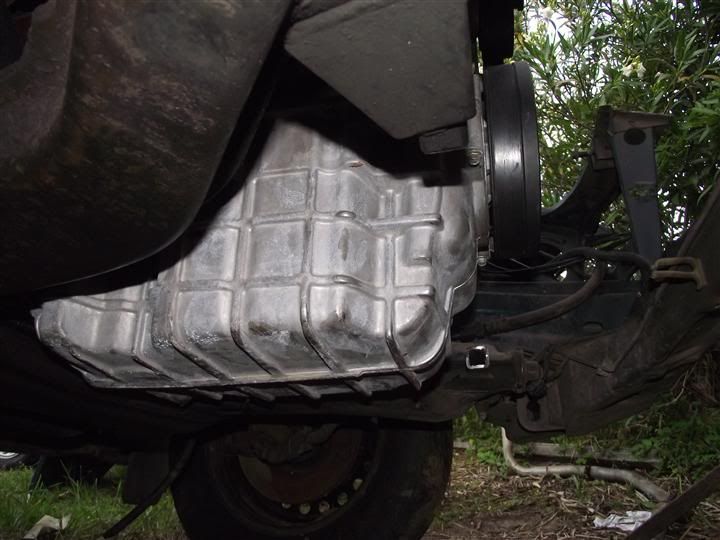 The last pic hopefully shows that if I move the bar forward the complete width of the bar it should clear by 5mm or so. I have also made a start on building the bracket for the throttle pedal, and I need to shorten the PCM mount by at least 5mm. We had a power failure for a couple of hours today, so hopefully tomorrow will see some more progress. Cheers BenJ
_________________ {DESCRIPTION} - Current Ride |
||
| Top | |
||
| BenJ |
|
||
|
BA DOHC 13 - PCM Bracket, Exhaust
PCM Bracket In the BA the Engine Computer is known as a PCM (Powertrain Control Module), and unlike the E Series ECU which is located behind the passenger kick panel, is mounted in the engine bay. It has it's own bracket which bolts in above the passenger strut tower. Luckily the PCM bracket also bolts straight in to the E Series engine bay. After a couple of warnings to check for bonnet clearance I did my own tests and found the inside rear bolt hole of the PCM does touch the bonnet, and that is without a bolt in place. Std bracket and PCM. 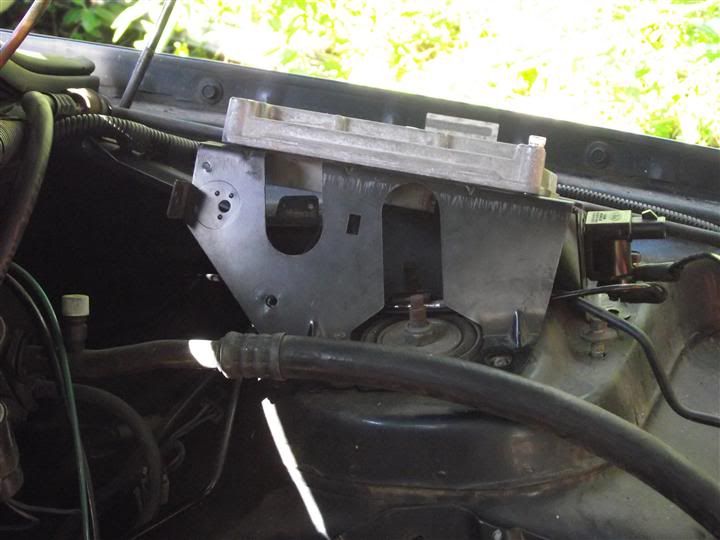 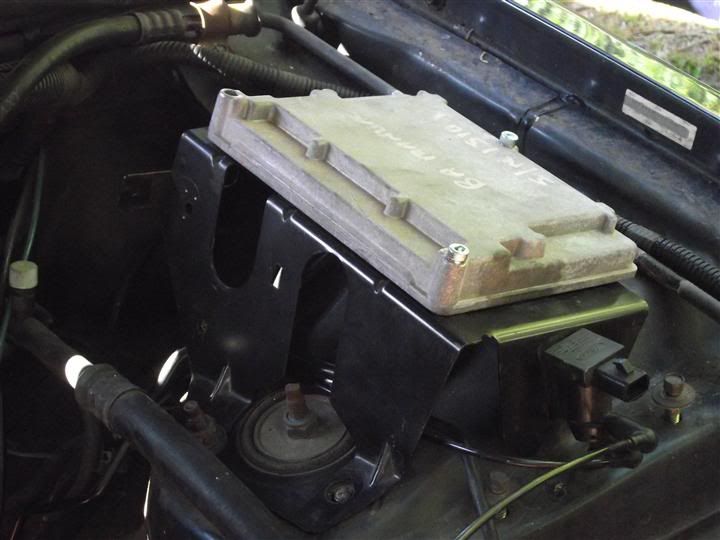 I had a couple of options regarding how to remedy this. One was to notch the bonnet brace, but I quickly dismissed this as then I couldn't just put on a spare std bonnet if needed. The other option was to mod the PCM bracket to lower the PCM. Winner!! I gave this a bit of thought, considering what tools I had available to me and how it would look when finished and came up with a plan. A few hours later I had this. 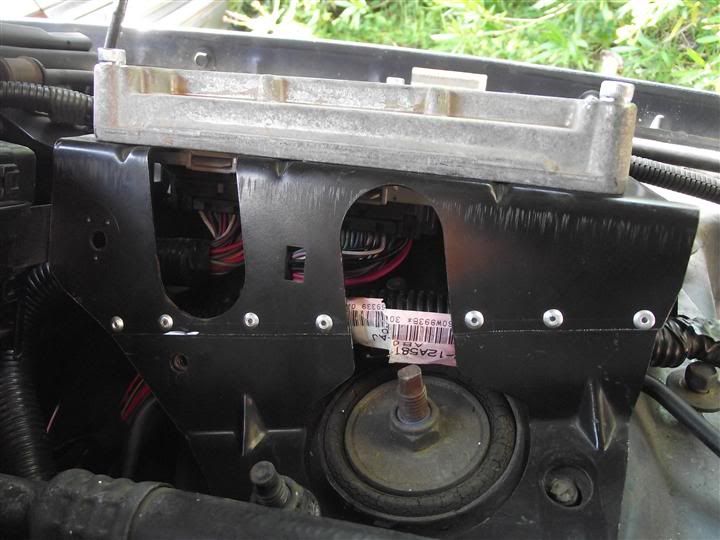 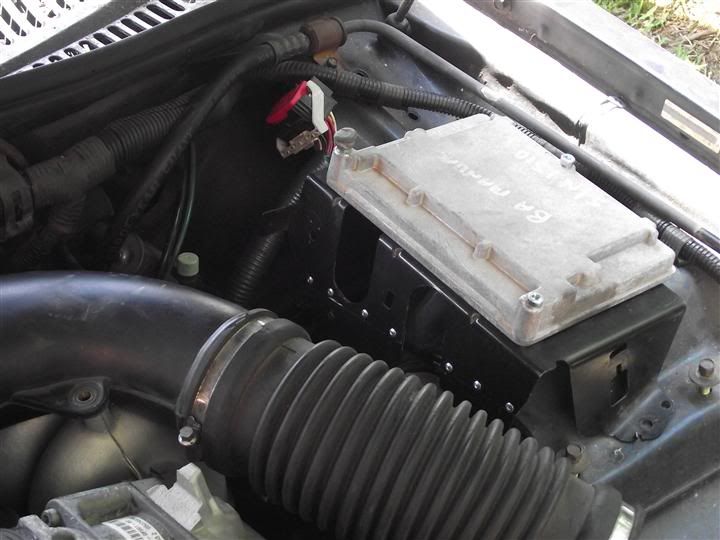 The blue tack test was then applied and with the bolt in place there is plenty of clearance now. 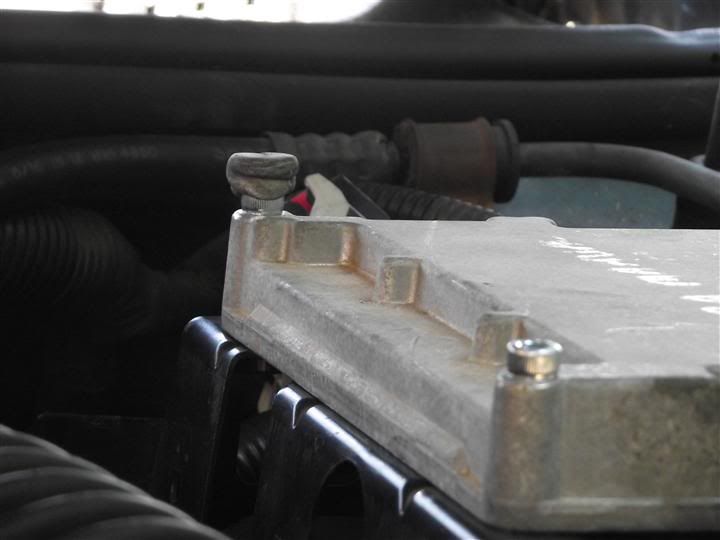 I sectioned the length of the bracket and then overlapped the two parts by approx 8mm. Some work with the drill and dremel, and it was pop riveted together and the edges were flowing together. I installed the wiring to check for clearance, as seen in the last pic above, and all is good. I also plugged in the second PCM/Body to Engine loom connection and mounted it on the PCM as per factory. Everything clears and looks neat and tidy. 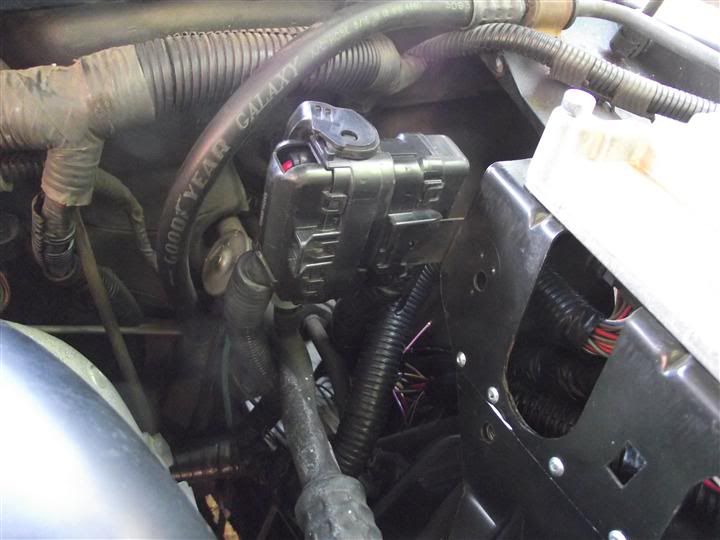 A bit of paint on the PCM bracket and it will look pretty stock. Exhaust I have read a few times that the standard exhaust bolts up to the BA exhaust manifold. Today I put that to the test. The result is, yes, sort of. The std cat converter bolts up to the exhaust manifold, but it appears to be approx 30mm further forward than an E Series. The back of the cat converter is supposed to sit flush with the support bracket on the back of the transmission. As this pic shows, it falls short some way. I have done the bolt up quite tight and it pulled it in bit less than 10mm. 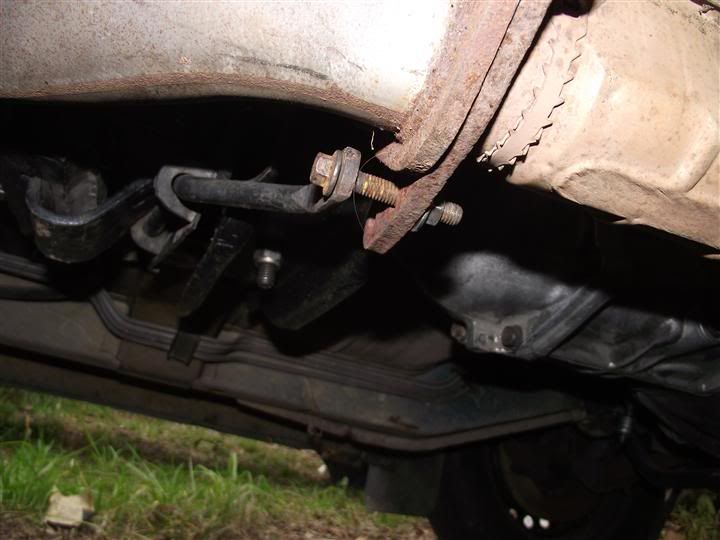 I was able to pull the exhaust forward on the ED and bolt it up, but now the main muffler is rubbing on the floor. I will either need to lengthen the cat converter pipe, or make a flange spacer or similar for the wagon. Did anyone else have a similar experience with their conversion? Or have you all had an exhaust made to suit? Please feel free to give some feedback. Cheers BenJ
_________________ {DESCRIPTION} - Current Ride |
||
| Top | |
||
| Who is online |
|---|
Users browsing this forum: No registered users and 9 guests |