

|
| BenJ |
|
||
|
{USERNAME} wrote: wen i bolted mine to the rest of the exhaust it didnt line up and was leaking at the manifold but yea it sits more forward.. Hmmm, ok. I have not started mine yet. Another thing to keep an eye on then. Thanks for the heads up. Cheers BenJ
_________________ {DESCRIPTION} - Current Ride |
||
| Top | |
||
| DOHCED |
|
|||
|
hey BenJ was reading your thread all night and today and I have to say man your awesome man, so wanna do a BA conversion in my EF in the future and I will be using your thread has a guide if I can,
keep up the amazing work man.
_________________ XG Ute - 3 Seater - Auto - Dual Fuel |
|||
| Top | |
|||
| wrongwaynorris |
|
||
|
Big thanks to Benji for my EF / EL and BA manuals . Cheers M8
|
||
| Top | |
||
| DOHCED |
|
|||
|
so whats been happening Ben.J?
_________________ XG Ute - 3 Seater - Auto - Dual Fuel |
|||
| Top | |
|||
| BenJ |
|
||
|
BA DOHC 21 - Air Con Pipes 1 + Pwr Steer + Spare Engine
Air Con Pipes 1 Having made the decision to run the factory Air Con Pump I knew I would have to get the A/C pipes joined. This will involve using the BA pipes off the pump and joining them to the E Series pipes on the car. As I thought this through I had a good look at the factory EA-ED and the EF/EL A/C pipes, condensers and evaporative dryers. I raided bits from the EF Wagon parts car, as proof of concept, and using the ED Ghia dummy car was able to fit the EF pipes, condenser and evap dryer with a small amount of trimming under the headlight opening. I installed a radiator to ensure all would fit. 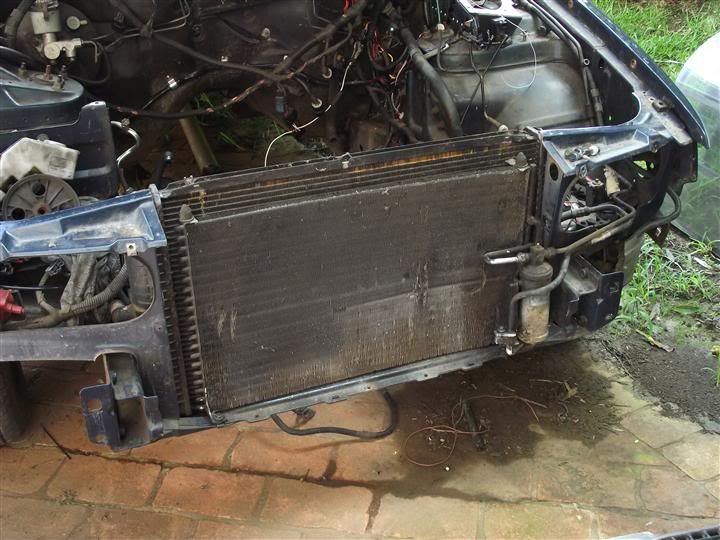 Here you can see the trimming I needed to do to clear the pipes. The pipes need a bit of tweaking later on. 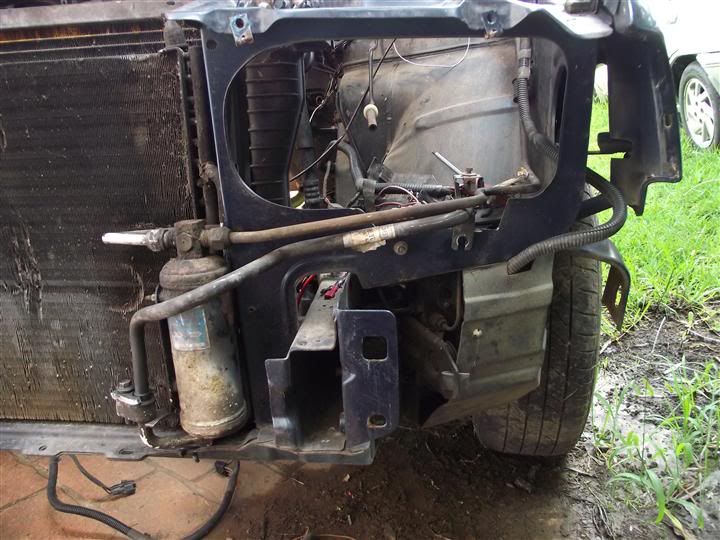 The main reason for moving to the EF piping is the location of the evap dryer. Being on one side, leaves plenty of room for the BA intercooler, if I go turbo later down the track. Compare the above shot to the location of the EB evap dryer in the picture below. 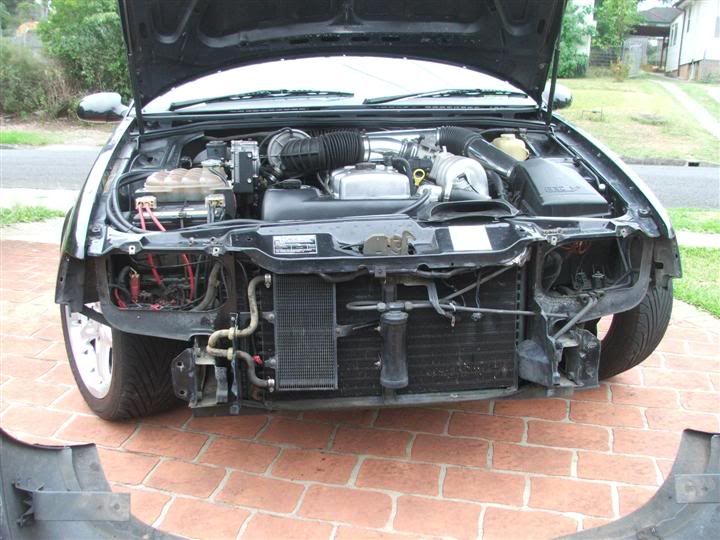 I have made contact with a local shop who can join the A/C pipes and once this is done I will update more details then. Power Steering Hoses I wasn't completely happy with the way the BA Pwr Steering hose was sitting. I also needed to figure out the return line from the rack to the pump. Once again I raided the EF Wag and used the return line from it. The EF/EL pwr steer return line runs under the engine mount, and the EA-ED line runs above the mount. I then shaped the BA hose to follow a similar route and after fitting an engine mount in place was able to get both lines running under the engine mount with enough clearance. 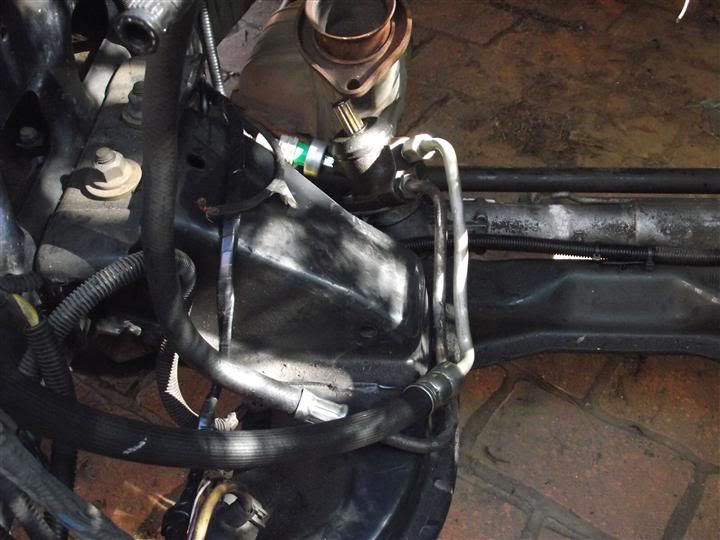 This will look much neater than the EB pipes did and keep them away from the exhaust a bit more. Spare BARRA I now have a spare. 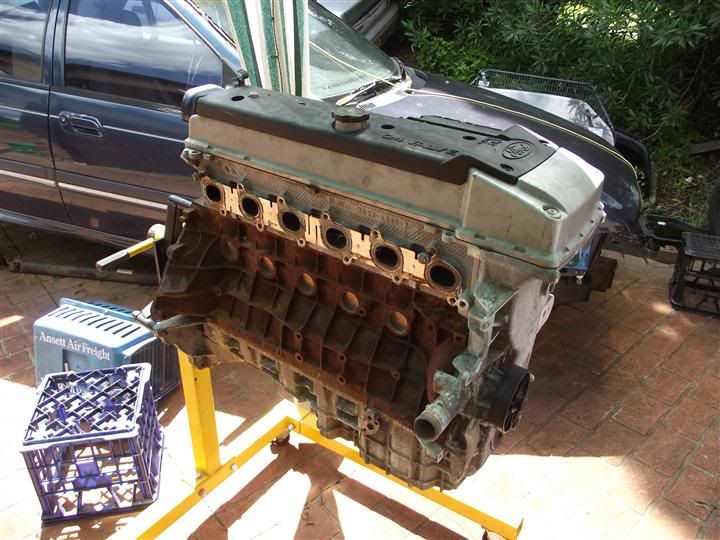 And it came with this on it. 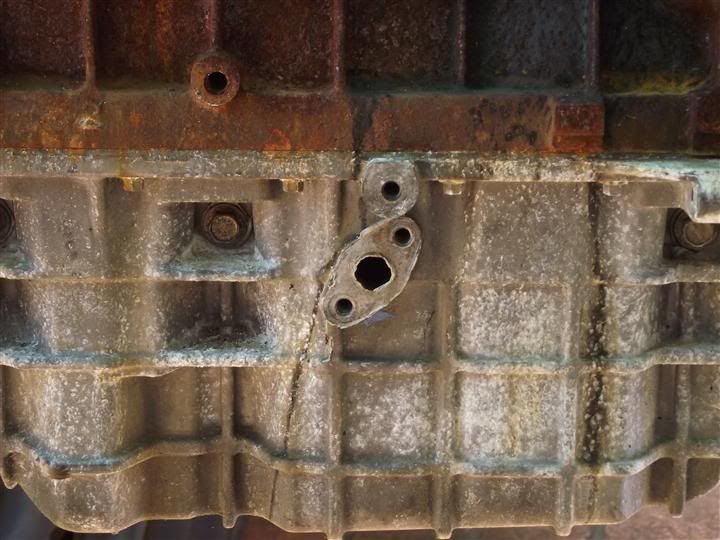 The story is the seller blew his turbo donk, and threw this n/a engine in the car while he had a new one built. Got it real cheap and even if it is stuffed at least I have the turbo sump, spare rocker cover etc to paint. Cheers BenJ
_________________ {DESCRIPTION} - Current Ride |
||
| Top | |
||
| DOHCED |
|
|||
|
looking good man, good score on the second barra, so want one of those need a job lol
_________________ XG Ute - 3 Seater - Auto - Dual Fuel |
|||
| Top | |
|||
| BenJ |
|
||
|
Cooling Woes + General Update
I have to admit that you all told me the after market header tank was crap. And you were all correct. It lasted all of 2 months. It started to leak around the radiator cap fitting and wouldn't hold pressure any more. It was also rusting inside the fitting. So I grabbed a factory one from my parts stock and after testing it for a couple of days, gave it a coat of paint to hide the ugly brown stained colour. Looks good I think. Before 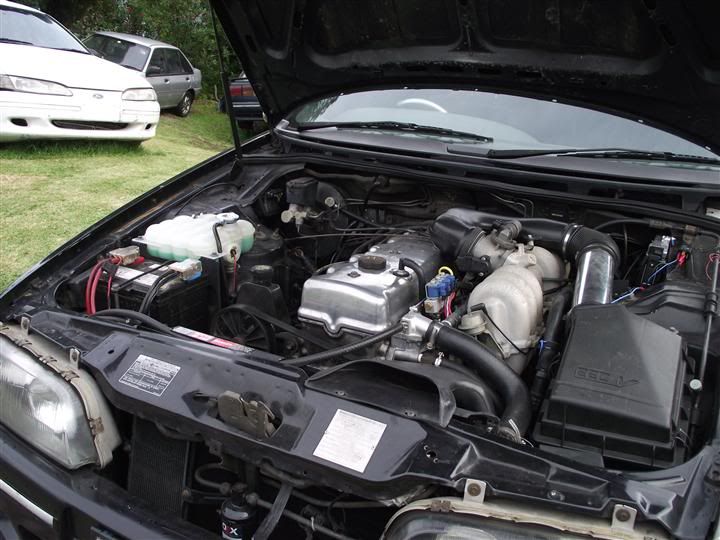 After 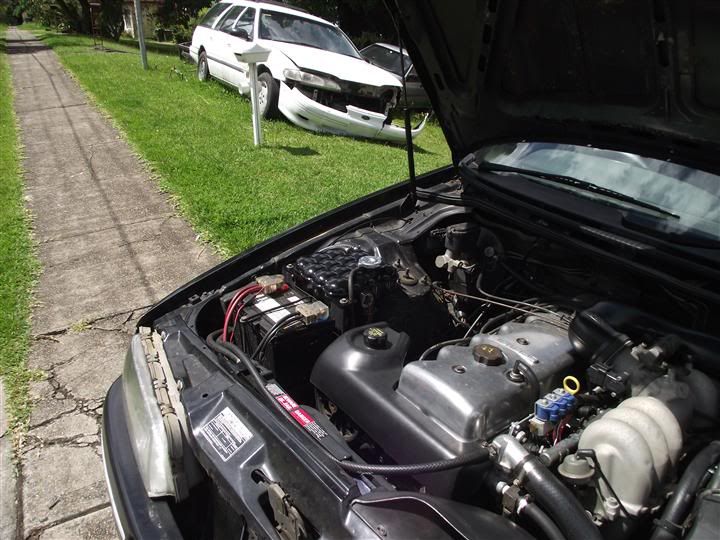 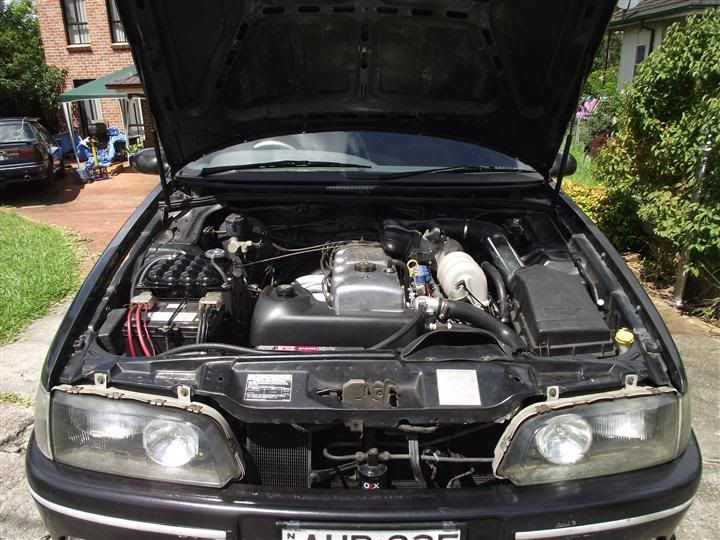 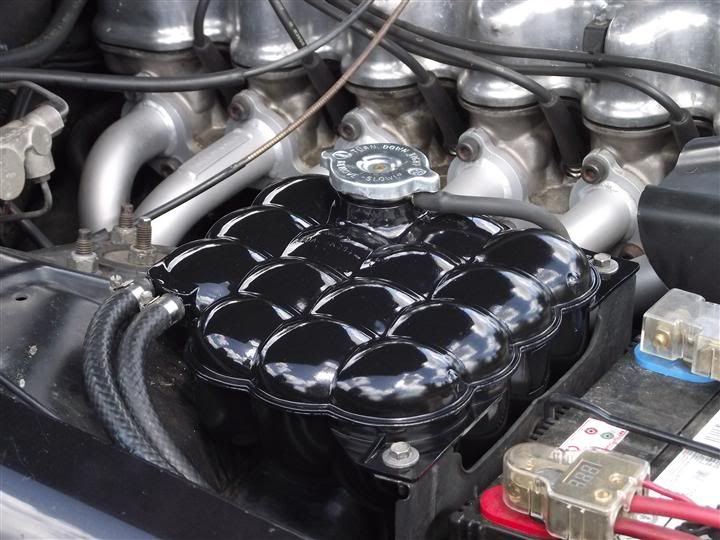 We will see how well the paint holds up. General Update The good news is the Wagon received a pink slip and is registered again for this year. Yay. To accomplish this I had to swap in the spare LPG tank as the current one was due for testing within the next 12 months. Bit of a mission but got it done. Found out the lock off solenoid on the original tank was a bit dodgy so replaced it with the solenoid that came with the spare tank. Found out that for some reason this lock off solenoid didn't want to operate after I filled the tank. Investigations over a couple of weeks proved that I had wired the two lock off solenoids in series, and while the old tank solenoid didn't have an issue with this, the new one did. After I rewired the lock solenoids in parallel everything was fixed. And as a bonus, the wagon now goes better. Got me wondering if the lock off solenoids were opening 100% while in series. I also pulled out the LPG regulator AGAIN to try and rectify a small LPG leak. I found that the fitting supplied with the injection kit that screwed into the regulator was a specific size and thread and was not a tapered fitting like most gas fittings are. When I assembled it all I used a GAS paste, which worked as it should on the tapered fittings, but on this one didn't seem to be working. I realised that as it was not tapered, the fitting wouldn't snug up correctly to the regulator. To correct this I used thread tape with a few layers wound around the fitting and was able to get it to tighten up much better than before. So far no leaks. I fixed an exhaust leak after the bolts that held the cat back exhaust to the cat converter decided to undo themselves, and while doing that found the oxy sensor had shat itself and collapsed causing a rattle I had been trying to find. This also explained away the dead spot I had been having for the last week or so. So, fingers crossed, all is running well at the moment. Cheers BenJ
_________________ {DESCRIPTION} - Current Ride |
||
| Top | |
||
| BenJ |
|
||
|
SS Inductions Snorkle
It should be noted that there is no way I would ever hand over the $280 to buy one of these new. However, when I was offered this as a trade for some chrome EF/EL door handles, saying yes was an easy choice. I have had the SS Inductions Snorkle for a couple of weeks, but it was only last night I got a second EF/EL airbox to use as the victim for this mod. Let's begin with a picture of my current intake. This is an EL GT item, so it is already larger than the standard item. 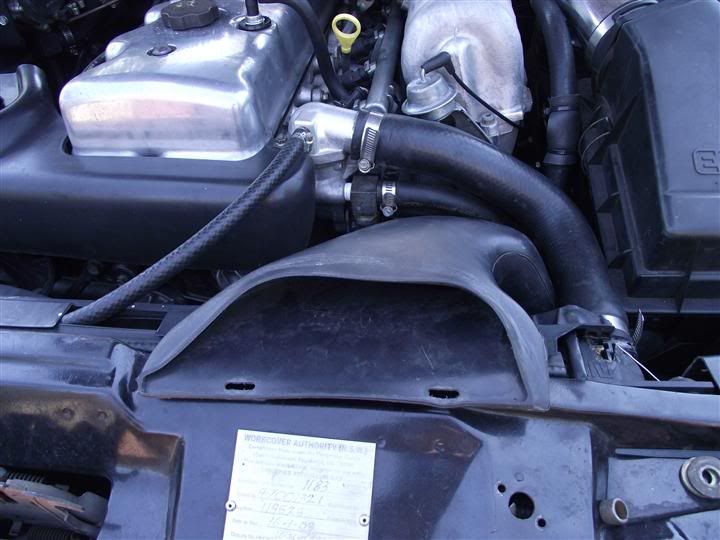 And here is the SS Inductions Snorkle. 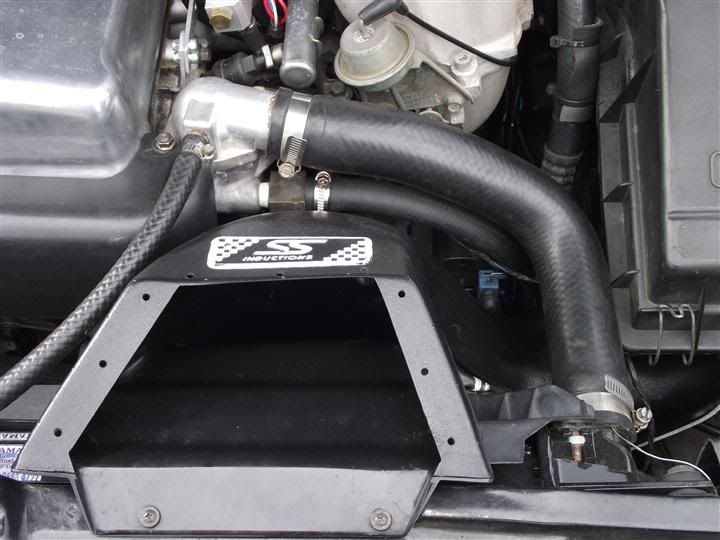 And the two of them side by side in the engine bay. 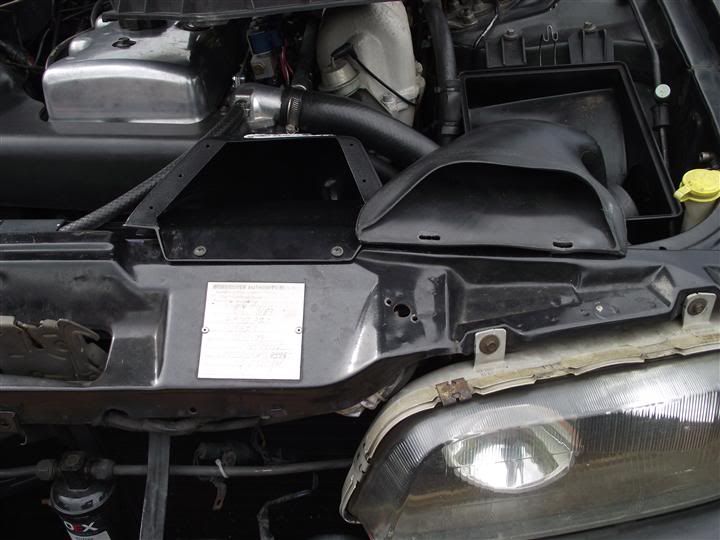 The SS Inductions Snorkle is not only larger in the intake, but the body and exit into the air box are also much larger. 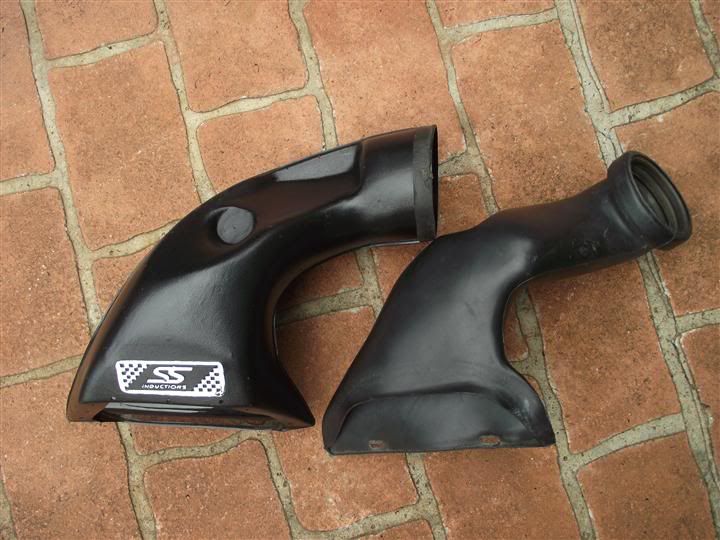 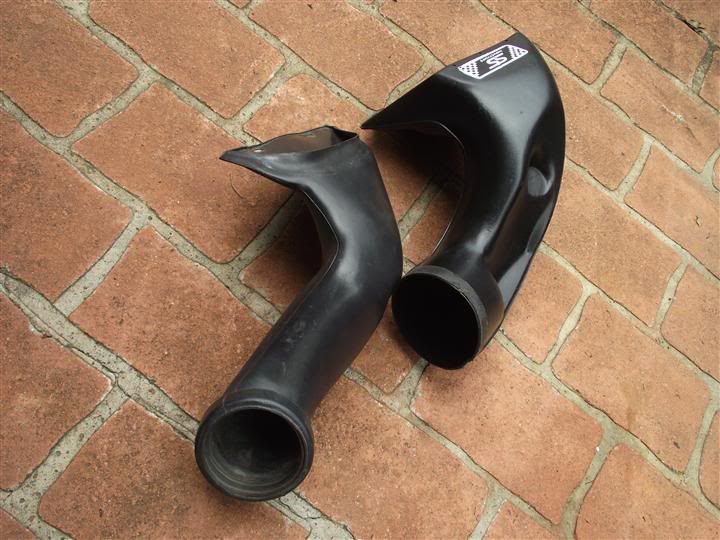 To fit the intake to your car you need to cut a large hole in the corner of your lower airbox. I marked out the hole with a sharpie and then using my trusty dremel got to work. I also had to trim down some of the external ridges for the required clearance. 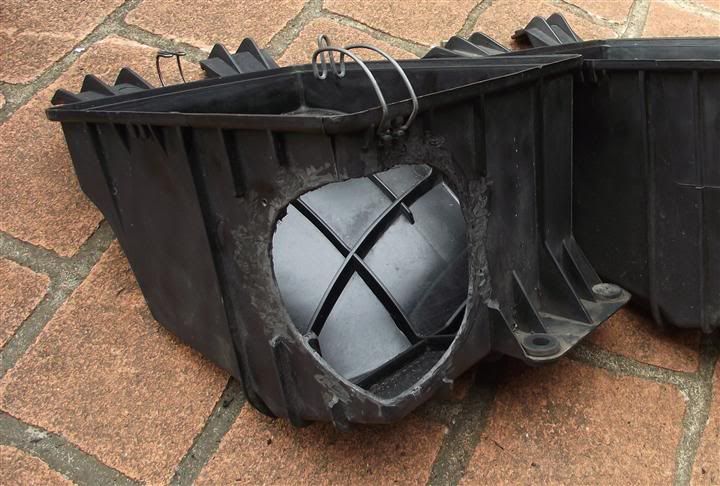 I then screwed the air box opening in place temporarily for a test fit, and then used some silastic to glue/seal the two parts together. The size difference is quite remarkable. 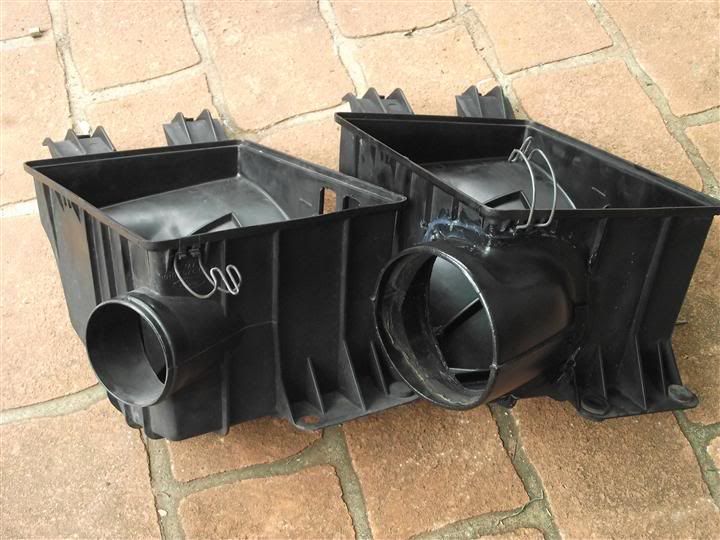 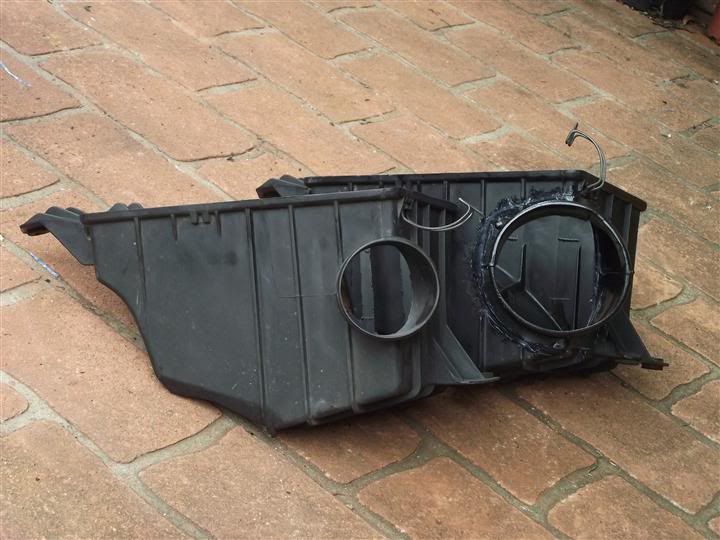 Here is the airbox in the engine bay. 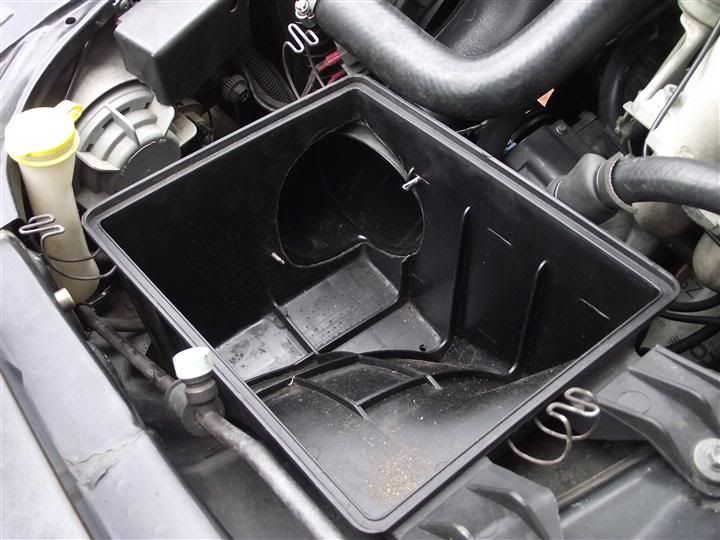 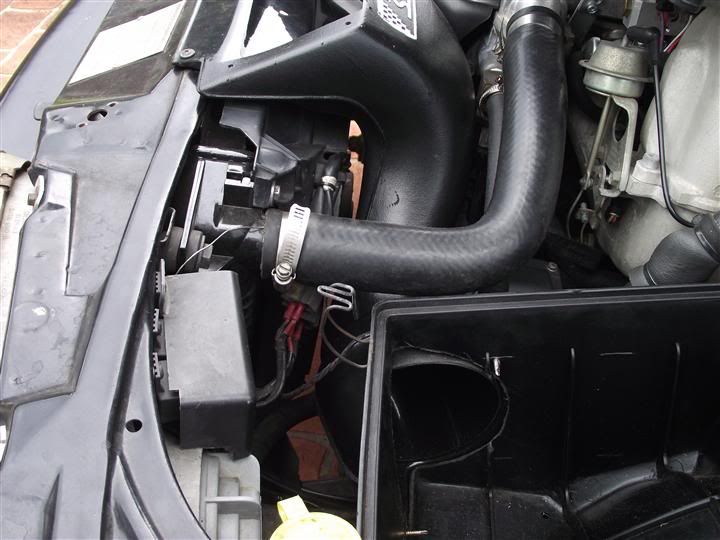 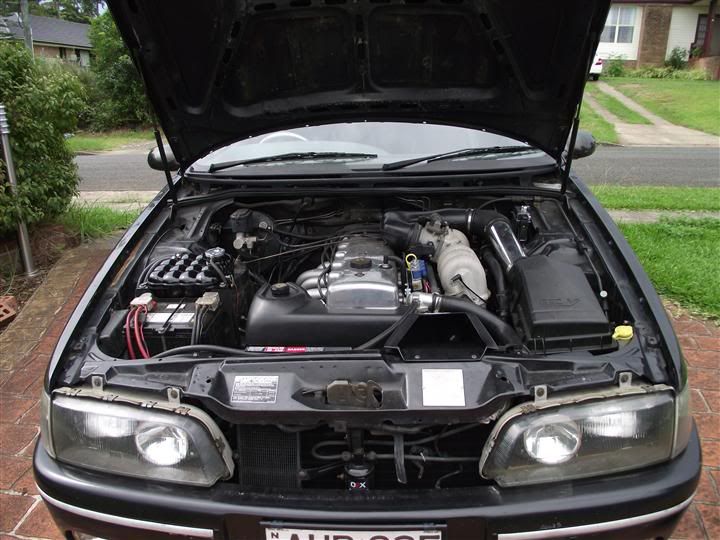 I have to say, the larger snorkle had more than sufficient clearance, including my non factory coil location. The wagon has more throttle response, and revs out a tad easier than before. Is it worth the $280 asking price for a new one? Not by my tight a** money spending rules. But if you can pick one up for cheap like I did, as they say, bigger is always better. And now the question arises, should I install a pod filter in the air box or is the standard paper filter good enough? Cheers BenJ
_________________ {DESCRIPTION} - Current Ride |
||
| Top | |
||
| SWC |
|
||
|
Fuken Gaaaayyyyyyyy
|
||
| Top | |
||
| BenJ |
|
||
|
{USERNAME} wrote: Fuken Gaaaayyyyyyyy LOL, so you are alive! Chat soon. Cheers BenJ
_________________ {DESCRIPTION} - Current Ride |
||
| Top | |
||
| TimmyA |
|
|||
|
G'day Ben...
Feel like we've got the same opinion of the SS inductions snorkel... Mine was $100 off ebay, so in a round about way probably similar to your chrome handles... I never had a stock one to try in my car... I fitted this when the VCT and BBM went in... I took out heaps more material than it's previous owner did and ended up with a very smooth hole into the air box... But no way is it worth $280... Unless of course you've won the lottery and struggling to find things to spend your 20 or 30 million on... I am just in the process of trying to find out the best arrangement of intake piping from the airbox lid to the throttle body now... Not sure what I want, or what is best for that matter... :/ Cheers, Tim
_________________ {DESCRIPTION} |
|||
| Top | |
|||
| Lukeee |
|
|||
|
New snorkel looks great and of course much larger!
It's always good doing mods that noticeably improve performance In regards to the air filter I recently got one of the JR cleanable reusable air filters for my parents AU... Heres the thread on boosted: http://www.boostedfalcon.net/viewtopic. ... &start=480 I'm not sure what your budget is or if stocks run out (I bought mine about a month ago) but I got it through Tuff Car Parts for $47 delivered. Cheers, Luke
_________________ Weekender: 07 BFII XR6T - Conquer |
|||
| Top | |
|||
| evxr6 |
|
|||
|
{USERNAME} wrote: Got me wondering if the lock off solenoids were opening 100% while in series. You may have been getting a little voltage drop when they were in series. When you wire in series, you share the voltage. When you wire in parallel, you share the current. But, I'm sure you already knew that |
|||
| Top | |
|||
| TimmyA |
|
|||
|
Probably like relays Ben...
Most specs will say something like 9V is required to change the state of the relay, but only 3 volts is required to hold it changed... So if you were managing to get them open then holding them open wouldn't have been too much of a task... They never really appeared to be the type of thing that would sit "halfway"... If you got one and ramped the voltage from 0 to 12 you'd find you'd get to a point where it'd just clunk to fully open... and then as you wound down it'd clunk fully closed... Or such is my experience with electro-mechanical components anyway... Where a transistor (as opposed to a relay) can be halfway open... If you want to think about it that way... Cheers, Tim
_________________ {DESCRIPTION} |
|||
| Top | |
|||
| sooty72 |
|
|||
|
{USERNAME} wrote: In regards to the air filter I recently got one of the JR cleanable reusable air filters for my parents AU... Heres the thread on boosted: http://www.boostedfalcon.net/viewtopic. ... &start=480 I'm not sure what your budget is or if stocks run out (I bought mine about a month ago) but I got it through Tuff Car Parts for $47 delivered. Cheers, Luke Not to get too far off topic, but a good mate told me that Performance Wholesale in Brisbane now have Fram Airhog cleanable panel filters for like $25.00! He got one for an EL and they look good. The cleaning kit was less then $20 too. Cheers, Grant.
_________________ Yes, I own a Ute. No, I won't help you move! |
|||
| Top | |
|||
| Who is online |
|---|
Users browsing this forum: No registered users and 5 guests |