

|
| evxr6 |
|
|||
|
Sorry to here of your loss, Ben. My sympathies to you and your family.
|
|||
| Top | |
|||
| rustyeb1991 |
|
||
|
condolences to you and your family and have a safe return trip
|
||
| Top | |
||
| Lucion |
|
||
|
Sorry to hear about your father Ben, Condolences to you and your family.
I miss my father a lot to mate, Chin up and safe trip home |
||
| Top | |
||
| evxr6 |
|
|||
|
I saw a BA XR sedan in matt black today. Looked pretty mad. Vote 1 for the stealth wagon!
|
|||
| Top | |
|||
| steedy |
|
|||
|
Terrible to hear about your dad, mate. Hope you and your family are doing okay under the circumstances.
I've been eyeing off your build thread for a while, the wagon is looking great, and it's given me heaps of ideas for my own wagon! Would be proud if mine pulled up half as nice as yours though.
_________________ The gene pool could do with a little bit of chlorine... |
|||
| Top | |
|||
| FordFairmont |
|
||
Posts: 6113 Joined: 8th May 2007 |
{USERNAME} wrote: sorry to hear about your father ben, condolances to you and your family.. on the other note, thats pretty good consumption for lpg. geez i can only think how much it would be to lose a father, so condolences there benj although i didnt think fuel consumptipon figures on the grievance drive would matter much |
||
| Top | |
||
| BenJ |
|
||
|
BA DOHC 24 - Radiator Hoses and Fans + Air Box + Throttle Pedal + Other Bits
Radiator Hoses I got motivated and decided to start installing parts needed for a test fire up. I had spare hoses laying around so had something to work with. I grabbed a header tank and the main hose that runs from underneath it to the side of the radiator. This is standard E Series fitment so no surprise it went together easily. I used the standard E Series Lower radiator hose and it fits like is was made to between the BARRA water pump and the radiator. 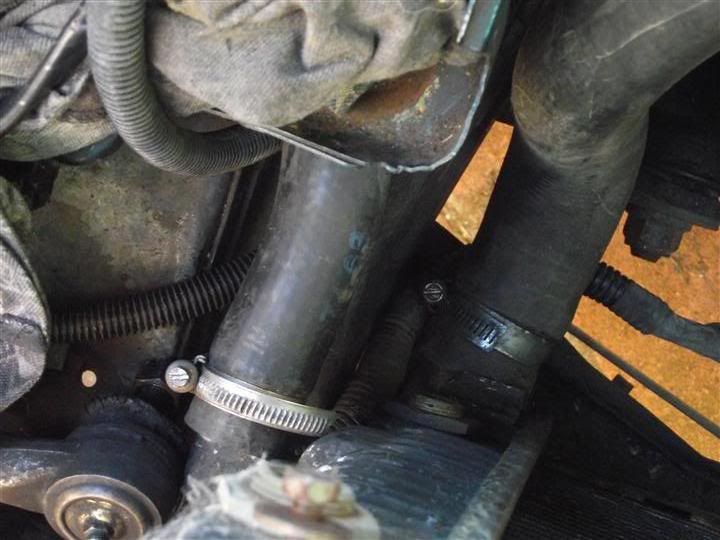 Then I tried the E Series upper radiator hose. 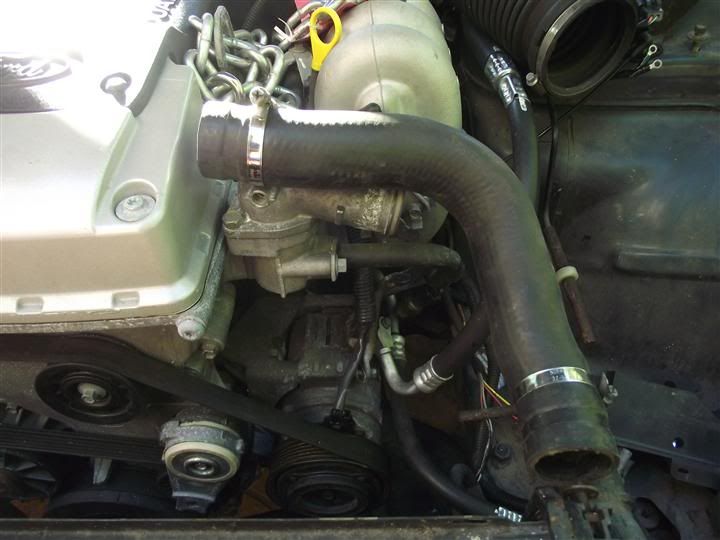 As the above pic clearly illustrates the thermostat housing is much closer due to the wider head. The hose clamps indicate how much needs to be trimmed off and using them as a guide removed the unwanted parts. 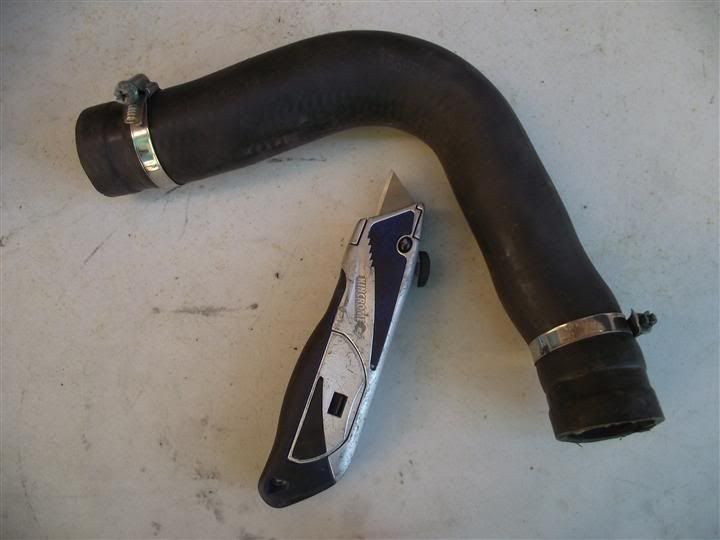 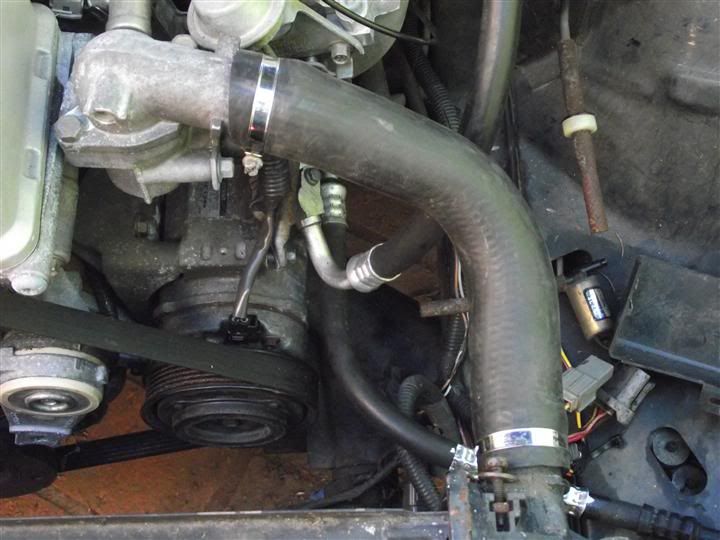 It now fits fine. I also ran the header tank lines from the thermostat housing air bleed and the radiator to the header tank. The standard length lines fit without any issues. 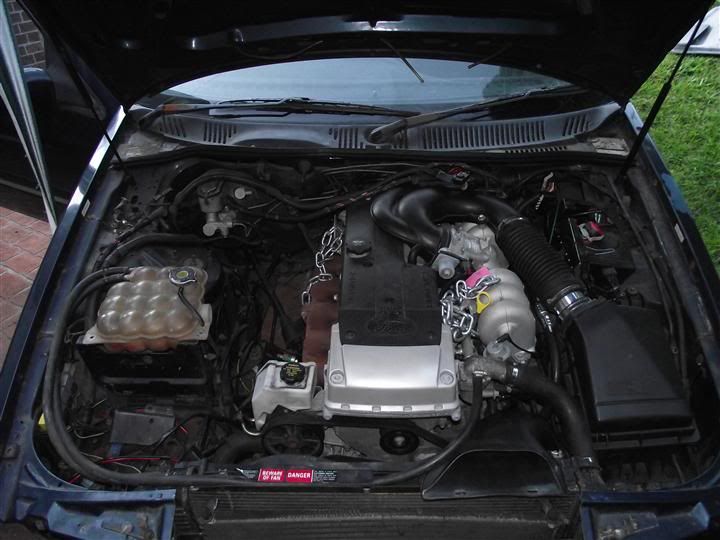 Thermo Fans I then slid in a set of EF Thermo fans. Seeing as I am using an E Series radiator they bolted like they were designed too. There is plenty of clearance between the front of the BARRA and the fan motors, even more than the E Series has. 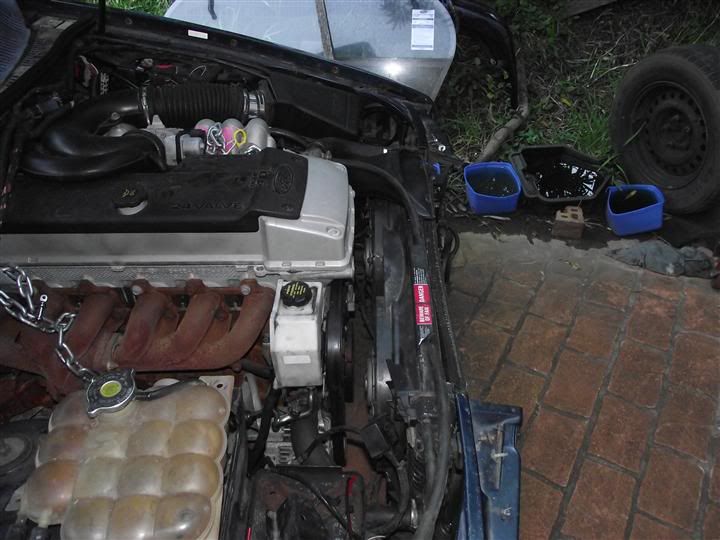 I plan to run the fans off the BA PCM, but I do have a Davies Craig setup here I can use if that doesn't work. Air Box I do have a BARRA air box, however they are quite large, and to fit in a box car, require a rather substantial dent to be made in the inner passenger wheel well. Seeing as I have the SS Inductions air intake I decided to use an E Series air box This bolts up as per factory, and the EL GT Snorkle fits without any issues. The BARRA intake pipe must be used as the AU or EL ones I have here do not fit the throttle body due to the design of the rocker cover. Using the BARRA flexible pipe, there is then a short gap between the end of the intake and the outlet of air box lid. I had a short piece of 3" pipe left over from when I made the previous LPG intake, and this made for a nice adapter between the two. 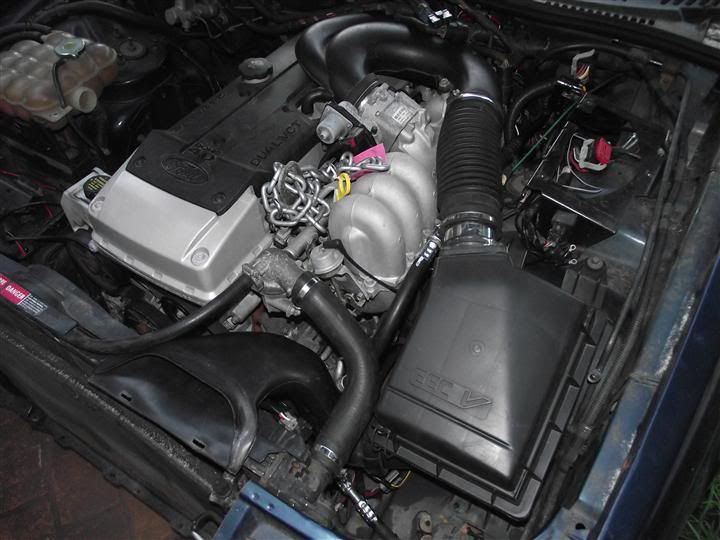 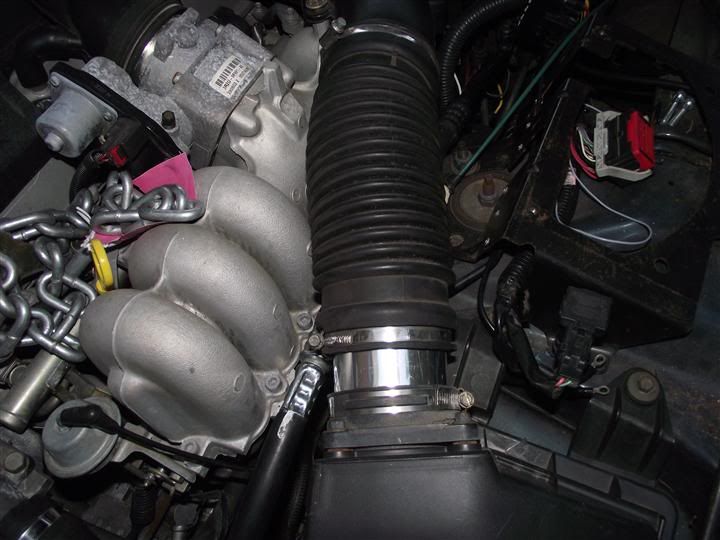 The A/C pipe will be located in place and held away from the air intake. Throttle Pedal I temporarily connected the throttle pedal wiring to the harness I built, and then bolted the pedal in to the test car. 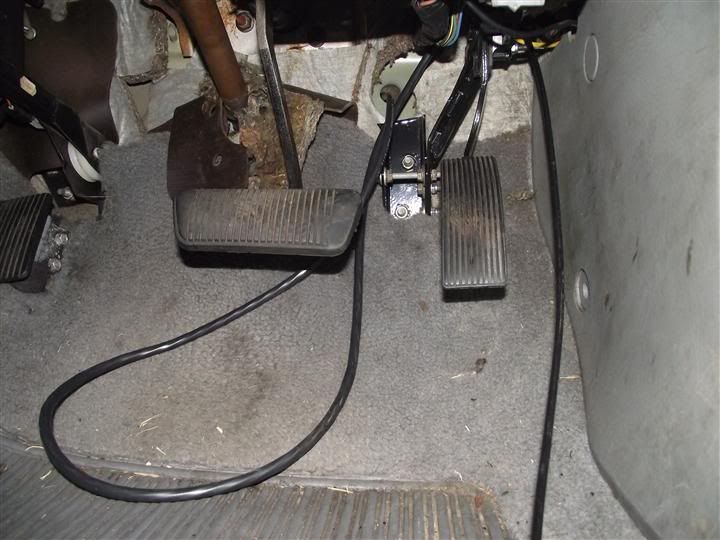 After sitting in the test car and pressing on the throttle a few times, I am very happy with how natural it feels. Other Bits I also installed the Pwr Steering intermediate shaft, so I can test the power steering set up, and I have acquired a spare loaner battery off SWC to power the test car. I have a list of other tasks that need to be completed before I can test fire the engine and am working through them as time permits. More non conversion updates to come soon. Cheers BenJ
_________________ {DESCRIPTION} - Current Ride |
||
| Top | |
||
| Lukeee |
|
|||
|
Looking good Ben!
It's amazing how the barra looks so at home in an e-series engine bay! Keep up the good work, almost there
_________________ Weekender: 07 BFII XR6T - Conquer |
|||
| Top | |
|||
| evxr6 |
|
|||
|
From what I saw on the weekend, looks like a majority of the work is done. Keep up the good work!
|
|||
| Top | |
|||
| SWC |
|
||
|
f**k GAY!!!!!!!
|
||
| Top | |
||
| Macca |
|
|||
|
{USERNAME} wrote: f**k GAY!!!!!!! It isn't gay if the sheep is female is it
_________________ 93 Ford Maverick LWB automatic petrol guzzler (gets stuck where Deli doesn't, big pumpkins |
|||
| Top | |
|||
| SWC |
|
||
|
{USERNAME} wrote: {USERNAME} wrote: f**k GAY!!!!!!! It isn't gay if the sheep is female is it Possibly acceptable in some countries but not in this state. |
||
| Top | |
||
| Macca |
|
|||
|
{USERNAME} wrote: {USERNAME} wrote: {USERNAME} wrote: f**k GAY!!!!!!! It isn't gay if the sheep is female is it Possibly acceptable in his original country but not in this state. Yep totally agree
_________________ 93 Ford Maverick LWB automatic petrol guzzler (gets stuck where Deli doesn't, big pumpkins |
|||
| Top | |
|||
| ToranaGuy |
|
|||
|
Love your work Ben, keep it up!
Cheers ToranaGuy
_________________ I am the ToranaGuy!|74 Lh Torana Turbo|78 Hz PanelVan|86 Mighty Boy Ute|93 EB2 Ghia,GT Mockup,5spd,LPGI,Full Leather|2 x EB Xr8 5spd's|{DESCRIPTION}|{DESCRIPTION}|{DESCRIPTION}| |
|||
| Top | |
|||
| BenJ |
|
||
|
BA DOHC 25 - Wiring Odds and Ends
While the main loom is completed there were a few loose odds and ends I needed to rectify. Oxy Sensor (HEGO) The E Series HEGO is a 3 wire design, while the AU to BA has 4 wires. I sourced a couple of HEGO sensors from the wreckers to use for the test run, from both E Series and AU donor cars. Using the HEGO plug in the E Series engine bay loom I sourced the power and earth wires, and then using the Male half of the plug I wired up an adapter that allows the AU HEGO to just plug in with the HEGO and Signal Return wires going back to the BA PCM. 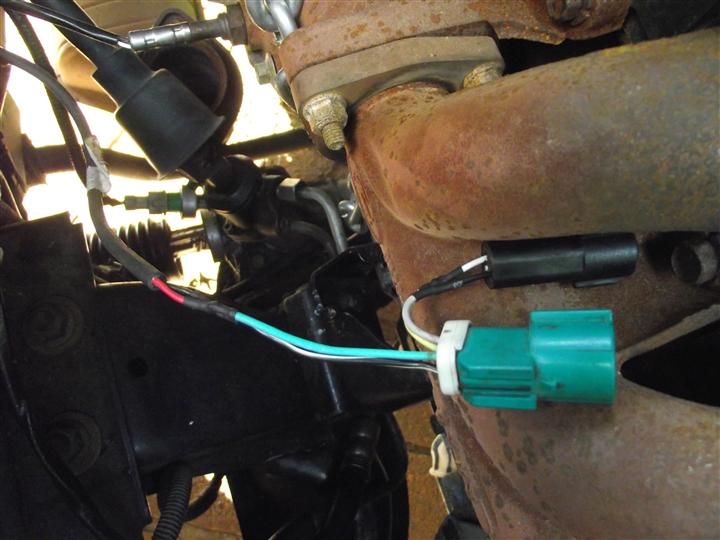 Plugs in nice and neat. 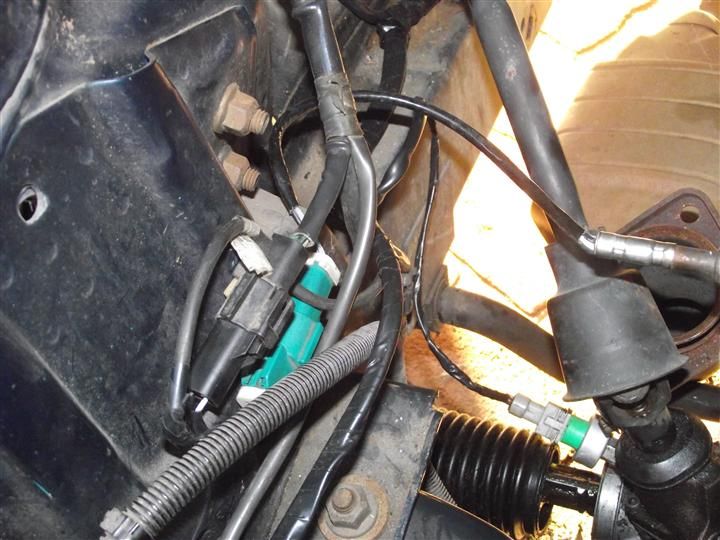 Power Steering Pressure Switch Having relocated the BA Pressure Switch to the E Series rack (yes I have to put a cable tie on the boot on the rack end) I wired up the plug to the new loom. 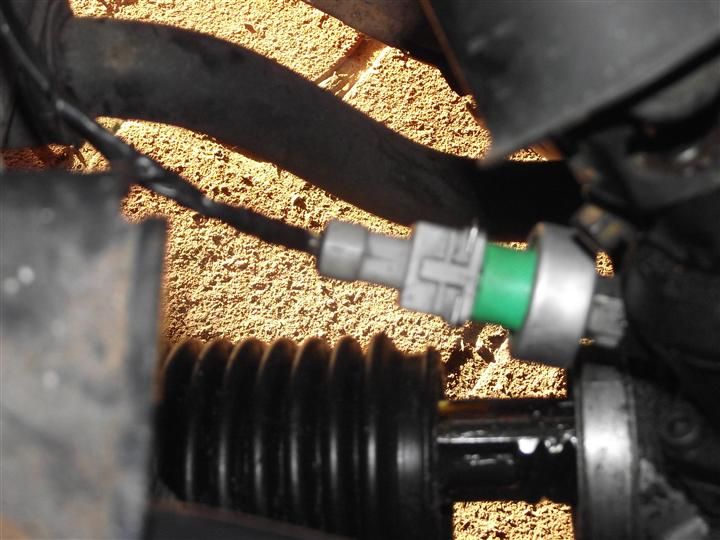 Speed Sensor Signal Wire Typically a BA PCM receives speed input from the ABS setup in the car. However, some base model utes without ABS, that also were fitted with a T5, used the same speed sendor as the E Series did. To tap into the wire I built another adaptor plug that interfaces between the gearbox loom and the engine bay loom. 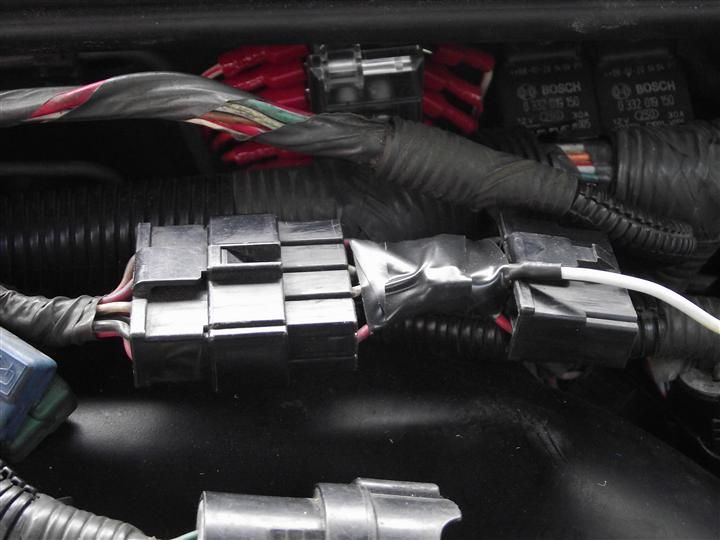 RPM Module I had one wire left from the RPM module to solder. This was the Crank Angle Sensor Negative wire on the B Series PCM (A) plug. This runs to a single wire plug I built into the new loom. The RPM Module itself was fixed into place with a cable using the standard holes a EF/EL BBM switch uses on the passenger side behind the washer bottle. A more permanent solution will be found in the wagon. No pics for this one. OBDII Plug Knowing I will need and OBDII plug to flash the BA PCM I was able to acquire a plug from an AU and from a BA. The wiring on both was actually different, but as can be seen below the physical mounting design of the plugs themselves were quite different. 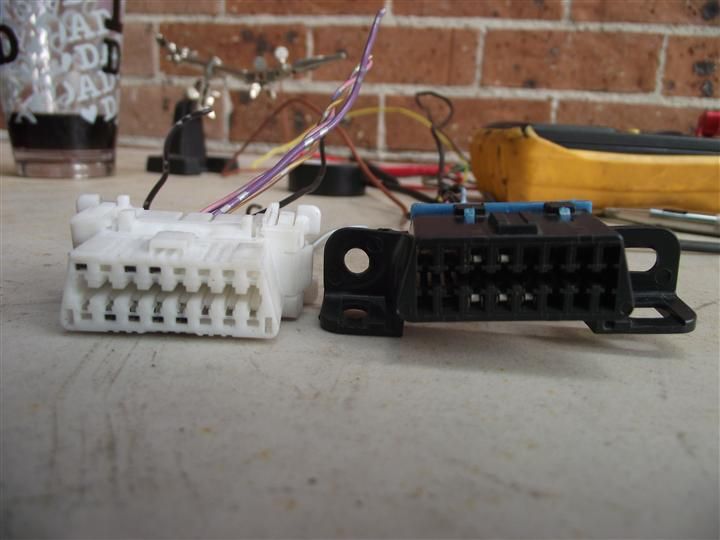 The white plug on the left is out of a BA, and just clips into place. The black plug on the right is from an AU and some rather nice built in screw mounts. Using the BA Plug as a guide, I repinned the AU plug to match. The BA PCM connection is made up of 3 wires. Two for the DATA Transfer, and one wire to supply power to the flash device. I also added the earth wires as the last two connections. All taped up ready to be put in the test car. 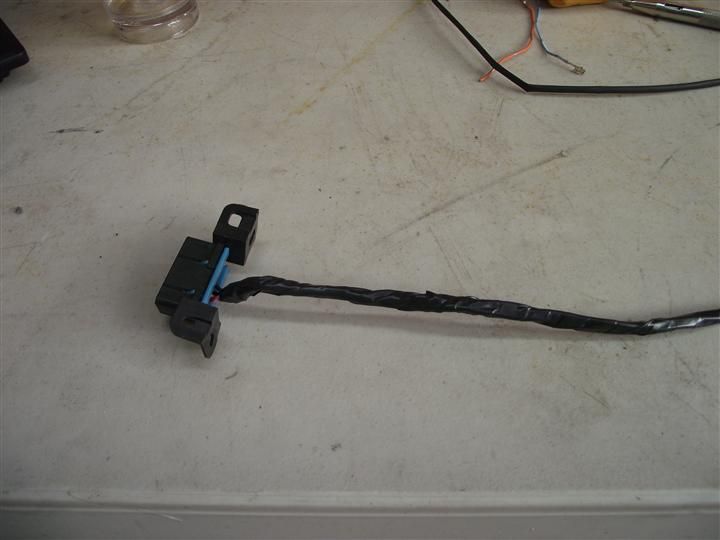 My loom in the engine bay routed the above 3 wires from the PCM through the EB Log Manifold Injection plug, and used the two INJ signal wires and the Air Temp Switch Wire. I intercepted these near the E Series ECU plug and connected the OBDII plug. Seeing as this is just a test car, I mounted the OBDII plug somewhere that will be easy to reach. 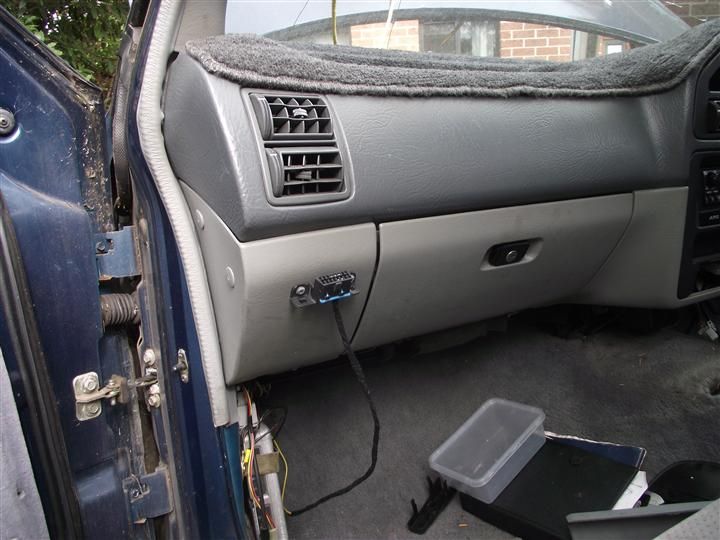 In the Wagon the OBDII plug will be located in the glove box area. Continuity Testing As each of the above plugs were connected I tested them for continuity to the BA PCM plugs. I also tested the permanent 12v lines, and the earth lines. The switched ignition lines will need to wait for me to hook up the test battery. Once the battery is in place I will also be able to test the starter circuit (with the engine unplugged). I will also be able to plug in the Xcal3, and get the required tune to flash the PCM for it to run as a stand alone engine. Then it will be time for fluids and a test fire. NOT FAR AWAY NOW!!!!! Can you feel my excitement growing? And not for any bloody sheep either!!!!!!!! LOL. Cheers BenJ
_________________ {DESCRIPTION} - Current Ride |
||
| Top | |
||
| Who is online |
|---|
Users browsing this forum: No registered users and 16 guests |