

|
| BenJ |
|
||
|
{USERNAME} wrote: Looking great BenJ! I absolutely love this build, i reckon its one of the most unique E-series builds out there. Quick question, where'd you get the extractor hex bolts from? I'm using the factory bolts with a buttload of washers on my headers as they're way too long now, the ones you have seem to fit nice. Hey Alfy. I got the bolts from a local bolt and hardware specialist. I just took in one of the factory bolts and they matched it but with a hex head. If you need them shorter they should have a variety of lengths to choose from. {USERNAME} wrote: Looking good ben. if the stereo controls dont work for you, how about mocking up some sort of hands free/auto answer for your phone (this combined with bluetooth system) With the laws the way they are now, maybe a decent mod to have a go at?- you seem to be good at making everything else work. My phone does connect via bluetooth to my stereo and I can answer the phone from the touch screen on the stereo, so I should be ok. I will be acquiring a phone cradle for my SIII though for that reason. {USERNAME} wrote: You aren't running prime brake pads by any chance? Popular with cab drivers for their price but notorious for chewing through brake rotors. I installed the pads that came with the rotors so should be a matched set. I have now been in touch with the seller and they have agreed to refund me or replace the rotors. Cheers BenJ
_________________ {DESCRIPTION} - Current Ride |
||
| Top | |
||
| wtbdlltd |
|
||
|
hey BenJ
one thing i have noticed that you have not done to your car is EF indicator stalks. have you thought about it. iv done it myself was easy to pull the old ones out with a few screws and put the new ones in. just watch out for the little balls on the combo switch they fly out when you take the stalks off |
||
| Top | |
||
| BenJ |
|
||
|
I actually have an AU stalk to put in as it has the on/off control for the cruise, which can be used for anything really.
Just haven't got around to doing it yet. Cheers BenJ
_________________ {DESCRIPTION} - Current Ride |
||
| Top | |
||
| evxr6 |
|
|||
|
{USERNAME} wrote: {USERNAME} wrote: Looking great BenJ! I absolutely love this build, i reckon its one of the most unique E-series builds out there. Quick question, where'd you get the extractor hex bolts from? I'm using the factory bolts with a buttload of washers on my headers as they're way too long now, the ones you have seem to fit nice. Hey Alfy. I got the bolts from a local bolt and hardware specialist. I just took in one of the factory bolts and they matched it but with a hex head. If you need them shorter they should have a variety of lengths to choose from. I used M10x25 capscrews (allen head bolts). They do up with an 8mm hex key. Any bolt shop should have them. Edit: Just noticed that you have a BA, Alfy. Might be the same, I have no idea! |
|||
| Top | |
|||
| BenJ |
|
||
|
Heater Core Replacement - Blahhhhhhh
Got up Saturday morning to find it had rained and was still overcast, threatening to rain. Bugger. Still, it had to be done. For the uninitiated, the heater core requires the 75% removal of the dash, and then the heater box. The dash for me is the easy part. The heater core however is bolted through the firewall via five bolts, of which most of them are in a PITA location to get at. Drivers side of head - not too bad to get at 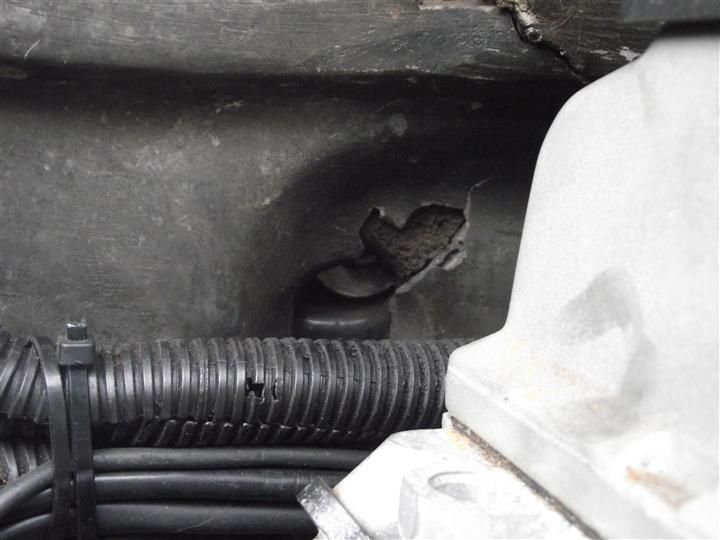 Passenger side behind head and wiring looms - you can see the top of the washer only - *%&)#$%*#@ hard to get at 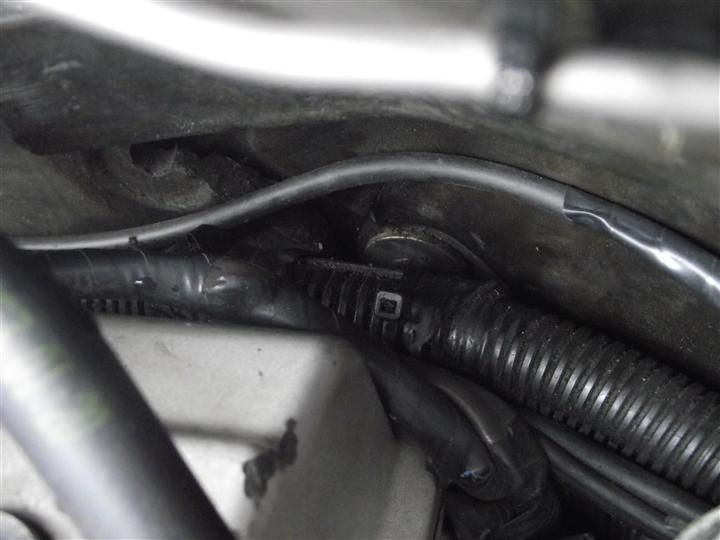 Passenger side under where the map sensor would normally be - This is the easiest one 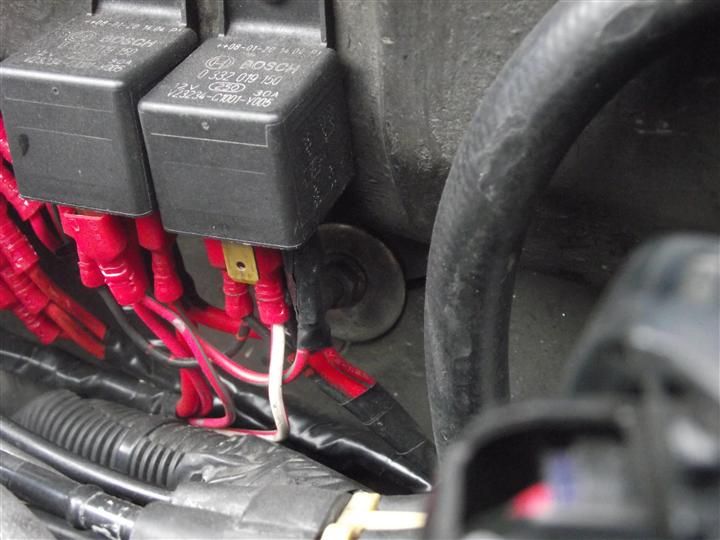 Underneath the A/C TX Valve - not too bad to get at 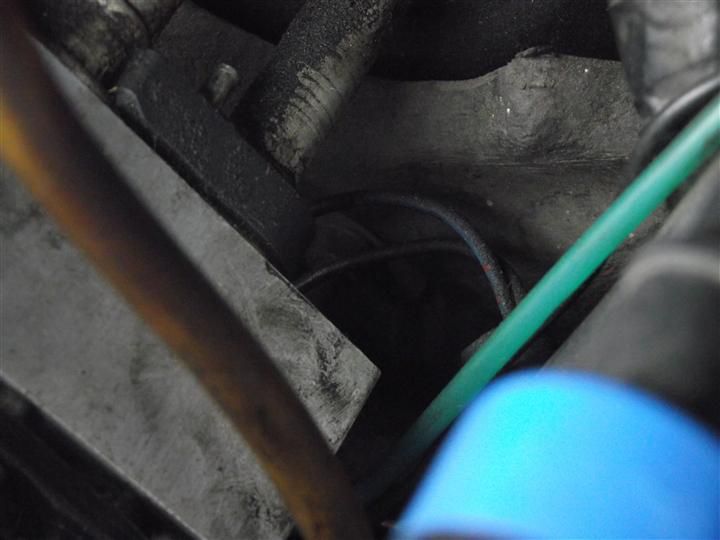 And the fifth one I had to get at from underneath and I CBF taking a photo of it. It is near where the heater core comes through the firewall. I managed to get all the heater box bolts undone with much frustration and creative language used getting at the bolt behind the head. Luckily I have flexi headed ratchet spanners, and the bolts were not all that tight. The the console was removed and the dash pulled back to expose the heater box. 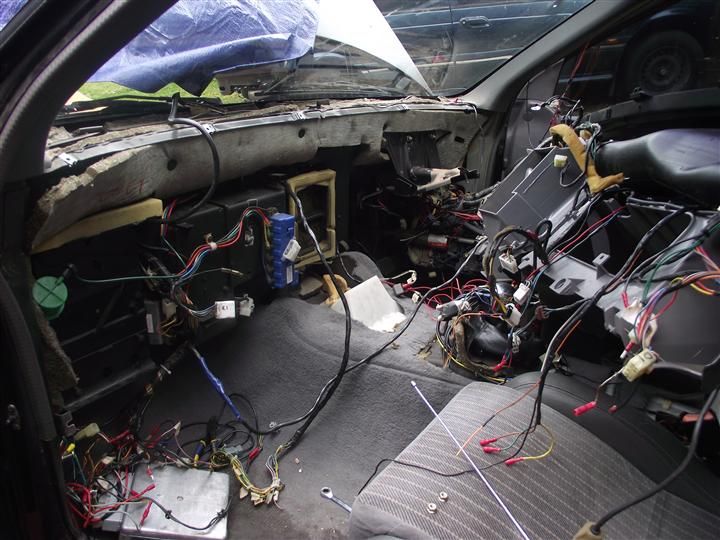 The trick here is to leave all of the drivers side wiring loom plugged in. In an EB this is where the bulk of the connections are. The remainder of the wiring is 70% A/C related and the rest is custom wiring I have added for the couple of minor mods done to the wagon, so self inflicted. Then the heater box comes out - but only after I have de-pinned two plugs from looms I added for the original EL Engine Conversion and then the LPG Injection. These had to be slipped out through the Vacuum tube access in the heater box. 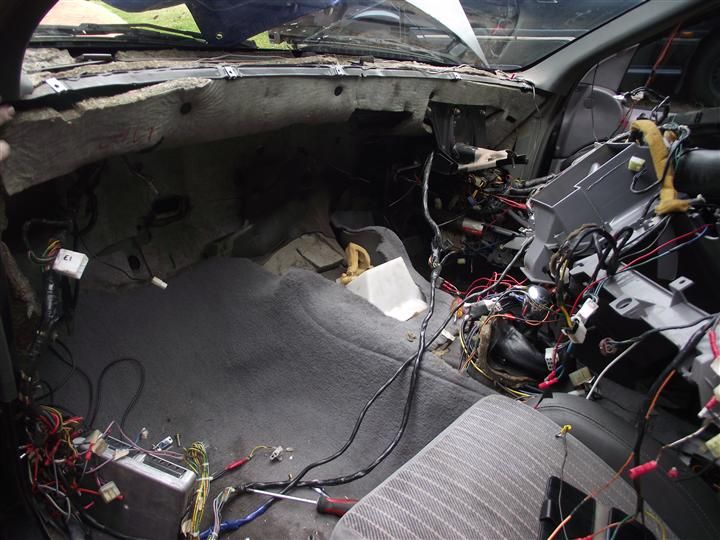 The heater box, once removed from the car looks like this. 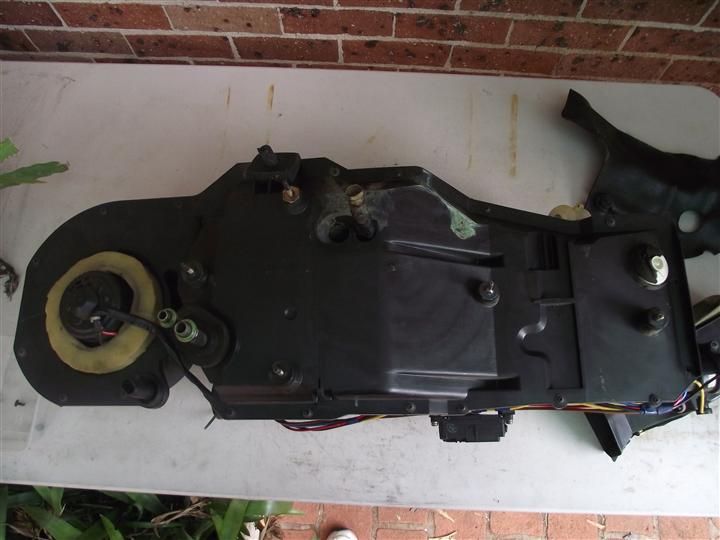 There are a stack of screws holding it together, and the lower half is sika-flexed together. And if you look carefully you can see there is a pipe missing altogether. With the firewall side of the heater box removed the A/C core and the heater core are both visible. 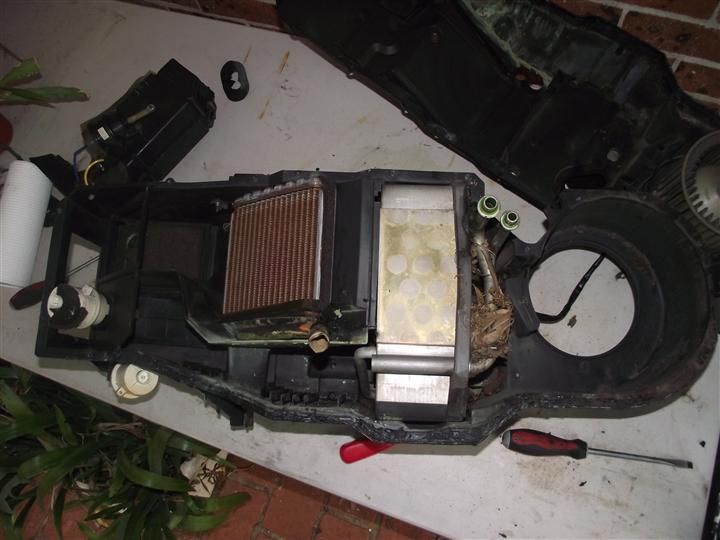 The A/C core has a fair bit of crap on it. 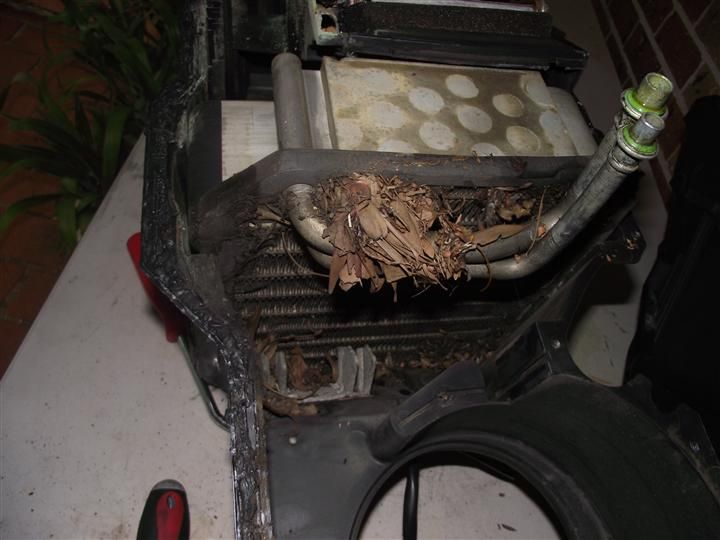 And the heater core is not pretty at all. 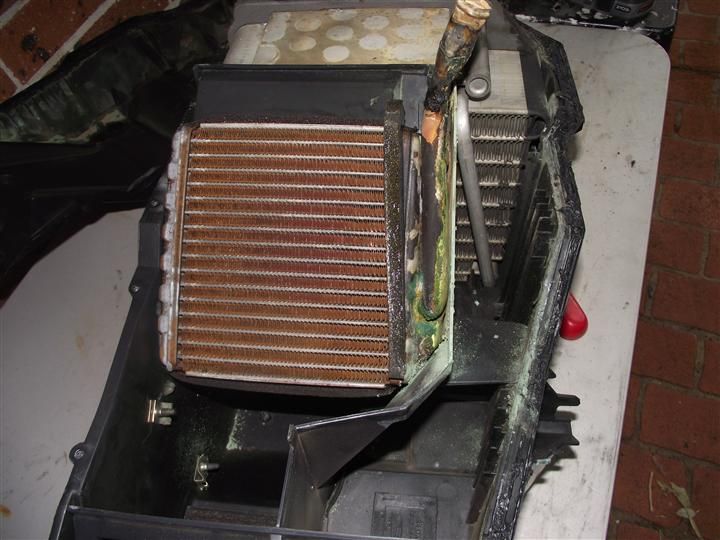 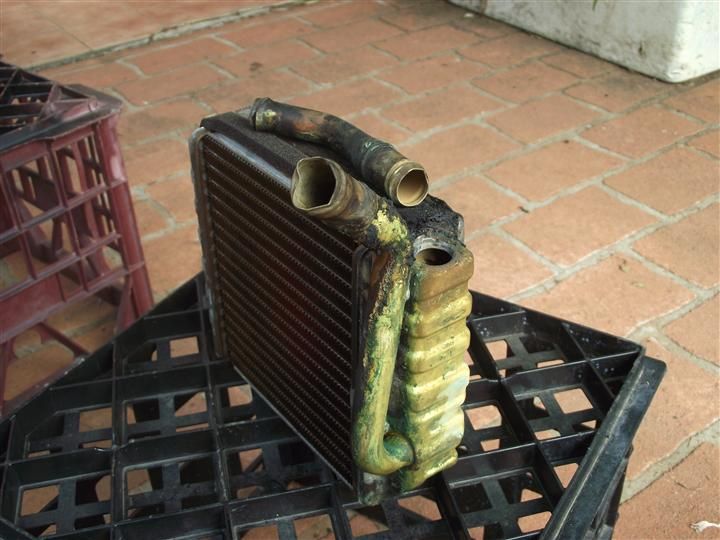 After cleaning up the A/C core and checking it over for any issues, it and the new heater core were placed back in the heater box. I used some silicone to seal the sides of the heater core against the box as the original foam was FUBARed. 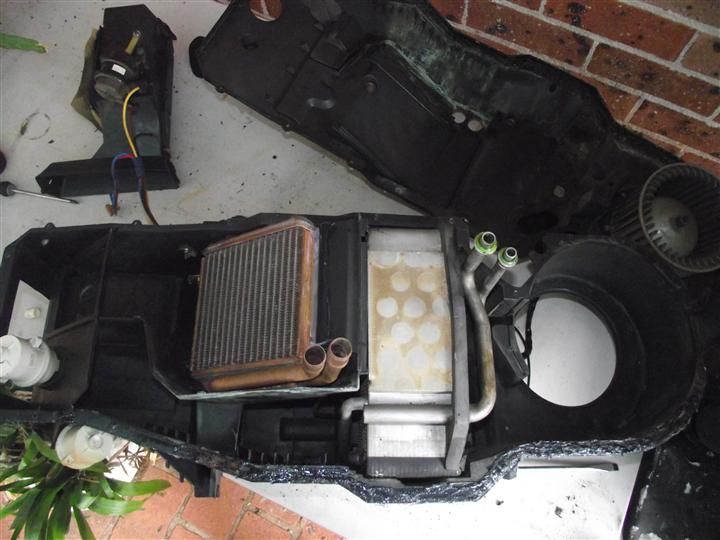 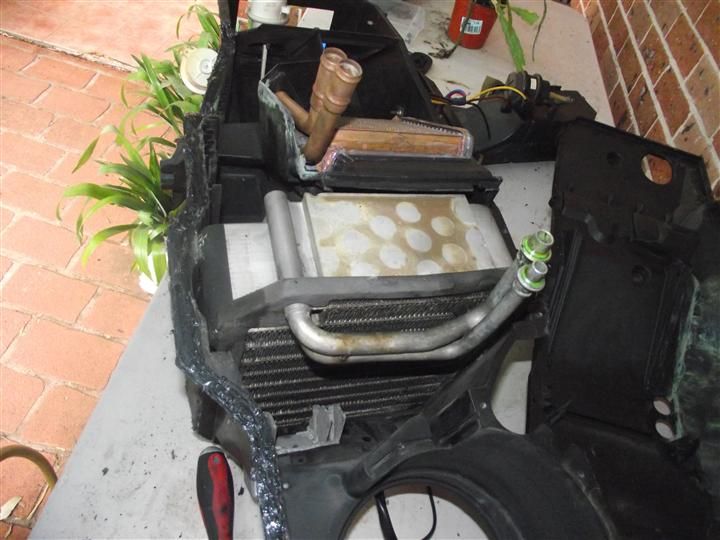 Then it was a simple matter of reassembling it all again. While putting it back together, my mate David assisted by fitting the EL plastic footwell duct. There are parts on the EB heater box that are not there on the EL version. I had the heater box and dash reassembled, and the car drive-able in time to get dinner. Sunday morning left me a couple of tasks left to complete the job. I jacked the car up so I could install the heater hoses onto the heater core pipes. It was at this moment when I looked up at the pipes from under the car that it dawned on me that the new heater core pipes were 15mm longer than the original one. &($%(#$%)&&^&*%$ and *&*#&%@)*#&$. Now this may not sound like such a big deal, and in a stock car with a SOHC engine, I doubt it would be. BUT, those of you who helped install the DOHC will know that there is VERY LITTLE ROOM. It all fits together like a jigsaw puzzle. I worked out that the wiring loom from the DOHC BBM was what was in the way. After much messing around I was able to lift the loom above the plane of the heater core pipes and secured the loom out of the way. PHEW!!!!! I was then able to finish connecting the heater pipes, start the car and test the heater after it warmed up. All is working as it should. I hope your weekend was much simpler than mine was. Cheers BenJ
_________________ {DESCRIPTION} - Current Ride |
||
| Top | |
||
| TROYMAN |
|
||
|
good work ben, i always dread removing and re fitting heater boxes...
|
||
| Top | |
||
| evxr6 |
|
|||
|
Well done, Ben. I am very glad that mine was replaced when the evaporator was replaced. I did literally nothing on Saturday, backed up with half disassembling a 323 engine on Sunday.
|
|||
| Top | |
|||
| rustyeb1991 |
|
||
|
{USERNAME} wrote: Well done, Ben. I am very glad that mine was replaced when the evaporator was replaced. I did literally nothing on Saturday, backed up with half disassembling a 323 engine on Sunday. is there a bpt in the wind? |
||
| Top | |
||
| evxr6 |
|
|||
|
{USERNAME} wrote: {USERNAME} wrote: Well done, Ben. I am very glad that mine was replaced when the evaporator was replaced. I did literally nothing on Saturday, backed up with half disassembling a 323 engine on Sunday. is there a bpt in the wind? Nope, just a water pump replacement. |
|||
| Top | |
|||
| Ballast |
|
|||
|
{USERNAME} wrote: {USERNAME} wrote: Well done, Ben. I am very glad that mine was replaced when the evaporator was replaced. I did literally nothing on Saturday, backed up with half disassembling a 323 engine on Sunday. is there a bpt in the wind? He is not worthy of a Mazda
_________________ Remember kids, the more pages of crap in your build thread, the bigger your e-penis is |
|||
| Top | |
|||
| ToranaGuy |
|
|||
|
Great work Ben! That's a job I need to tackle when I get my Eb Ghia back & can be bothered, the heater core. I've got a new core, and funnily enough a couple of spare heater & a/c box assemblies as well. Funny what Eseries bits you end up with after pulling a few apart.
Cheers ToranaGuy
_________________ I am the ToranaGuy!|74 Lh Torana Turbo|78 Hz PanelVan|86 Mighty Boy Ute|93 EB2 Ghia,GT Mockup,5spd,LPGI,Full Leather|2 x EB Xr8 5spd's|{DESCRIPTION}|{DESCRIPTION}|{DESCRIPTION}| |
|||
| Top | |
|||
| Rick's EF Fairmont Wagon |
|
||
|
love your work Ben.
I had to do this job on my Nissan Bluebird TRX when I had installed airconditioning. I also had the heater core leak in my mini SS. I rebuilt the heater / aircon unit for the EF fairmont which I have started back on building at last.
_________________ BF3 Egas XT Wagon |
||
| Top | |
||
| BenJ |
|
||
|
DOHC Intake Upgrade + Rear Rotors + HEGO + QLD Trip
DOHC Intake Upgrade I know a few E Series owners are 'upgrading' their air intakes to BA pipes. But, did you know that BA owners upgrade their intakes to another factory item? One of these is not like the other. 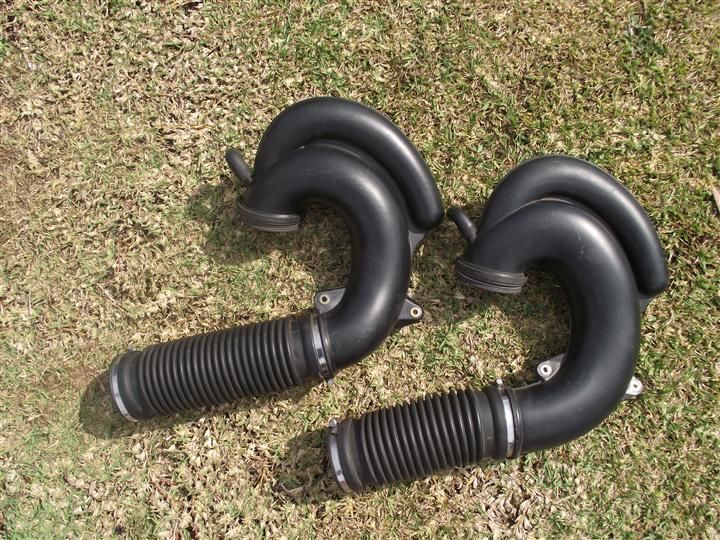 Can you spot the difference? 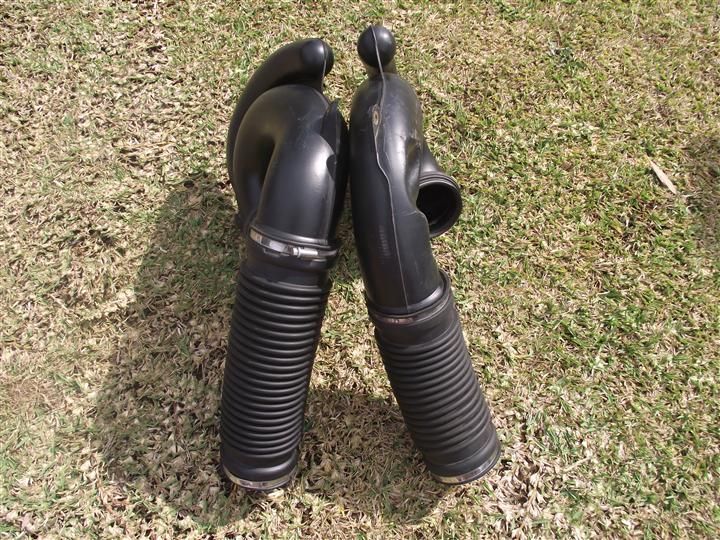 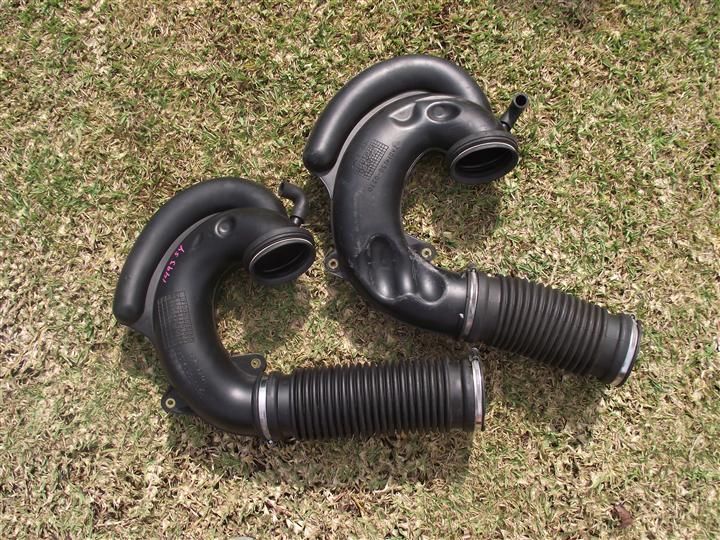 And the model in question the new intake comes from? The Ford Territory. The Territory intake sits higher over the engine on these spacers. 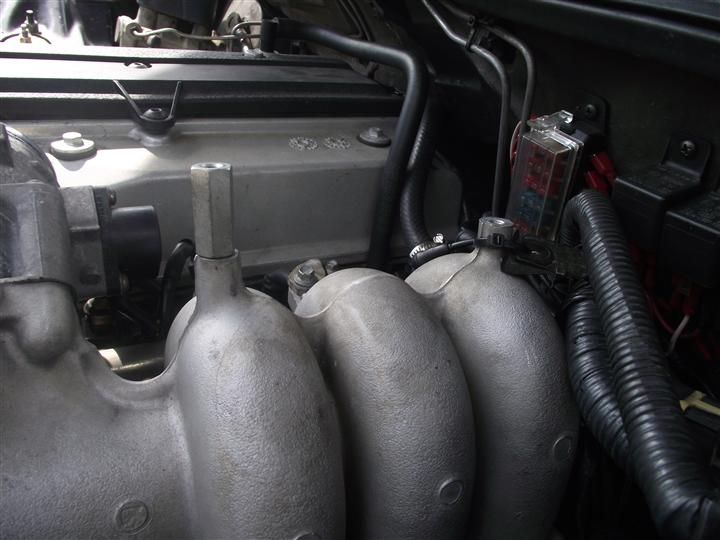 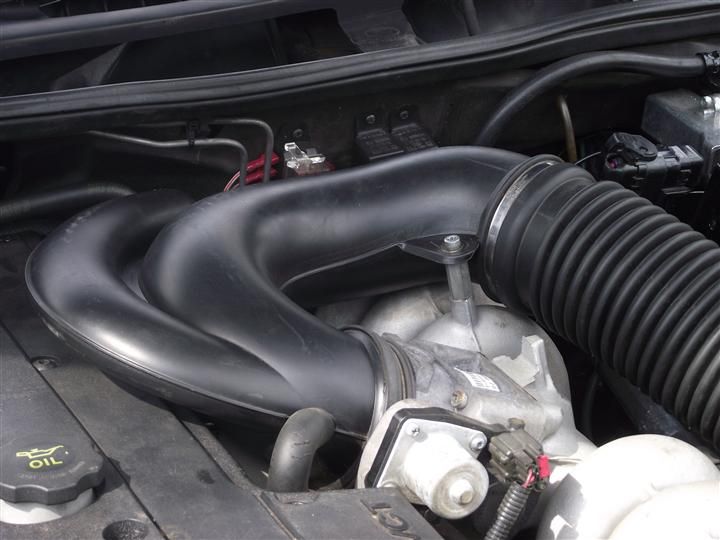 As I am using the E Series air box, I had to add in a short adaptor to suit both the BA and the SY intakes. 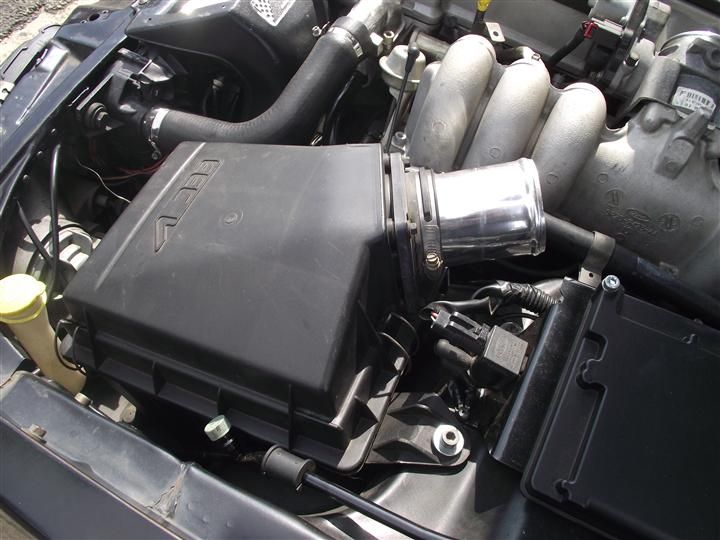 And the finished install. 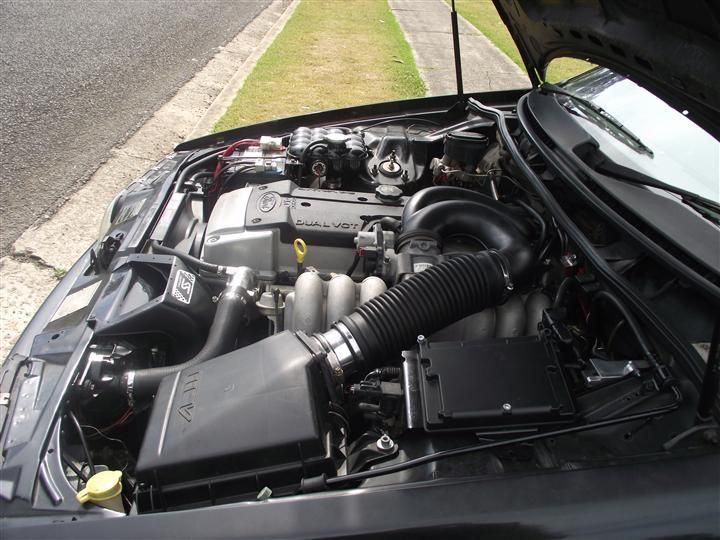 It is interesting to note that there are quite a few subtle differences between the two. Apart from the obvious lack on indentations on the bottom of the pipe to clear the BBM top, the plastic Territory pipe is a different shape, as well as being shorter overall in length. Correspondingly, the flexi pipe is longer than the BA item. Seat of the pants performance meter says it is a bit freer to rev than before, but that is about it. Rear Rotors An inspection of my rear rotors revealed they were well and truly stuffed. So $105 later for stock rotors and pads by Ultima I was able to take care of the situation. Old vs New 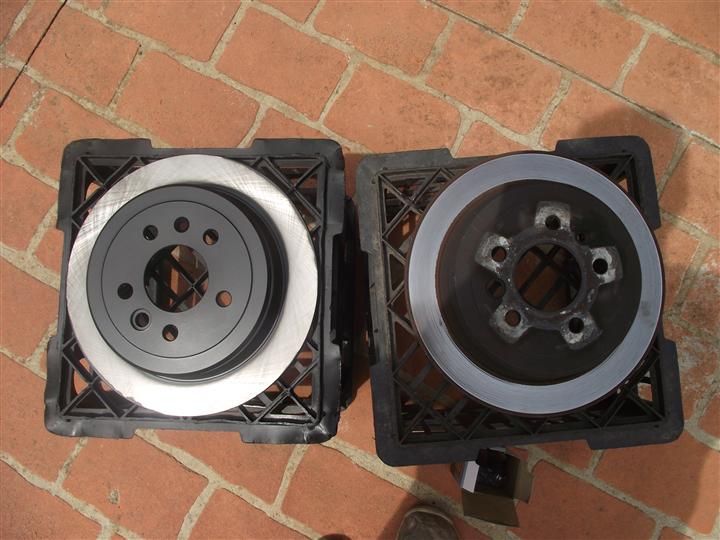 New on car 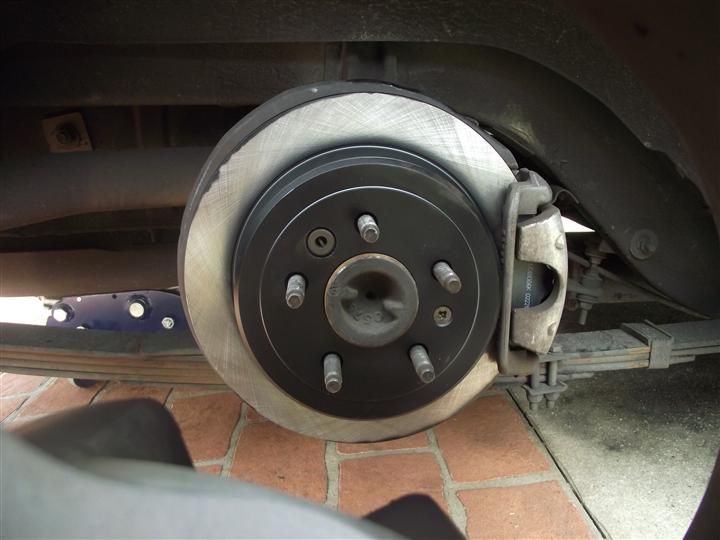 Prior to installing them I painted the hubs and rotor edge to prevent that nice rust finish they always get. HEGO I had been experiencing a drop in performance after the engine warmed up, and a check with the XCal3 for DTC errors retuned issues with the HEGO. So I swapped in a spare I had and the same issues and errors occurred. I decided to have a closer look at the HEGO wiring, and discovered that I had stuffed up when making the loom adapter for the HEGO. On the EB1 engine bay loom the HEGO plug has three wires, and two of them are Black/Green. One of these goes to earth and the other to the E Series ECU as the signal wire. I had wired the HEGO Sensor earth to the ECU wire DOH!!!! This means the HEGO was not heating up as designed and in effect not really working causing the engine to run in closed loop mode!!!! A quick correction, and the engine is performing much better when hot and is much more consistent in the throttle application. QLD Trip I am driving the Wagon to QLD again next week, and will be staying near Mooloolabah. If you are in the area and would like to meet up, please send me a PM and I will provide you my mobile number. Cheers BenJ
_________________ {DESCRIPTION} - Current Ride |
||
| Top | |
||
| evxr6 |
|
|||
|
Nice upgrade, the BA unit looks like it got too close to the extractors lol.
|
|||
| Top | |
|||
| wtbdlltd |
|
||
|
the ba intake is moulded to sit on the intake runners. benefit with the territory one is that as it sits higher there is not mold lumps so cleaner air flow
|
||
| Top | |
||
| Who is online |
|---|
Users browsing this forum: No registered users and 42 guests |