

|
| huggiebear |
|
|||
|
thanks. its weaping oil under exhaust on cyl 1 so a new headgasket will be done shortly, new steering rack will go in shortly and a new power steering pump is needed then onto shocks and springs then rust (was only patched before) then gearbox/diff freshen up
unless i can find a nice rust free na/nc/da/dc cheap... the more i look a the list of what needs doing for a reliable daily the more it makes sense to buy something else but im over changing cars... maybe an AU on lpg lol |
|||
| Top | |
|||
| Falcon_92_EB |
|
||
|
{USERNAME} wrote: 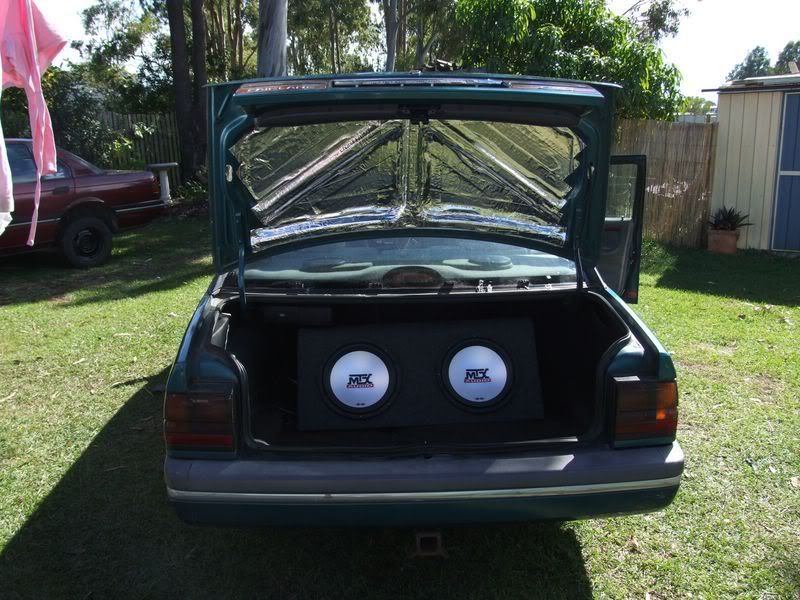 How did this come out? Example: no funny smells or melting on hot days? i've been thinking about doing it to my AU. |
||
| Top | |
||
| huggiebear |
|
|||
|
no smells or anything. only issue is after a while one strip starts to come undone after a really hot day
|
|||
| Top | |
|||
| huggiebear |
|
|||
|
not alot going on lately. with the gf's new job i get aprox 3 hours max per week to work on the cars. but i have started to make progress.
i have stripped the wagon of its brake lines and removed the ABS unit i have also cut the holes for the cooler pipes to pass through. the choice has been made to go back to the EA-ED intake manifold. this should shorten the piping by a massive amount. i have also started designing a airbox for the pod filter which will also hide the header tank. will be made from stainless and will allow only the filler cap for the tank to poke through. the hot pipe will be heat wrapped and also have heat shielding to protect the alternator wires. im going to throw a spare diff i was given in so i can roll the car. i now need a new diff as the old housing and bearings were destroyed in the floods (center and gears were ok and are for sale for 50 bucks 3.23) im also working on an AU3 roof unit but instead of sunglasses holder it will open to show a panel with switches for the 2 fuel pumps (which will allow me to turn off the stock pump to empty the surge tank if needed) and also thermo fans over ride and allow me to select 1 fan or 2 fans on constant or revert back to ECU control. im also fitting a starter button in there for pretty much wank factor but also a little extra security. they will all have LED indicators. 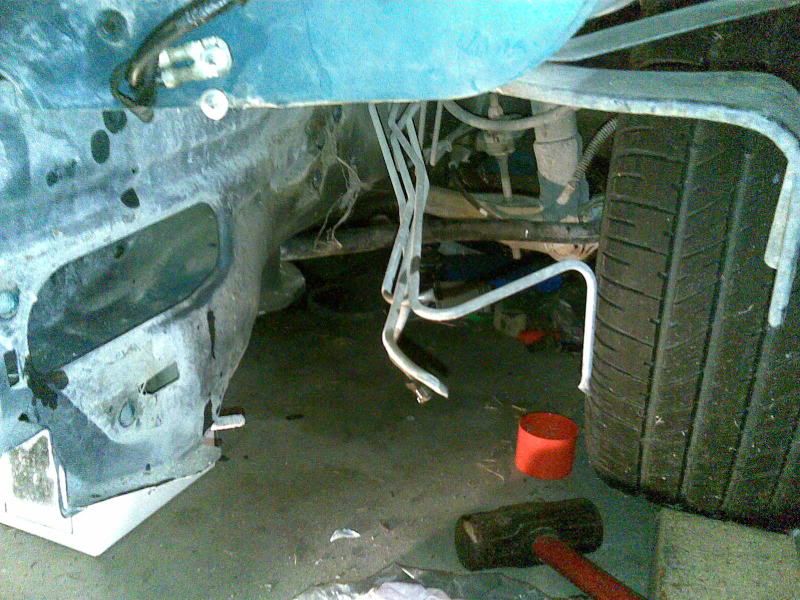 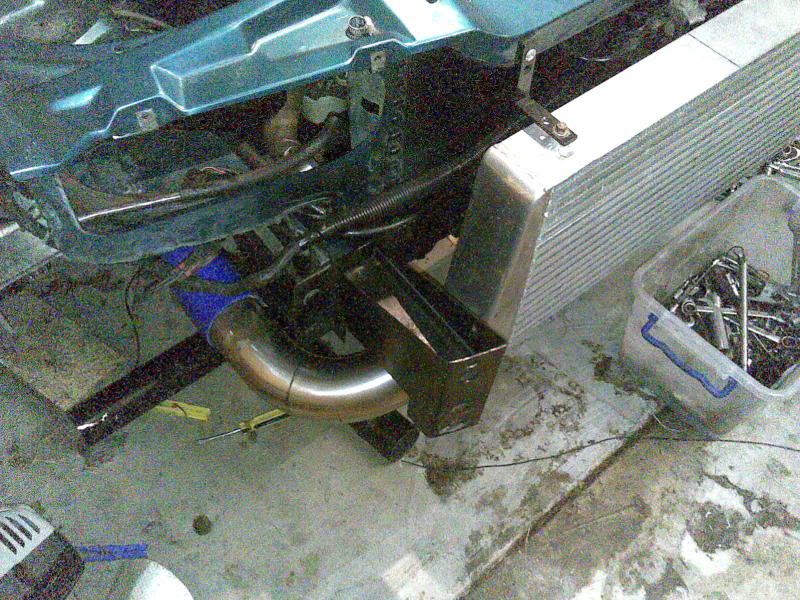 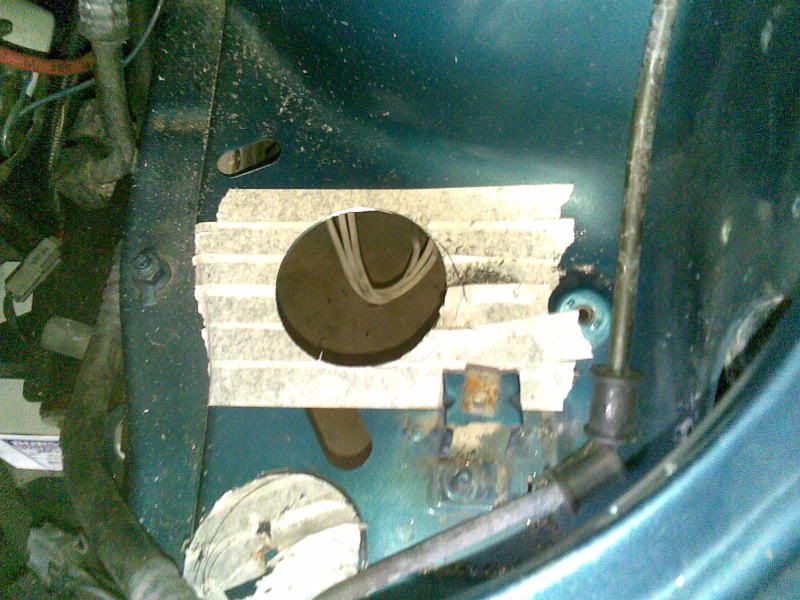 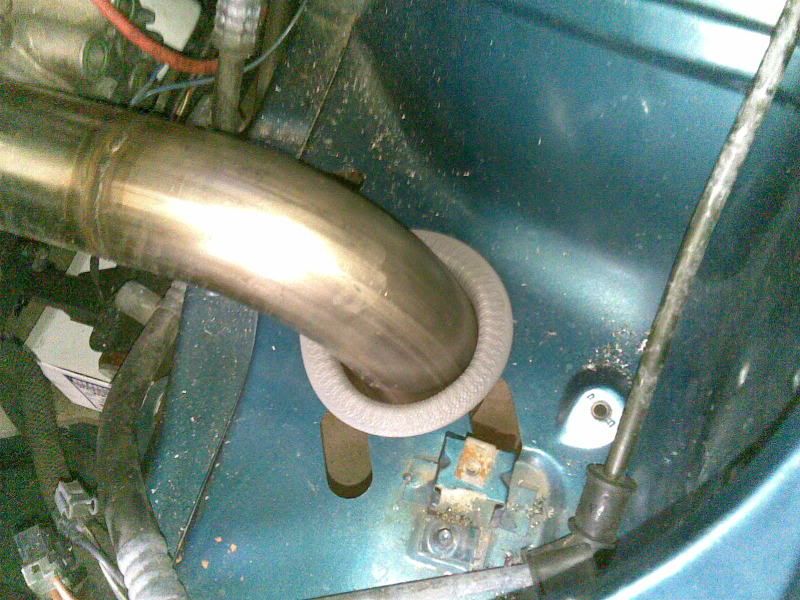 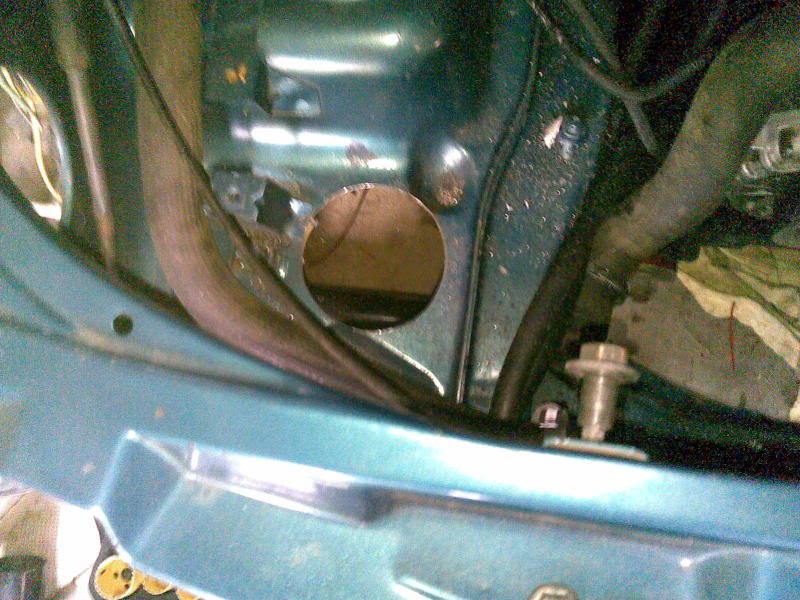 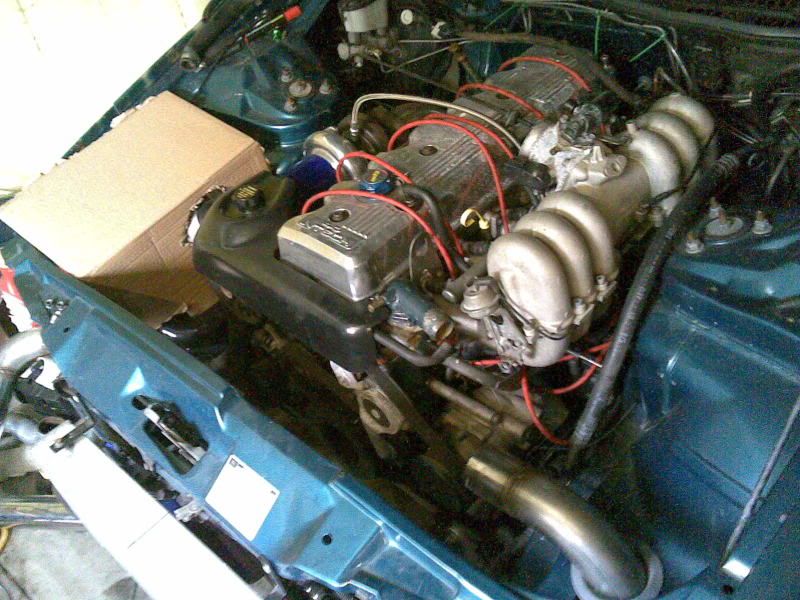 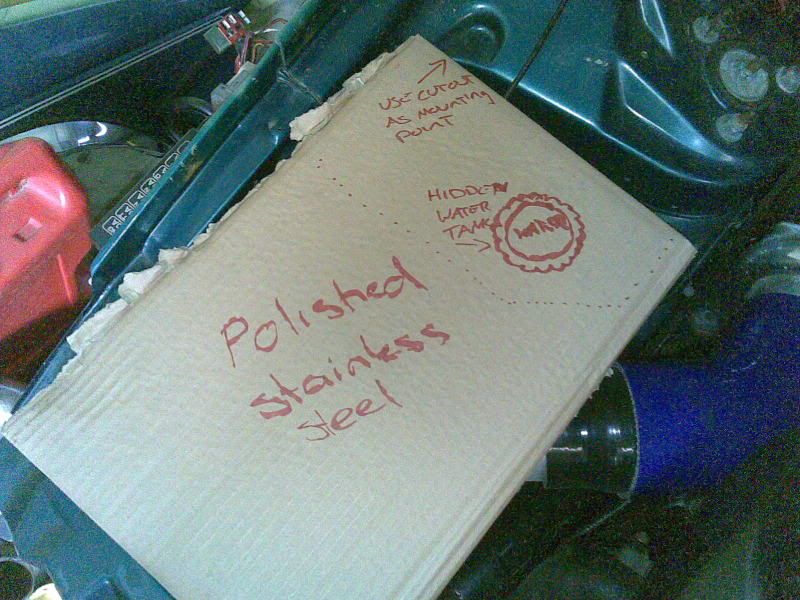 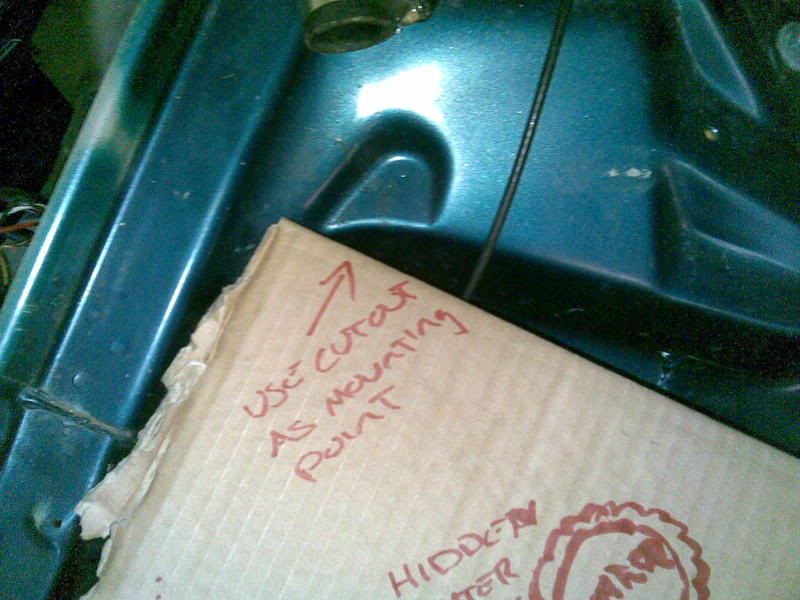 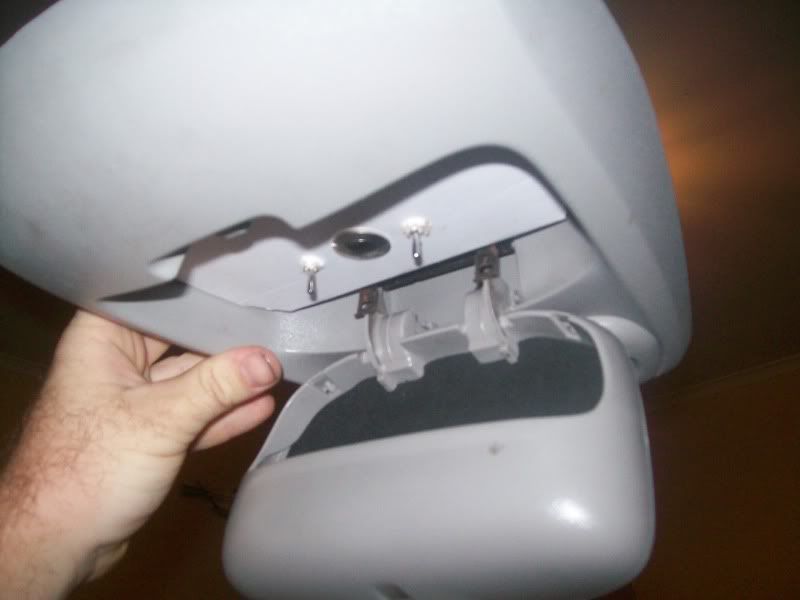
|
|||
| Top | |
|||
| huggiebear |
|
|||
|
ok small update. picking up a spooled diff this weekend which should go nicely in this.
also the long cooler piping is no completely gone. hot side is piped up. needed to do some panel beating to make it fit nicely but will be hidden anyways. the pipe needs to be shortened by an inch or 2 which will be done when the silver pipe is welded to the black pipe. this section will be heat wrapped. 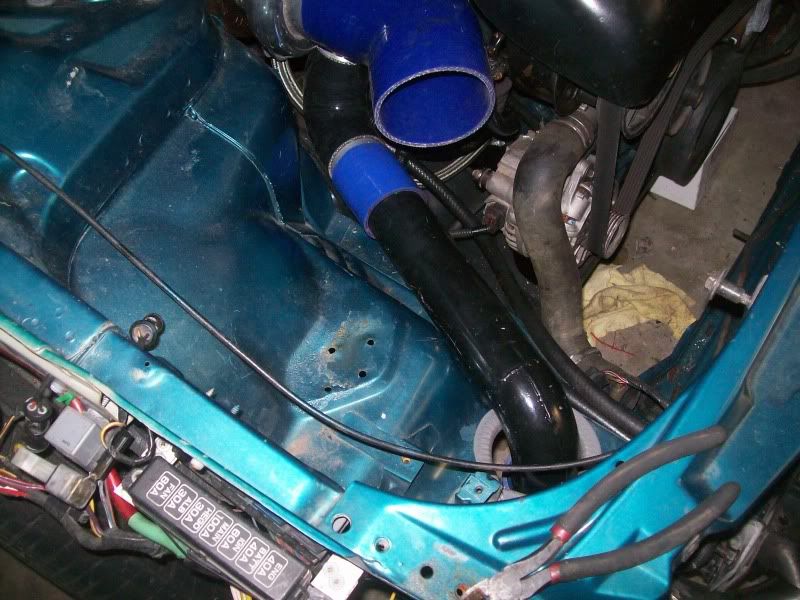 as it goes through the panel and into the silicon bend it goes from 2.5" to 3" 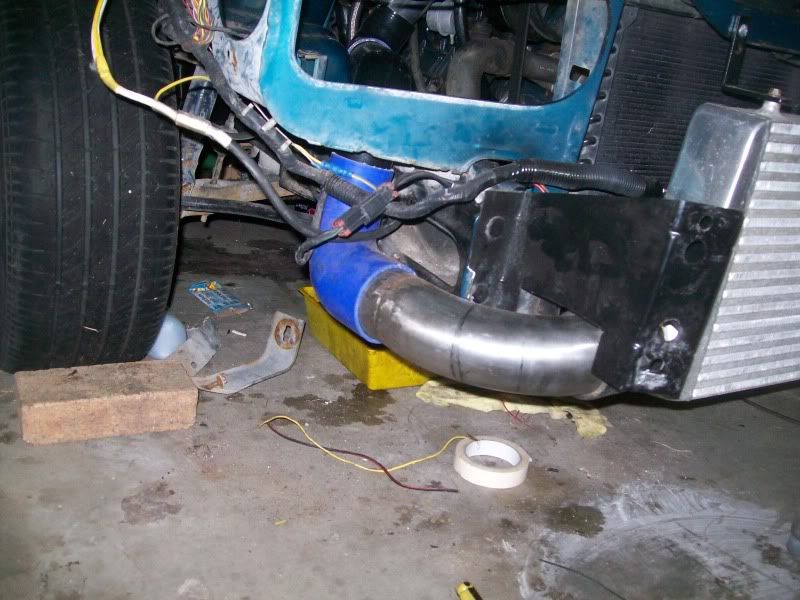 again this is here to give me an idea of how things will sit while i try and find some 4" stainless pipe. it also keeps the bugs out 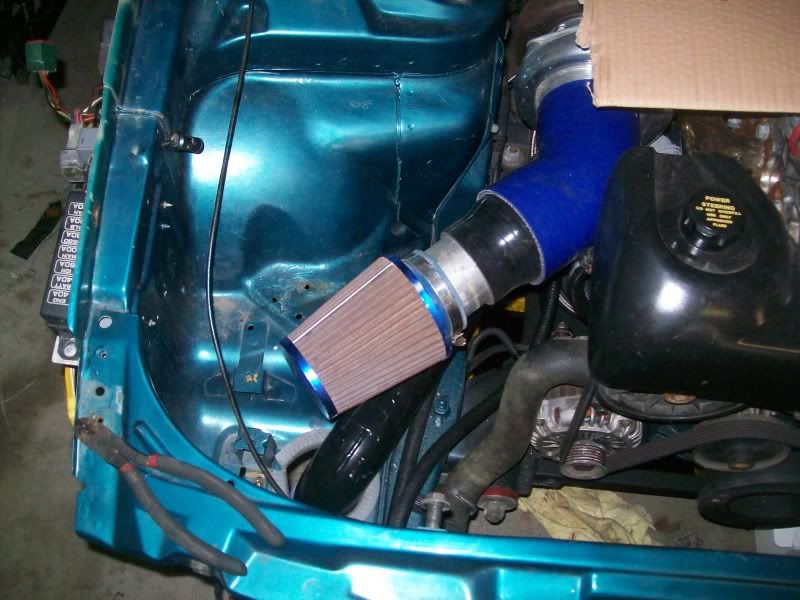 on the cold side i have the pipe to go to the intake but im awaiting my XH tensioner before i cut it to size so i know exactly what length i need it 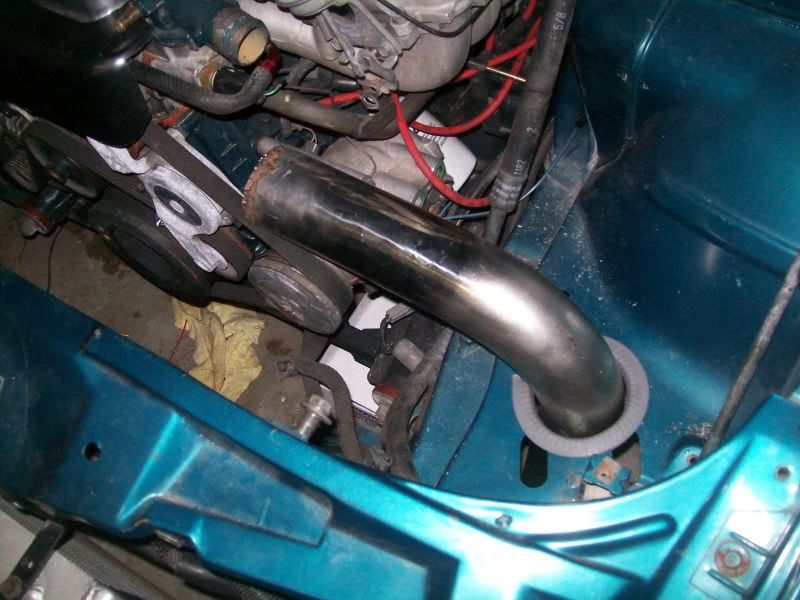 this is all thats left to do on the cold side - join these 2 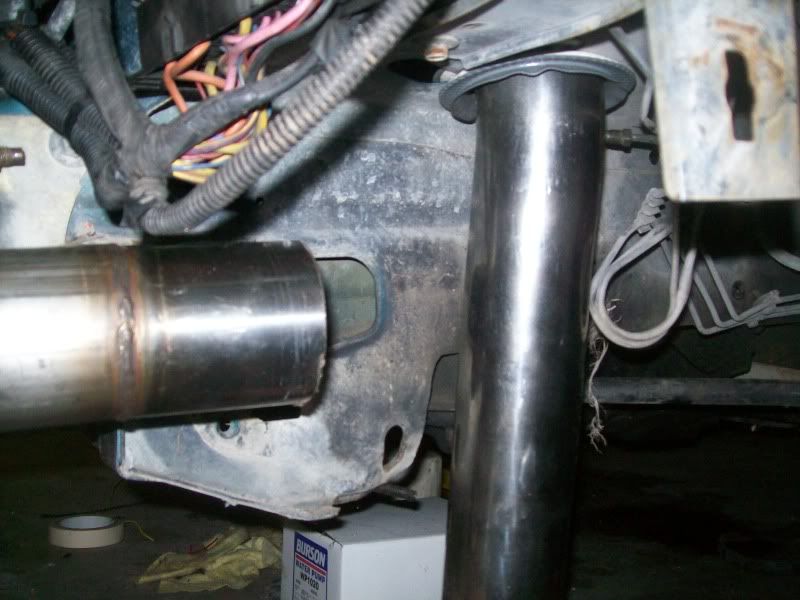 now im left with all this room to fill 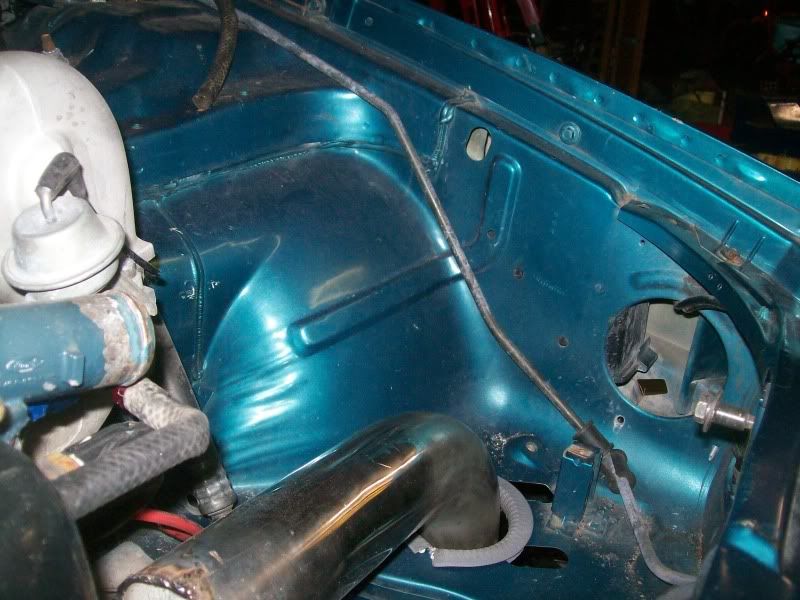 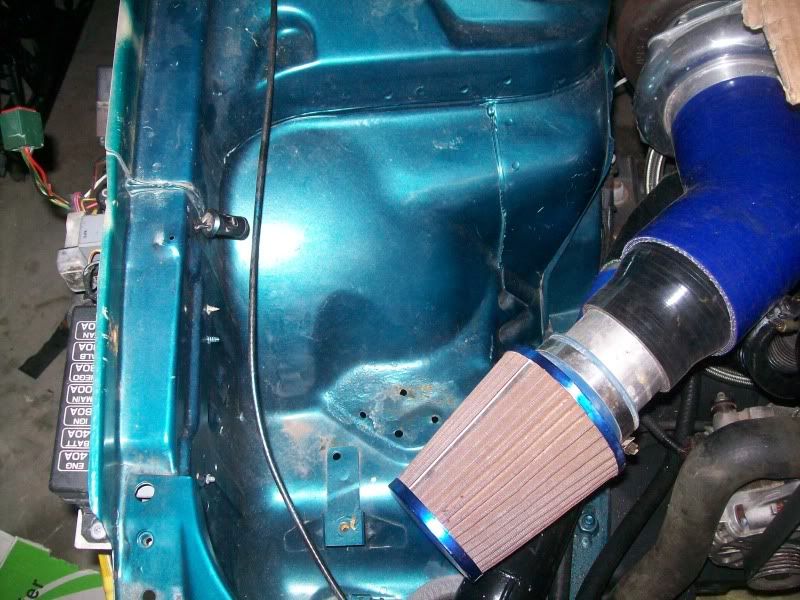 so the plan is to make an airbox on the drivers side. it will go from the shock tower to the headlight with holes for the hot pipe to pass through. also with this ill be making a custom header tank which will sit under the panel. and only the cap will be seen. the back of the tank near the shock tower will have a -6 fitting welded on for the turbo water return. 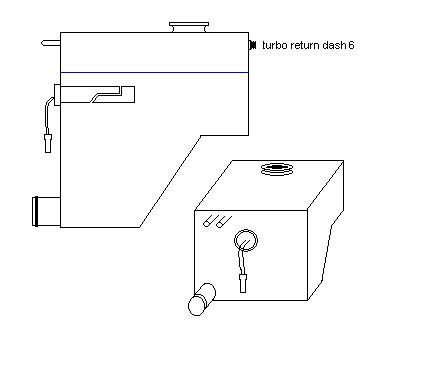 the passenger side will get the same treatment. however instead of a header tank it will hide the catch can. also custom made. i mocked it up using an old washing powder box and there was plenty of room over the top of the intake pipe. the plan for this one is a basic box design. 2 inputs at the top near the shock tower. the hoses will exit here drop down to the bottom of the cover near the chassis rail, under the intake and up to the rockercover. on the headlight side of the can will be a normal barb fitting which will then to go a hard line which will run under the radiator (where the front right brake line runs on an ABS equipped car) and up the other side where it will go to a soft line and into the intake pipe. for drainage i didnt have to look far, beside the intake hole i cut there is access holes for the old ABS unit, a simple hard pipe with a screw cap on the end will feed through this holes so draining the tank if needed will be as simple as undoing the end cap from under the wheel arch. at first i was going to attach this to the stainless cover but welding to the panel will create heat marks which is like to avoid. 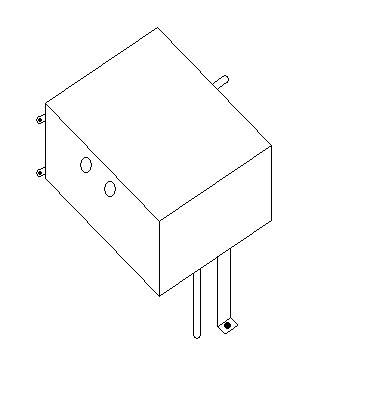 motor wise the plans have changed a little. the motor and box will be removed again so i can fit up the new brake lines, clean up the firewall and possibly paint the engine bay either satin black or factory green. the AU motor i have here will be going in. i pulled the rockercover off the motor and was pleasantly surprised when the entire inside was a almost new looking silver. the head will come off, head studs installed, 2 metal head gaskets and a check on the bottom end before it goes in. im also hoping to pick up a box thats had a bit of work (hoping = hope it isnt gone by the time i have the cash) im also hoping to fit some better valve springs as from what others have worked out they seem to be the first hold back. thats all i have for now. feel free to add opinions/comments. |
|||
| Top | |
|||
| huggiebear |
|
|||
|
ok bit of an update. after getting as much piping done as possible i was at the point of installing the old style manifold before i could go any further, but the day i planned on doing it i got a call from a mate saying they blew the motor in their EF and if i knew of one local... a few hours later i was left with an empty engine bay and some cash.
seeing as tho the motor was rebuilt to standard with cheap head gasket it wouldnt hold up to any form of boost. so now i have no choice but to install the AU motor but it will receive some goodies in the form of valve springs and a cam before it goes in. anyway onto the good stuff. while i had the empty engine bay i decided the paint needed fixing. final decision was mode on gloss black. i wanted satin black but finding out any clear coat will make it look gloss and leaving it raw paint it will hold onto any dirt around the place and look unclean. the radiator support panel will be staying body colour. it gives it a good look (not like the AU's) and wont look like its been painted black to hide accident damage. i stripped as much as possible from the bay pretty much everything left in there now will be painted. im not worried how the k-frame or power steering rack turns out as they are not seen so less prep work was put into them. its currently sitting in primer awaiting some nicer weather to lay down some paint. 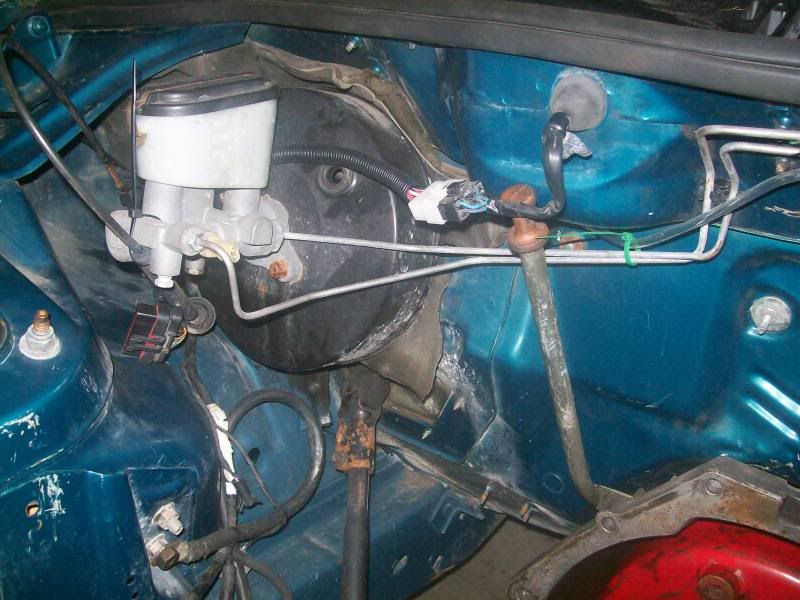 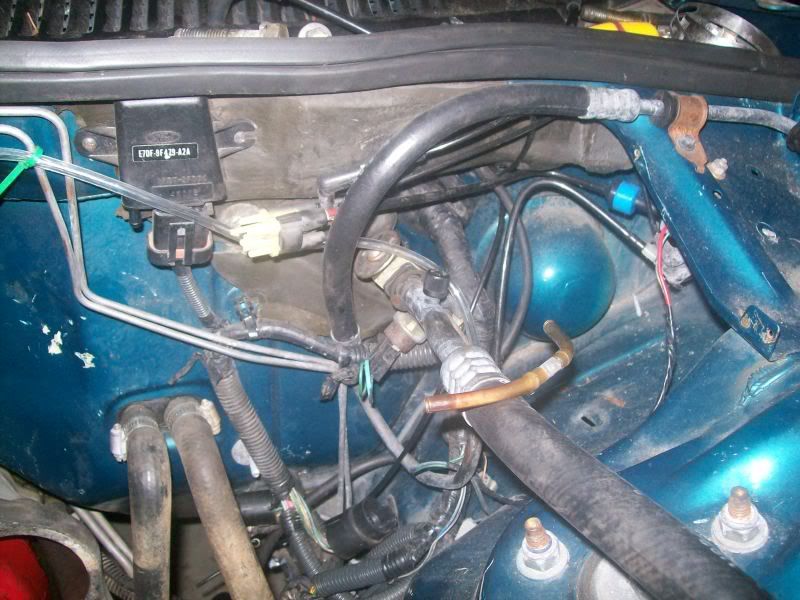 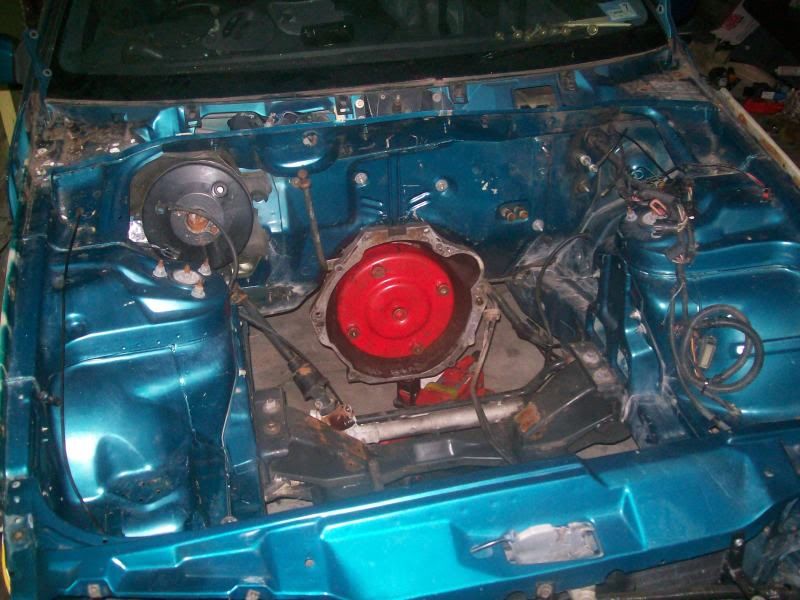 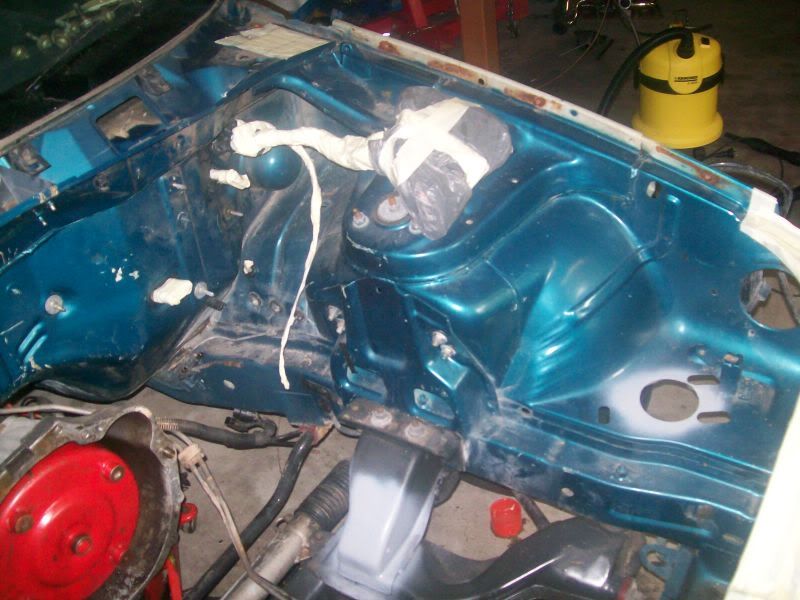 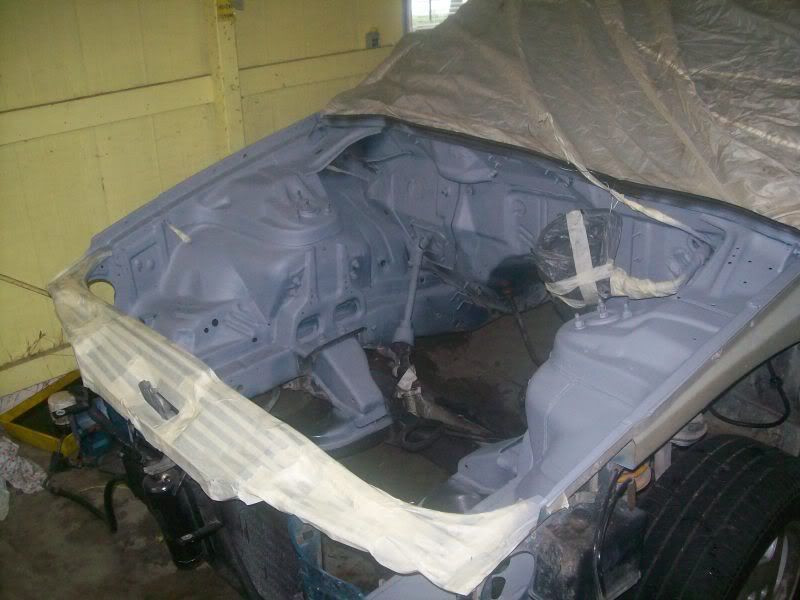 that last pic isnt up to date. i have since touched up the primer where it was missing in places. the shock bolts were sprayed in primer before i realized so i have since removed the bolts lifted the body and put plastic between it. i have some newer hats to go in anyways so no big drama. im going to see if i can get some polished nuts for the shocks if not some new stainless washers at least.. more pics in a few days when the paint has set (unless i stuff it up) i wont a new boost gauge on ebay calibre brand but has to be better then the $14 ebay one i have currently, also scored a XH tensioner for 50 bucks on ebay too. i also picked up my 3" exhaust. it needs to be welded back into one piece. and the diff should be picked up within 2 weeks.    so still left to find now is injectors > 24lb ECU - with built in map sensor and boost control? 3" cat rims + tyres then basics like ball joints, fuel hose and rego. |
|||
| Top | |
|||
| TROYMAN |
|
||
|
funny enough, the calibre boost gauge is the same as my old one and to be honest it would have been the most accurate boost gauge ive had so far, more accurate then the autometer one i have now....
|
||
| Top | |
||
| BEAR80 |
|
|||
Age: 44 Posts: 683 Joined: 4th Mar 2010 Ride: BF Fairmont Ghia & TS Magna Location: central coast |
i personally have used oil pressure, boost and water calibre gauges and found them quite good, and accurate and relied on them.
i have sold the boost gauge but i still have the water and oil pressure gauge, so if your interested in them huggie send me a pm just my 2 cents |
|||
| Top | |
|||
| huggiebear |
|
|||
|
well this is the one i currently have so its 100% an upgrade lol.
http://cgi.ebay.com.au/New-52mm-Car-Gau ... 3a6562dcd8 thee sun is shining so looks like ill lay some paint today |
|||
| Top | |
|||
| huggiebear |
|
|||
|
well i have had some good and bad experiences with my first ever paining parts of a car. first up my spray gun was clogged and was spitting the paint out like a spiders web after a few minutes. so a full strip of the gun, cleaned and put back together and she is all good. but stupid me left the pressure up high so the first coat was pretty s**t but turned the pressure down to 35psi and it started doing really nice coats.
behind the booster stuffed up with the gun issues (thats the reason why i started there as its not seen) i still have to get a pressure pack can of black to do right up into the corners as i just couldnt get the gun into the corners. wich to me is no big deal as again it wont be seen once complete. apart from a little orange peel look to some bits and a few small bits of crap that got stuck to the paint at some point. again im not overly fused and think it came out quite good for my first ever attempt with no real advice (a few people on facebook gave me a few hints on pressure etc) 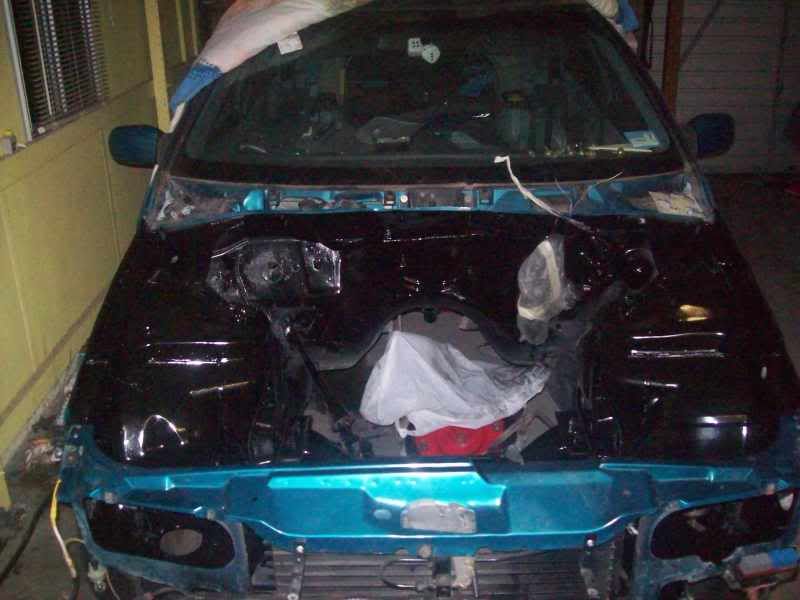 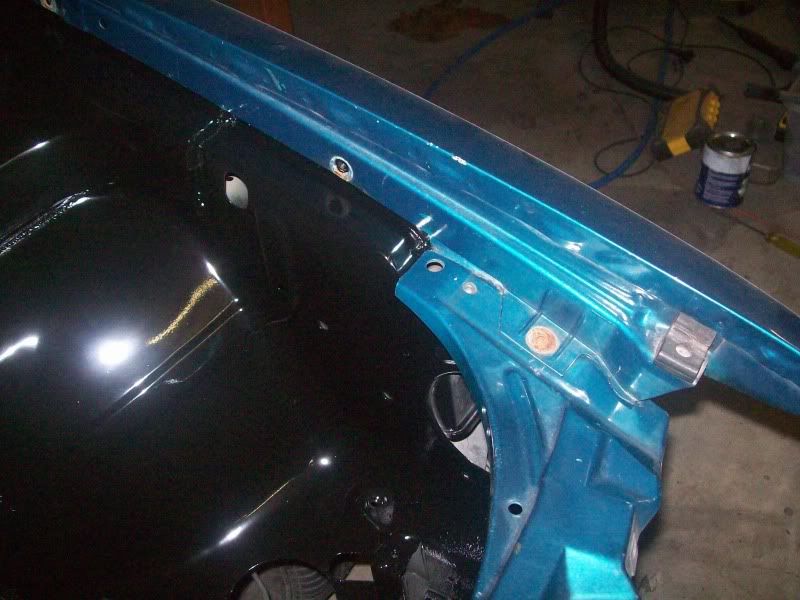 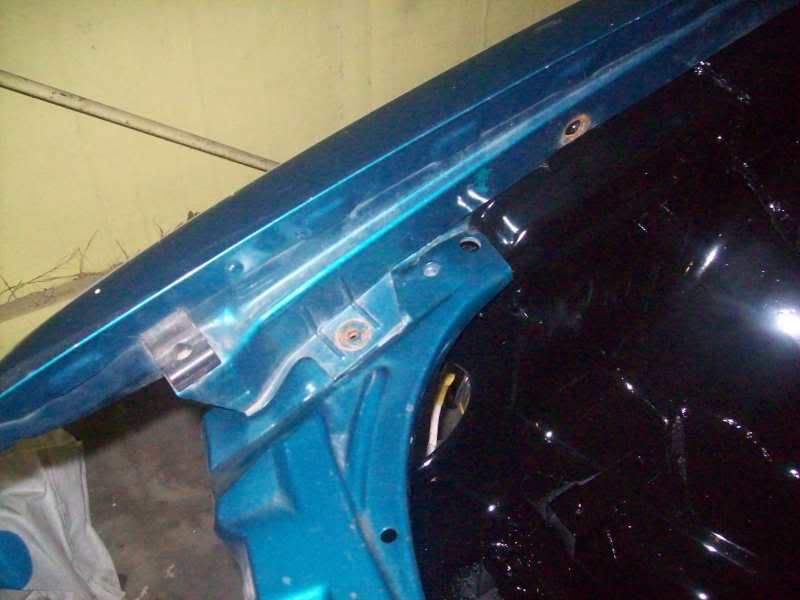 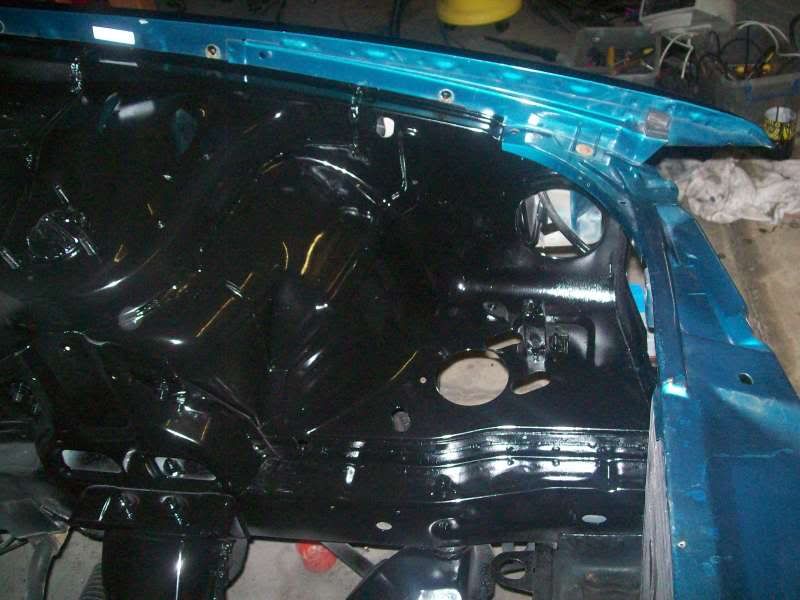 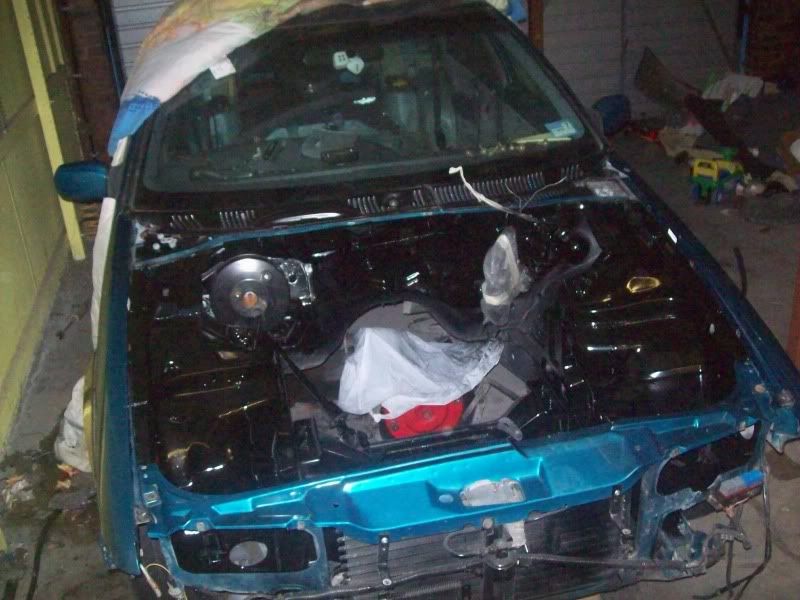 the plan is to give the remaining green areas a good polish and a few coats of clear along with the whole bay so it all has a real nice shine. so now as this sets over the next few days im going to try my hand at polishing the intake manifold and a few other bits and pieces |
|||
| Top | |
|||
| NCIILANE |
|
|||
|
Look great mate....good work!
Only way to get rid of the orange peel effect is to lay a couple more coats on and sand it off with wet'n'dry and a block, but like you said, it's the engine bay and won't notice it when it's all back together.
_________________
|
|||
| Top | |
|||
| huggiebear |
|
|||
|
cheers mick. to be honest i dont think its that bad. its more like cellulite lol.
look at the 2nd pic right near the flash. thats the bad spot something i can live with... there will be stainless covers over the whole area so basically the only parts of the bay that will be visible will be the top of the shock towers |
|||
| Top | |
|||
| ToranaGuy |
|
|||
|
Nice work dude, keep at it!
Cheers ToranaGuy
_________________ I am the ToranaGuy!|74 Lh Torana Turbo|78 Hz PanelVan|86 Mighty Boy Ute|93 EB2 Ghia,GT Mockup,5spd,LPGI,Full Leather|2 x EB Xr8 5spd's|{DESCRIPTION}|{DESCRIPTION}|{DESCRIPTION}| |
|||
| Top | |
|||
| Nigel |
|
||
|
Yep. Good work. You dont want perfect anyway cause you will scratch it
Now - when will it be running - or the 5.0 |
||
| Top | |
||
| huggiebear |
|
|||
|
im hoping it will be running again in a few weeks. i want to let the paint set a bit and still have to add some clear to it all. i also want to have the motor fully built out of the car as it makes things a billion times easier
|
|||
| Top | |
|||
| Who is online |
|---|
Users browsing this forum: No registered users and 151 guests |