

|
| facer01 |
|
||
Age: 31 Posts: 284 Joined: 27th Sep 2009 Ride: 1995 EF Ford Fairmont Location: Bundaberg, QLD |
where did you get your gear knob from it looks awesome.
also did you use vht vinyl dye to paint your plastics? |
||
| Top | |
||
| KWIKXR |
|
|||
|
Thanks bud, the gear knob was bought from a 'JDM type' import accessories place over here in NZ. Brand was M-sport if I remember correctly, probably just some cheap asian brand.
Looks good and works okay, however mounting it to the shifter shaft with the 3 grub screws provided is pathetic (I ended up using a couple of thick o-rings over the shaft and pushed the shifter down over the o-rings until it held position firmly). Also needs the shifter rod extension thing shortened a good 15-20mm so that the shift mechanism functions properly. Regarding the painted plastics, yep, just VHT vinyl satin black paint. For plastics I used a plastic adhesive/primer before spraying on the satin black |
|||
| Top | |
|||
| KWIKXR |
|
|||
|
While I'm here, I may as well type a run down of what's going on at the moment..
Have had a few electrical issues during the last few weeks.. Alternator decided to die for the 2nd time in 12 months, last time it was the regulator which was a simple repair cash jobbie.. This time, the rectifier decided to commit suicide. Worked out a hell of a lot cheaper and easier to just buy a second hand alternator from Pick a Part so that's what I did, swapped it in and the Fairmont was back on the road Then on Wednesday, the master power window switch died on me, or the drivers side front switch to be exact. It was acting up earlier in the week, thought it would be the typical 'pull apart the switch and clean the contacts' sort of job. Tried that, plugged it back in to try get the window up and was greeted with a fat spark and some smoke after a few presses of the switch. Picked up a rebuilt replacement from the wreckers today so hopefully that'll last me a long time. Have bought a few more little bits and pieces to go towards the Fairmont too... 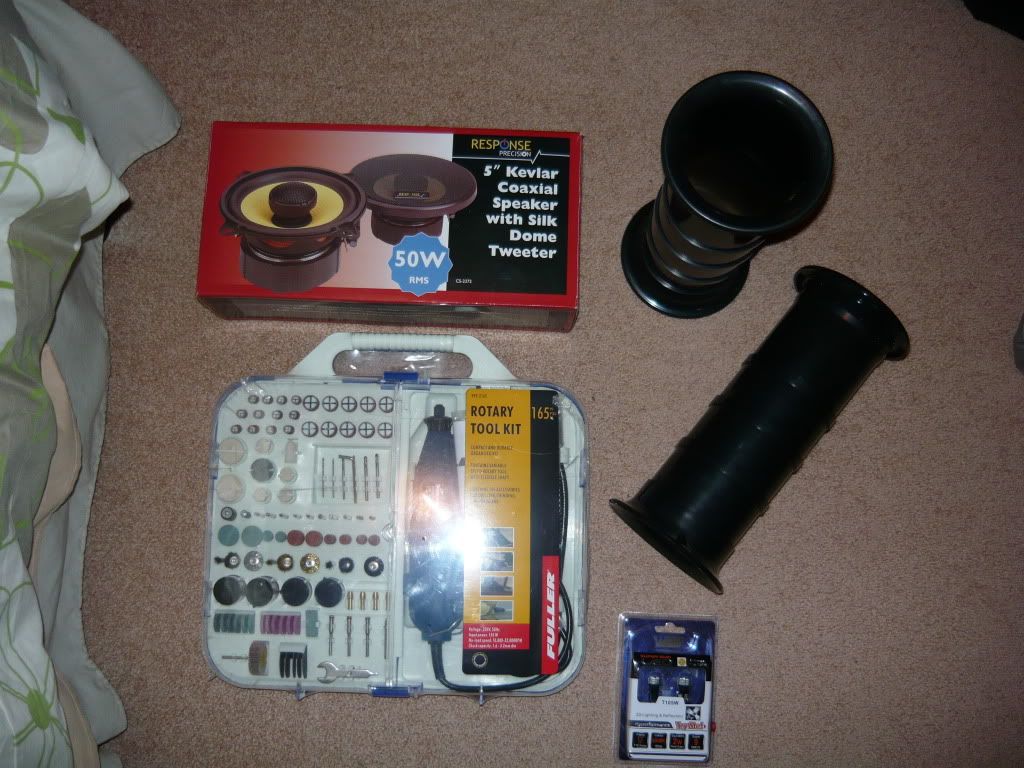 Have caught the audio bug again Have decided to put my old Response 6" woofers into the stock speaker holes in the parcel shelf to fill the holes properly and provide a little extra midbass, and fit the 5" coxials into the lower rear doors with the swivel mount tweeters positioned to suit. Both sets will just be run off the 4 channels provided by the headunit and will be 'faded' somewhat since I'll retune the front stage and sub amps so that they play louder than the rear setup. Last thing I want to do is drag the sound stage backwards when sitting up front. 4" aeroports will be used if my plans go ahead of making a new sub box for the ID12v3's. The box will no doubt have to be a fair bit bigger, at least 1.5cuft per sub I'm thinking. Hope I can make something that won't take up too much extra boot space. Picked up a new electric 'dremel type' grinder kit on special to replace my old nearly broken POS I used last time lol - poor thing. Should be good for doing some of the light porting/polishing work on the Tickford head. Still need to buy some more bits for the air die grinder before I start work getting stuck into the port job. Grabbed some LED's so I get started on the Fairlane interior dome light swap over. Luckily the map lights are just a pair of T10's so I bought some nice 360deg SMD led's from Supercheap. Nice and bright and seem to be better quality then the stuff you buy off Trade Me. Seems the Fairlane light uses a T15 bulb for the main light, so I'll need to track down a decent sized SMD type multi-LED unit for that too. Sent my stock cam off to get a regrind last week. The job is being left to Henry @ Auckland Camshafts to choose a suitable profile for my setup. Was planning originally to have Franklin Cams do the grind for me, but stumbled upon Auckland Cams, and had an awesome chat with Henry regarding a nice bump stick for the Fairmont. He seems very knowledgeable about cam profiles for the EA-EL 6's with a nice range of profiles from mild street to all out speedway cam's, so I thought I'd give him a go. His prices were also a fair bit cheaper too which always helps, hahaha. Not sure on which profile or exact spec's at this stage as he wants to have a good read over my requirements and the engine/driveline setup before he makes his recommendation, but about .500" lift and 221/222deg duration @ .050" was mentioned over the phone, sounds promising Hopefully the cam will be freshly ground and sent back next week, all ready to go in over the Christmas holidays And here's a few snaps of the Fairmont, as usual, nothing much has changed 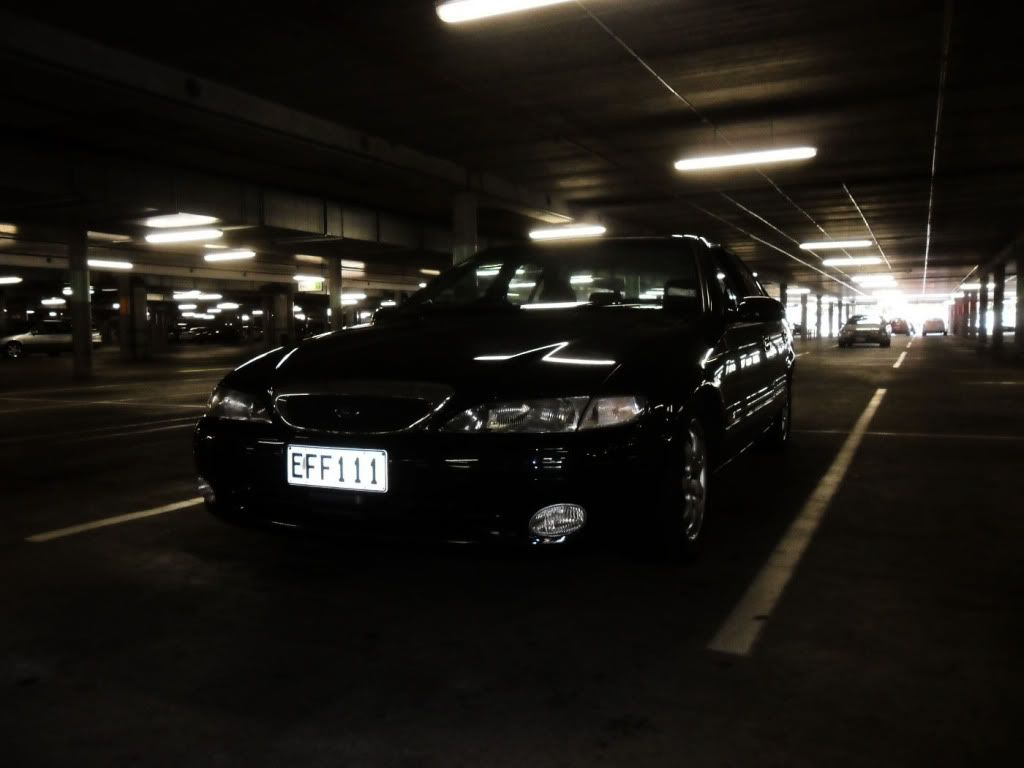 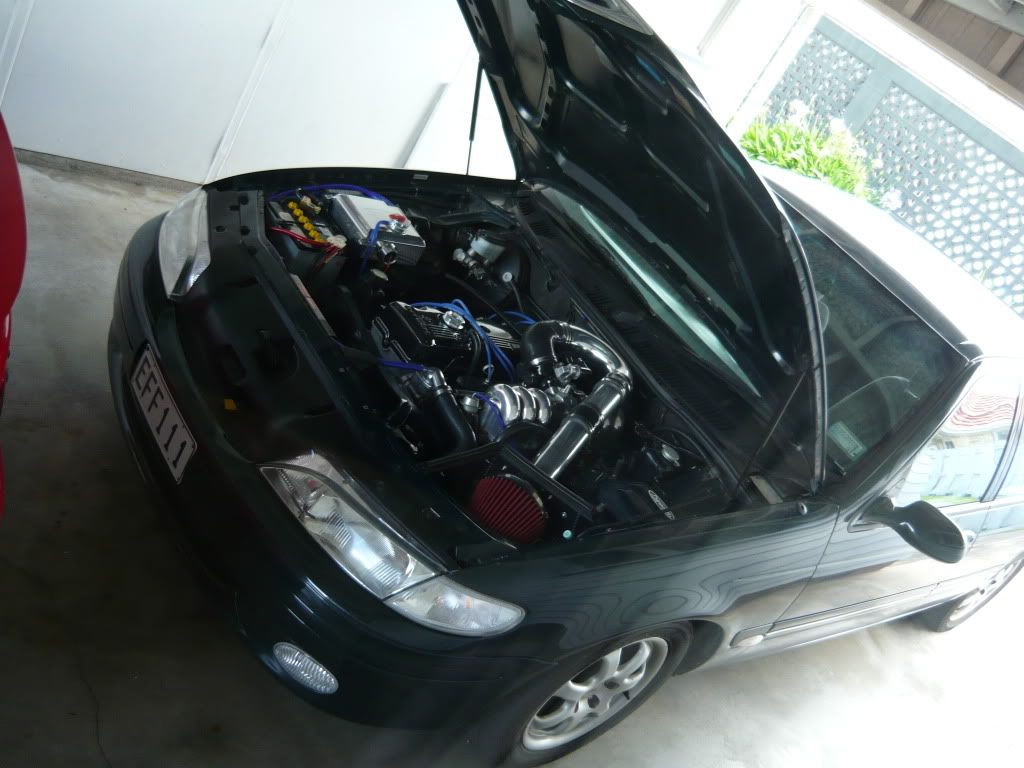
|
|||
| Top | |
|||
| SLO247 |
|
||
|
Sexy! I thought you had a cam already.
The wheels look good on it, but I reckon it may be time to go to something bigger. They just aren't doing the car justice! I threw up some pics of the new EL finally too, in the "show us your E-series thread". Getting it back on the dyno after christmas then? |
||
| Top | |
||
| KWIKXR |
|
|||
|
Cheers Slo!
Lol, this will be the 3rd cam I'll have now.. Will put my current one away for now, not sure what I'll do with it, and my other Franklin cam will possibly go into Dad's XR6 if he wants it. Can't wait to see what the new cam will perform like though Will definitely need a tune asap though, if the grind we talked about is the one that's chosen in the end, it'll have a few more degrees of duration than the Wade 1521a. Hopefully Protune will be open early in the new year so I can get the dyno run sorted and then talk to Jason @ TI about a J3 - thats the plans anyway I've been looking around at wheels recently too, not that I can afford a new set, but it's always good to see what's available. Saw these few options which would look alright I reckon.. http://www.trademe.co.nz/motors/car-par ... 216229.htm http://www.trademe.co.nz/motors/car-par ... 317955.htm Also spotted these and still don't know if I'll impulse buy them http://www.trademe.co.nz/Browse/Listing ... =425939175 I'm up for some new rear tyres before I take it in for a warrant of fitness next month so new wheels are definitely out of the equation right now. It sucks looking at the Fairmont and wondering how nice it'd look on decent wheels, the 16's make it look not low enough Just saw your EL over on AFF, looks so mint man!! Awesome buy I reckon, looks pretty bloody clean, definitely a keeper. Looking forward to seeing a build thread on that |
|||
| Top | |
|||
| KWIKXR |
|
|||
|
Managed to get the Fairlane interior dome light swapped in yesterday.
Sprayed the grey surround piece in satin black, to match the rest of the interior, as usual lol.. 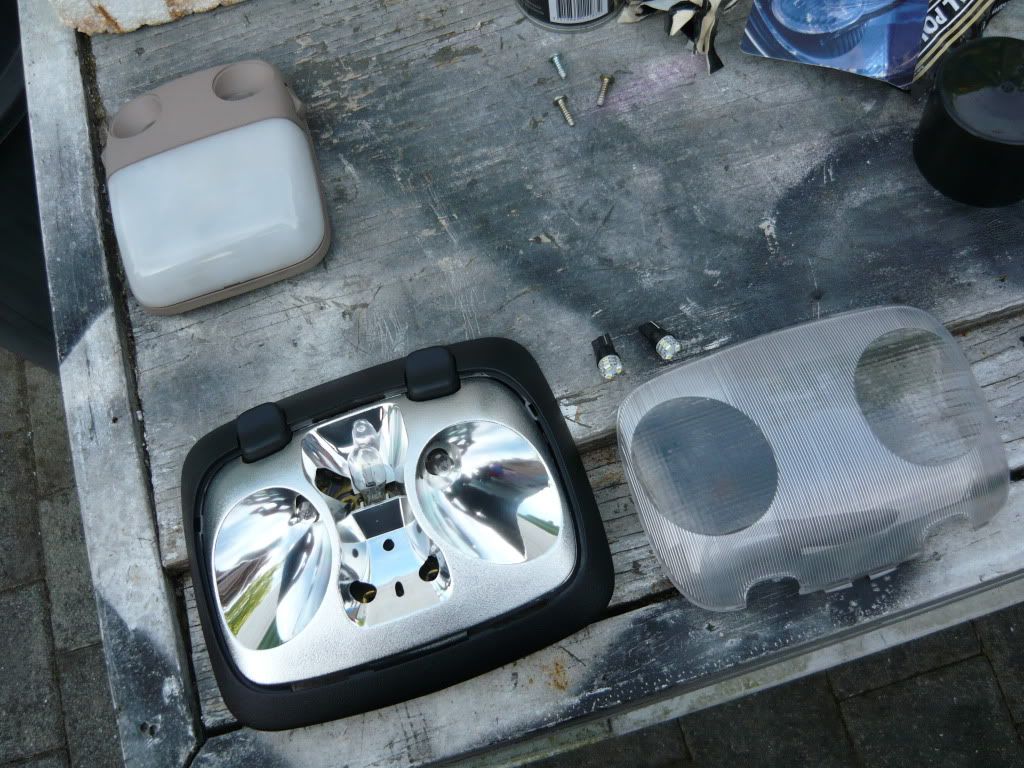 Fairly simple job with a nice result. The difference in light output compared to stock is amazing, the map lights actually aim down to a reasonable position too. To do this mod, you need the Fairlane light, the plastic base plate it mounts to and also the loom plug and a short run of the 3 wires that connect to the plug. The light assembly mounts to the plate with 3 screws, and the plate uses 4 screws which fit directly into the factory drilled holes in the Fairmont. The swap over is basically a case of removing the old light assembly, cutting the wires off, mounting the Fairlane light base plate using the factory holes, wiring up the Fairlane light loom plug up to the existing wires, mount the light and you're done. Took me a while to figure out the wiring but managed to find a thread on here saying what went where. Both of my EF EL workshop manuals only had the Falcon/Fairmont wiring diagram so they weren't much help Anyways here's the scenario - the Fairmont light has 2 green/yellow wires (both positive, one for the main light and one for the map lights) and one blue/black wire which I assume is negative. By the looks of it, it also mounts to the roof in a way that part of the circuitry grounds itself to the roof mounting points, again just an assumption. 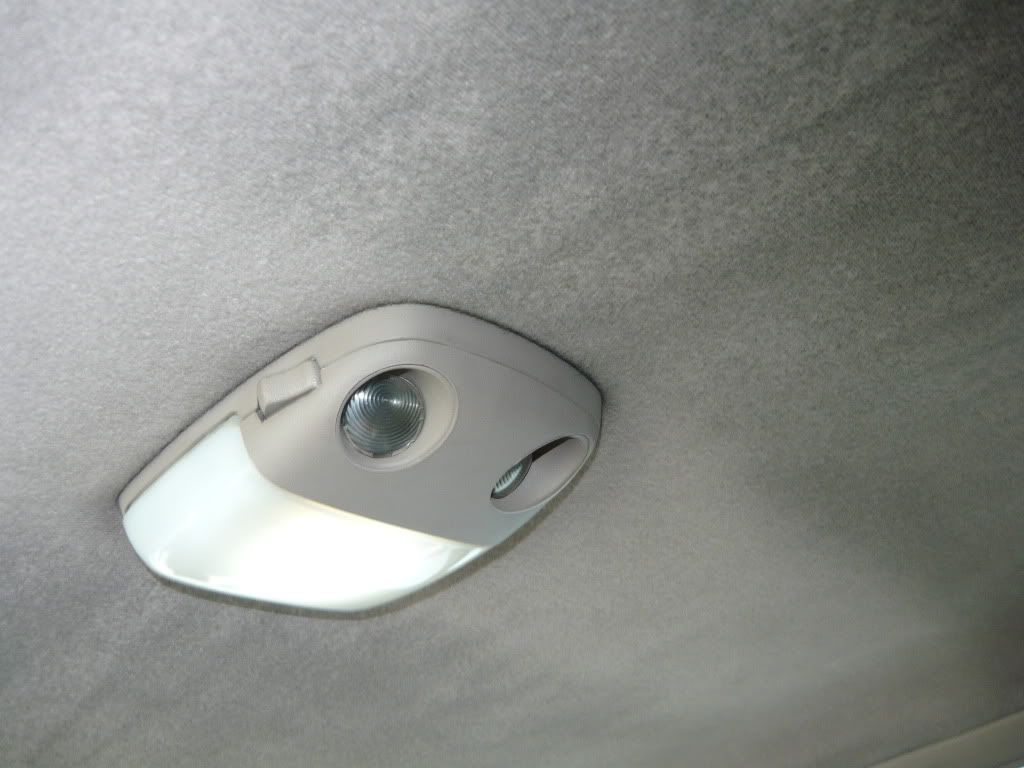 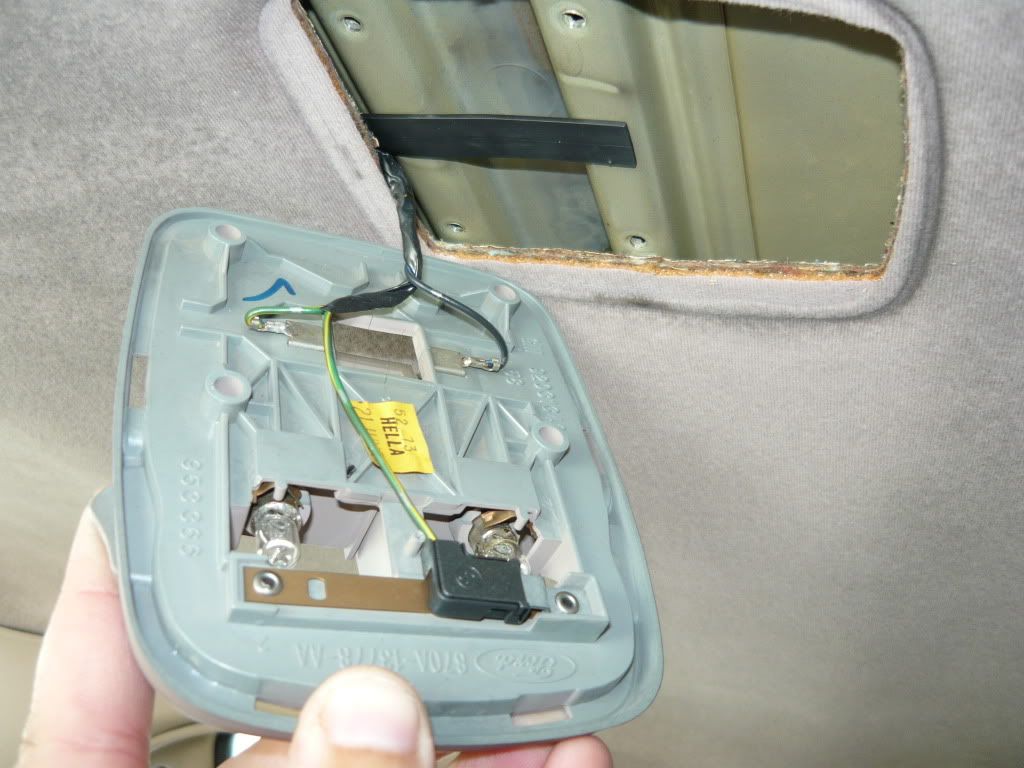 This just shows the Fairlane base plate mounted up to the factory holes (I lost one of the screws somewhere down the side of the seat, lol). 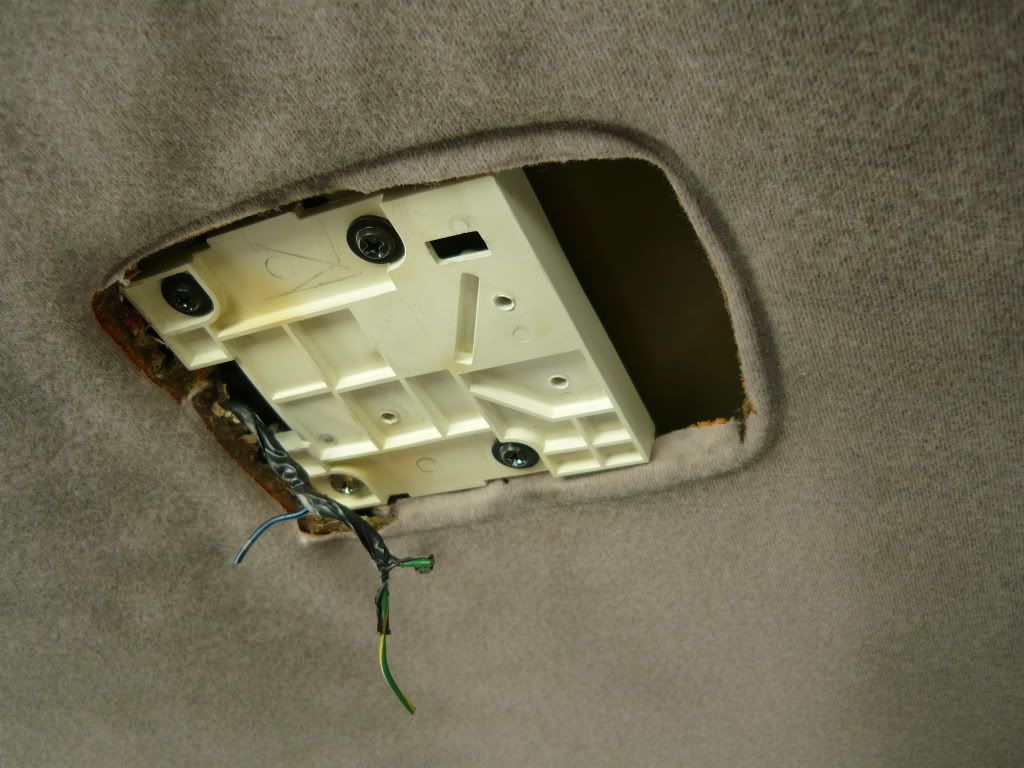 Wiring The fairlane light loom has one green yellow wire, one blue black wire and one black wire. What you need to do is join both of the green/yellow wires from the Fairmont loom together and wire that up to the green/yellow wire from the Fairlane loom plug. Wire the blue/black wire from the Fairmont loom to the blue/black on the Fairlane loom plug and you'll have one black wire left over on the Fairlane plug. This black wire is just a ground wire, so all I did was strip a little bit of paint around one of the mounting points back to bare metal where the Fairlane light base plate mounts to the roof. I crimped a small forked spade connector to the wire, loosened the screws for the base plate and slipped it in between the base plate and the mounting point, then screwed it back together so the connector is pretty much clamped between. You can just see where the spade connector is mounted under the top right corner 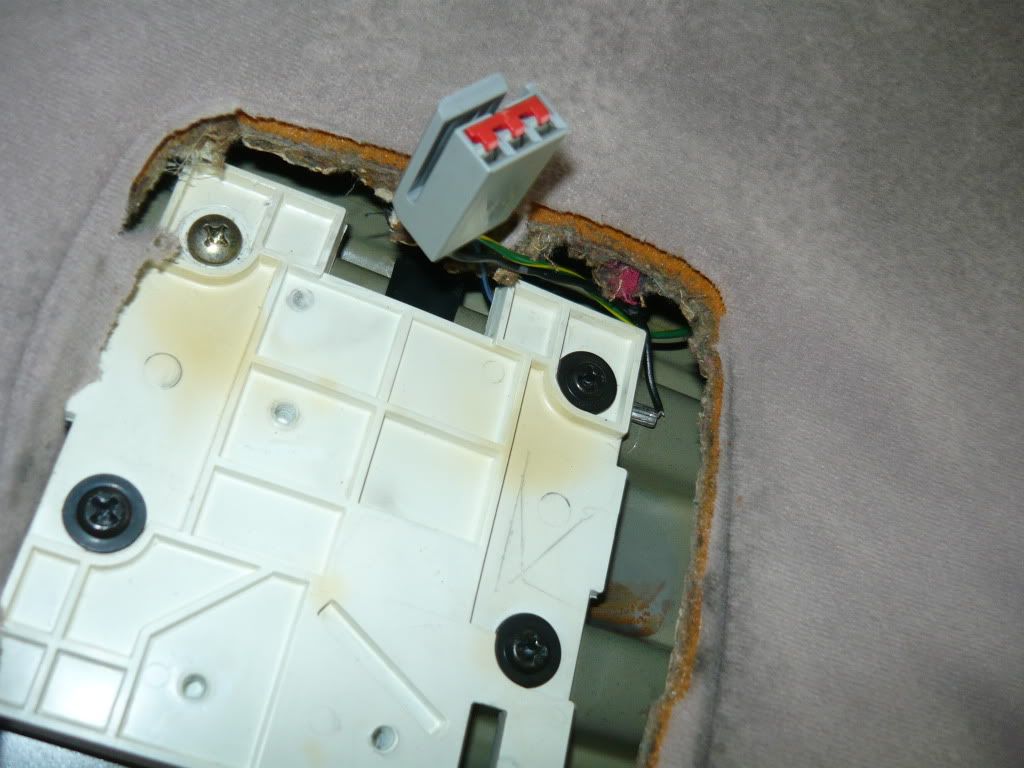 Once that is done, just tuck the wiring up inside the headlining, connect the plug up to the Fairlane light, mount the light to the base plate and you have a Fairlane dome light installed! 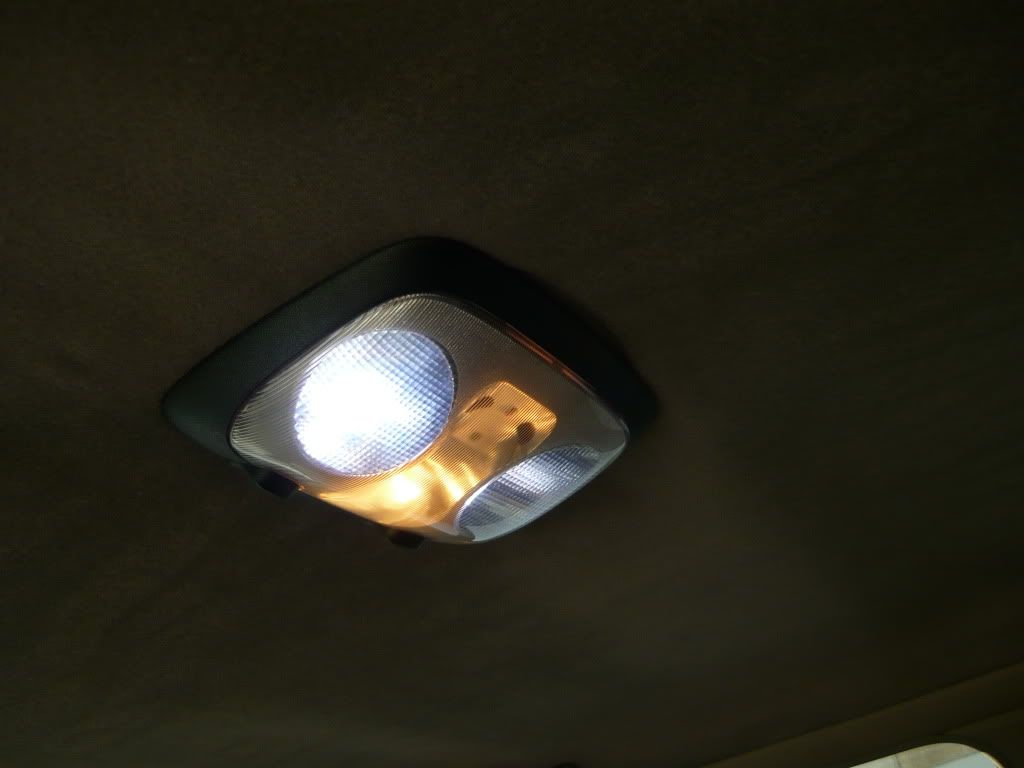 The map light bulbs are T10 size and the main light looks to be a T15 - just incase anyone is wondering. I still have to track down a decent T15 white led for the main light, but I should be able to get one off Trade Me. There is a slight indent left from where the old one sits over the hoodlining as it sits further up than the Fairlane light, but it's barely noticeable. Also, fitted my Response Precision 6" woofer into the parcel shelf yesterday. Have them faded down on the headunit but I can barely hear them when they are at normal settings anyway. Looks better than having boring grills over blank holes so that's a bonus 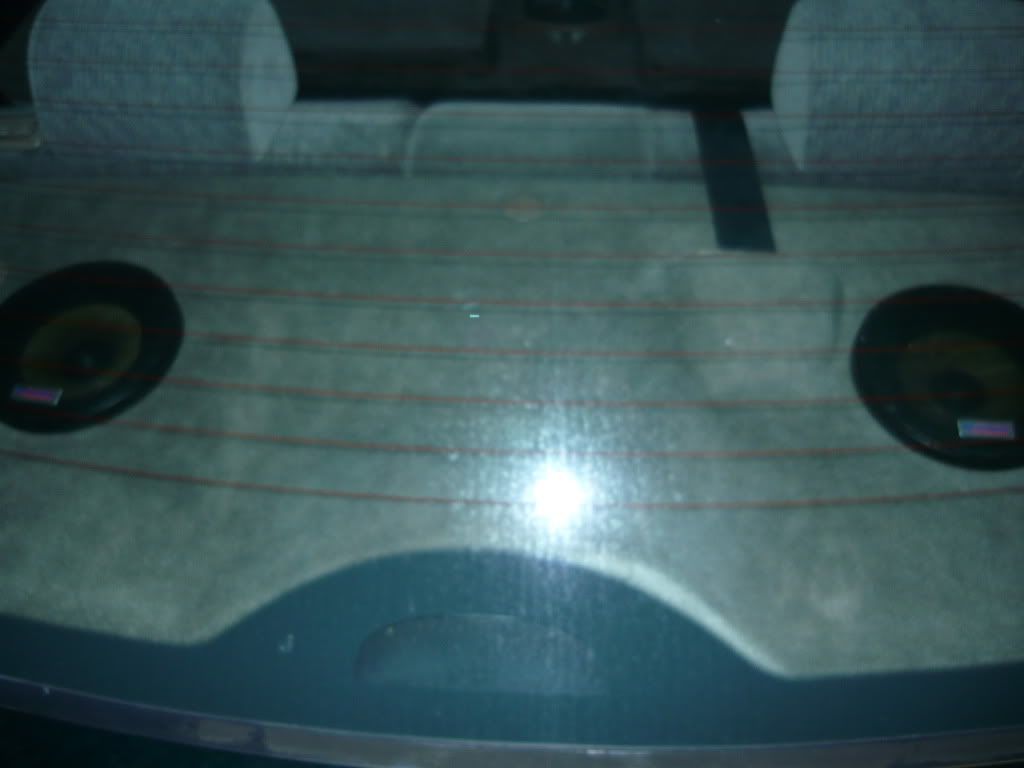 Just received an email back from a leather repair company who can restore my steering wheel.. As you can see it's a fair bit worn.. Bloody rough C*** not looking after Momo sexyness 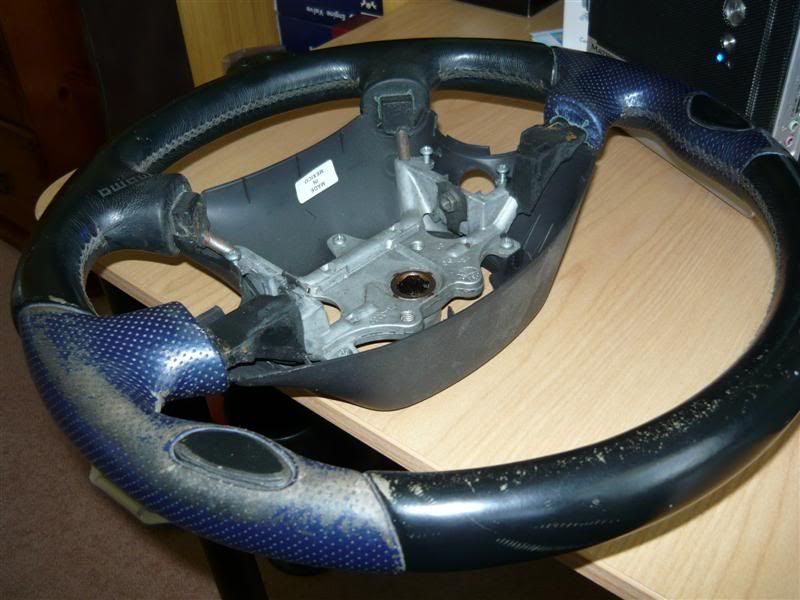 I'm up for about $120 to have the leather restored and dye the blue sections black, including them picking it up and dropping it back off once it's done - I think I'll be getting that done this week |
|||
| Top | |
|||
| SLO247 |
|
||
|
Thats a good price for the wheel I reckon!
Those speakers look good too, I've always thought the precision response stuff looked excellent for the price. Good work with the Fairlane roof light, its simple once you get your head around the different wiring. Those first two sets of wheels look good. The LTD ones would just ruin it I think. I tried a set on that NF once and they looked terrible, have you ever seen a pic? Thanks for the comments on the car too. I was $1500 in front doing the swap over from the NL, and I'd much rather have the 5.0 EL! Lighter, faster, handles better and not stupidly long. I should have Pedders shocks and springs in it in a few weeks, I reckon that will transform the stance and handling. I actually took a leaf out of your book and did a single din radio surround in VHT black for the EL. Couldn't find a cappa one. I tried the two VHT browns too but they both looked terrible. Keep it up anyway, its always enjoyable reading your thread. Lots of pics and info. |
||
| Top | |
||
| KWIKXR |
|
|||
|
Yeah sure is! I hope they won't try change their mind and bump up the price when they see it though, I would have thought it would be over $200 easily! I've sent them photo's and they've given me the price, so they can't get around that now lol.
Nah those LTD wheels probably wouldn't suit the car very well, needs to be at least an 1.5 inches lower all around to pull off a decent slammed original look. Would much rather the 16" DL wheels, they look hot Mate, the Pedders suspension will make a world of difference to the ride and handling. Wish I could find Pedders gear over here for a reasonable price as I probably would have gone that way again if it wasn't was finding the Koni and Bilstein shocks cheap. Pedders is stupidly expensive here because there is only one Pedders workshop in NZ afaik. How does the black single din surround look in the cappa interior? From memory I think MAD did the same in his EL, looked quite good. Haha, thanks mate, lots of pic's are needed to keep up with all my dribble from time to time. Can't believe this thread has dragged on for 80 something pages, and I still have heaps of stuff to do! |
|||
| Top | |
|||
| KWIKXR |
|
|||
|
Cam is back from being reground, looks like it'll be fairly meaty!! Big thanks to Henry @ Auckland Cams
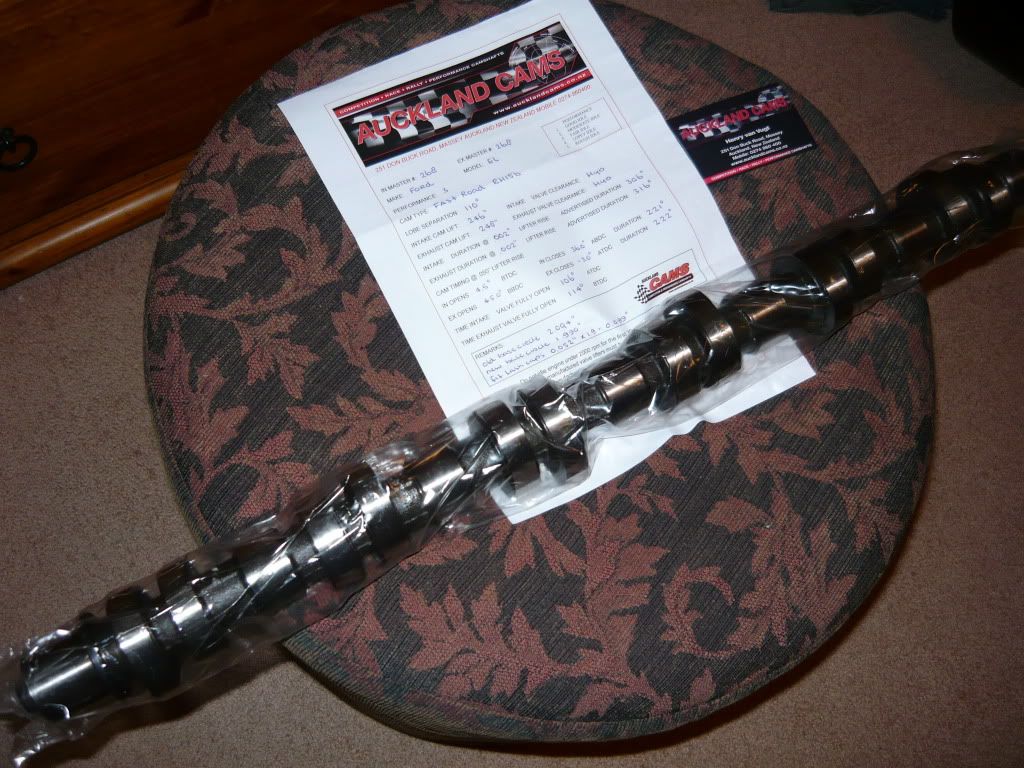 Cam lift: In 0.246" Ex 0.248" (so 0.492"/0.496" valve lift with the 2:1rr) Duration @ .050": In 221deg Ex 222deg Lobe seperation: 110deg Looks like I'll have to start saving for a 2800rpm stall and then an LSD centre to go in with my 3.89 gears next year Judging by the cam specs and from other people's experiences with cam's of similar duration, the ECU will have a fit in stock form, so I'll be ordering a custom tuned J3 chip from Jason @ TiPerformance in a week or 2. Just need a chip burnt with something to suit my setup so I can at least get it running before it goes on the dyno. Received my repaired and re-dyed Momo wheel back from Bruce @ Fibrenew today as well. Did a mint job for a great price, pretty stoked with the result 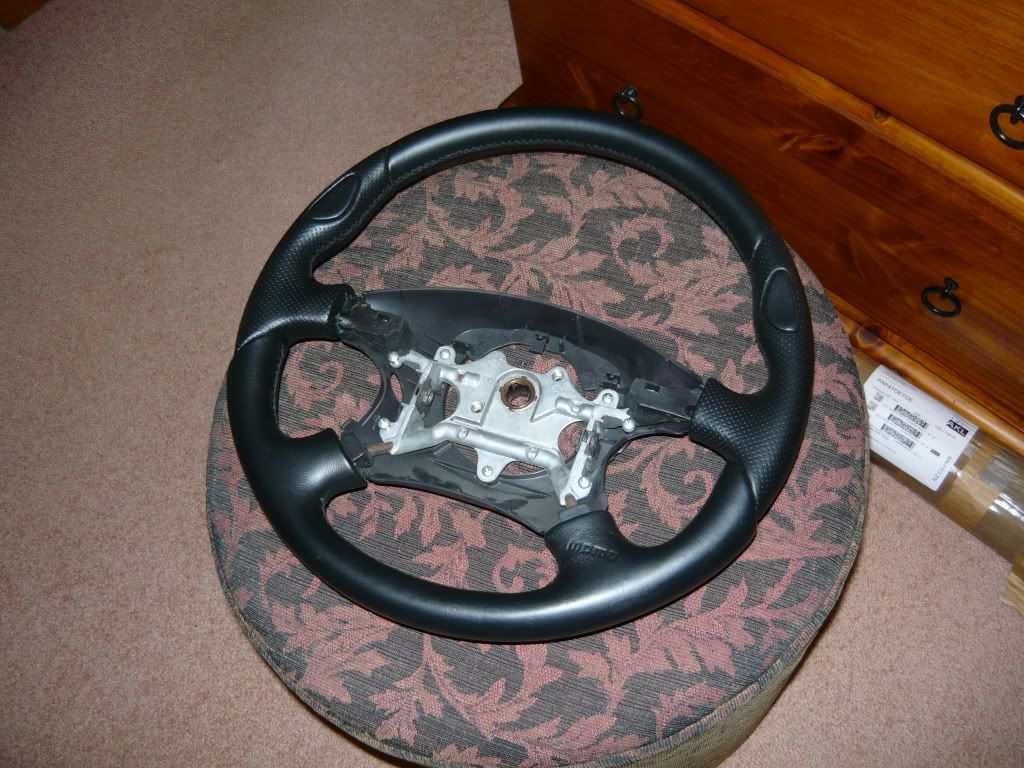 Also started buying a few more parts and getting some work done on the head over the weekend. Picked up a Permaseal MLS head gasket and an ACL VRS kit for the rest of the gaskets, as well as some new head bolts and a new set of spark plugs. 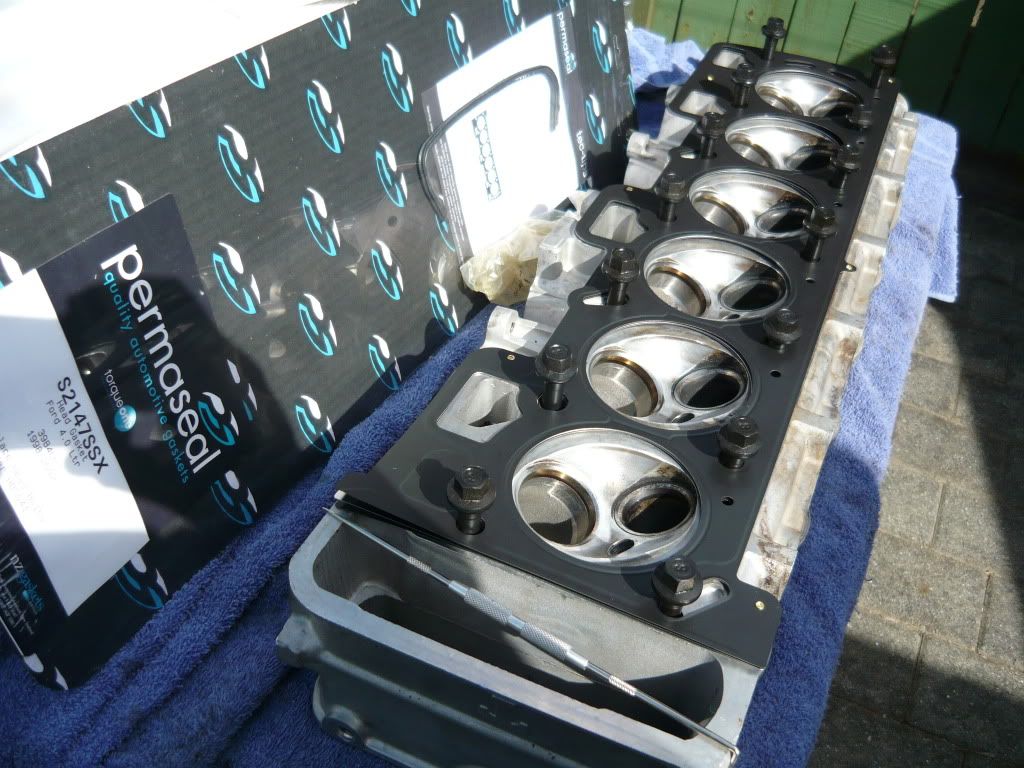 Scribed out the cyl. bores using the gasket to work out how much I had to play with - not a lot! Seems these MLS gaskets have slightly smaller cyl. bores compared to the typical e-series composite gaskets. Managed to get the combustion chambers all cleaned up and removed and smoothed out most of the shrouding around the valves so that area is done now. Now to get onto the intake and exhaust ports. Not going to go all out with this head, just basic things such as working on the short turns, widening around the valve guide, blending valve seat to bowl transition etc should be good for what I'm after so hopefully I can get that all done over a few hours and a couple of beers. 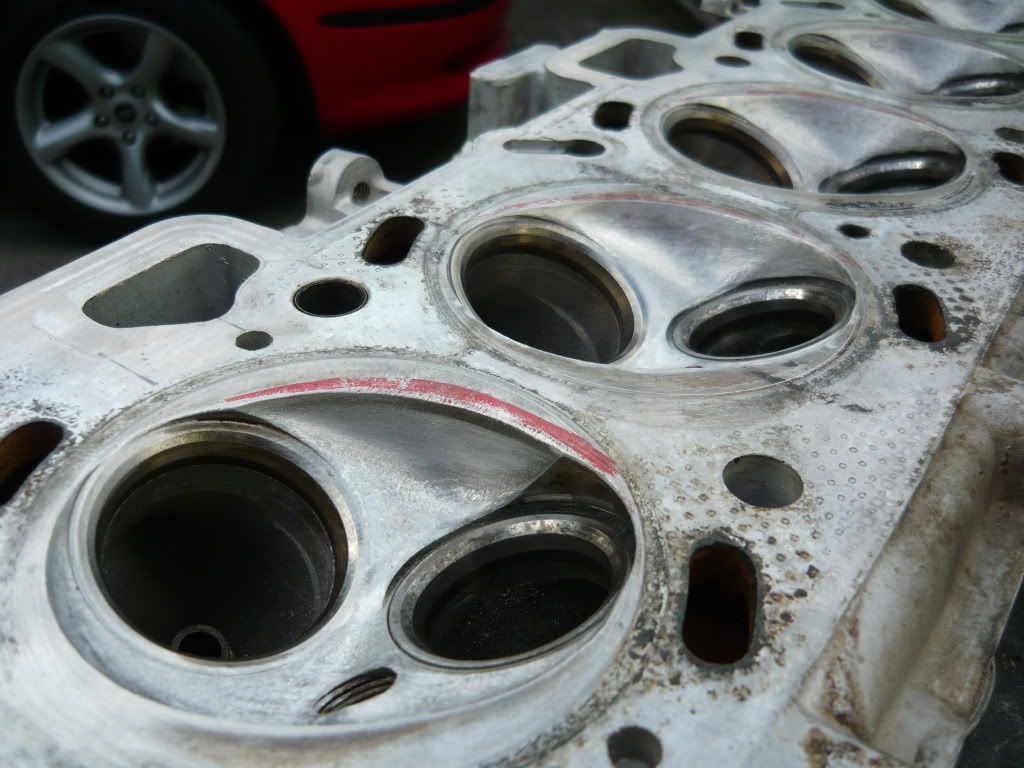 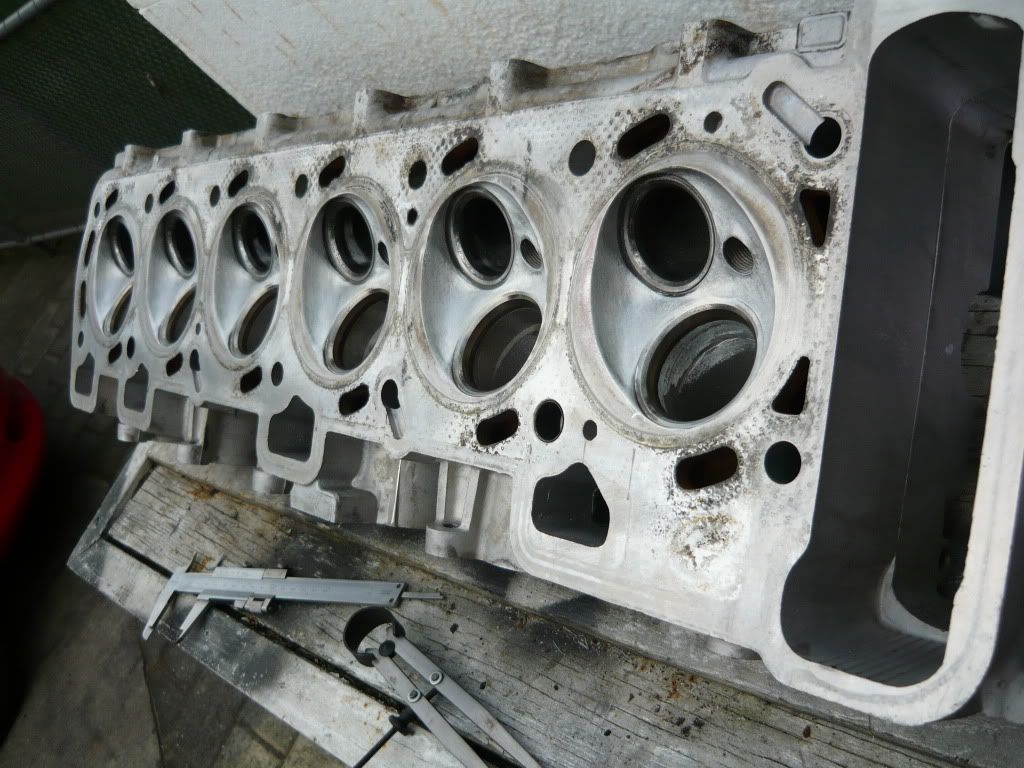 Fingers crossed I can get the rest of the port work done during this week so I can drop it off at the cyl. head guy on Saturday to get the valve seats recut, valves backcut and lapped in, surface shaved about 30thou. If not, it'll definitely be going there mid next week as I need to get s**t done ASAP. |
|||
| Top | |
|||
| FordFairmont |
|
||
Posts: 6113 Joined: 8th May 2007 |
its fun playing with cams when theyre so easy to install in the mighty 6
i wouldnt have a damn clue where the cam goes in my car lol |
||
| Top | |
||
| B Bear |
|
|||
|
Damn all those parts look good ! The steering wheel came up great ! Such a difference
Like FordFairmont said it is fun playing with the cams as they are so simple to change, just so many damn bolts to take out !! |
|||
| Top | |
|||
| revcore |
|
|||
|
That Fairlane interior light swap looks great....I'm considering doing the same thing with my EL Fairmont wagon.
_________________
|
|||
| Top | |
|||
| SLO247 |
|
||
|
Good s**t mate. What do they mean by restore the leather? I'm guessing they fill and smooth it?
It looks brilliant, that seems quite cheap to me. Good luck getting the cam and head all sorted. Should liven it up a bit! Damn that Cappuccino roof lining too. The colour is perfect to show every tiny speck on dirt. |
||
| Top | |
||
| KWIKXR |
|
|||
|
{USERNAME} wrote: its fun playing with cams when theyre so easy to install in the mighty 6 i wouldnt have a damn clue where the cam goes in my car lol Sure is!! Gotta love OHC motors Haha, cam the AU!! How's things going with the AU? Started modding away at it? {USERNAME} wrote: Damn all those parts look good ! The steering wheel came up great ! Such a difference Like FordFairmont said it is fun playing with the cams as they are so simple to change, just so many damn bolts to take out !! Yep, turned out great! Beats paying $500+ for a 2nd hand good condition one in my books I hear ya! The rocker gear on these motors would have to be the single biggest b**ch when it comes to a cam swap {USERNAME} wrote: That Fairlane interior light swap looks great....I'm considering doing the same thing with my EL Fairmont wagon. Cheers dude! Definitely worth the swap I say, you'll absolutely love the map lights {USERNAME} wrote: Good s**t mate. What do they mean by restore the leather? I'm guessing they fill and smooth it? It looks brilliant, that seems quite cheap to me. Good luck getting the cam and head all sorted. Should liven it up a bit! Damn that Cappuccino roof lining too. The colour is perfect to show every tiny speck on dirt. Cheers mate! Yeah pretty much what they do is high fill all the scratches and marks, then re-dye the entire wheel using specialised leather products. I was considering trying to re-do the blue section with the VHT vinyl dye myself, but there's no way I'd get a finish like how it's turned out after Fibrenew worked on it. An entire leather retrim would be awesome for the wheel, but I'd hate to ask how much to get that done, lol. Yeah man, should give the Fairmont a decent amount of kick once the head and cam are on. I'm so keen to feel how this cam kicks in, it's supposedly a strong midrange cam and with the 110LSA, it should be quite punchy when it's in its powerband As for the cappa roof lining, I want to burn the fkn thing! It's slowly starting to sag along with looking real dirty but I can't be bothered trying to fix it right now. Would much rather have the lining retrimmed in cappa or maybe even perforated black leather/vinyl so I guess I'll be getting quotes for that in the new year. |
|||
| Top | |
|||
| B Bear |
|
|||
|
Now I have a question for you KWIKXR, when you did the dynamat on your parcel shelf how did the carpet that covers it come out? Is it fairly easy ? I had a look at the wreckers today and it seems like it's held back by the black plastic coverings to the left and right, what appears to be glue in the middle and maybe some little christmas tree pegs on the actual shelf and of course the speakers too.
Basically is it easy enough to remove and then once all insulated put it back on ? Thanks |
|||
| Top | |
|||
| Who is online |
|---|
Users browsing this forum: No registered users and 70 guests |