

|
| KWIKXR |
|
|||
|
Sound deadening can be pretty expensive. I have used Dynamat Xtreme for most sound deadening applications and pretty much swear by it as it works so well so thats all i have ever used. I think i payed something like $80-$90 for 2 big sheets of it but that was at mate's rate's from Repco
|
|||
| Top | |
|||
| facer01 |
|
||
Age: 31 Posts: 284 Joined: 27th Sep 2009 Ride: 1995 EF Ford Fairmont Location: Bundaberg, QLD |
haha ok then sick as ill have to take a look when funds allow me too
might get some MDF this weekend seen as though its pretty cheap, you reckon it would pay off to go with some thicker MDF? |
||
| Top | |
||
| KWIKXR |
|
|||
|
I'd say either 12mm or 16mm MDF is the go for the floor and walls. I'd prefer the 16mm but the Bunnings i went to had just ran out of it and only had either 12mm or 18mm. Even though 18mm is only 2mm bigger than the 16mm i thought it would of been overkill at the time
|
|||
| Top | |
|||
| facer01 |
|
||
Age: 31 Posts: 284 Joined: 27th Sep 2009 Ride: 1995 EF Ford Fairmont Location: Bundaberg, QLD |
alright sick as ill probly do the floor myself and do the best i can then have a mates mate do the sub enclosure for me because he does custom boot installs and will do it heaps cheaper than auto barne and all that s**t, just gotta get a quote from auto barne and bust his balls a bit lol
|
||
| Top | |
||
| KWIKXR |
|
|||
|
Small update of the latest.. Boot install progress has been slow due to sorting out a suitable amp for my splits and working out a mounting place for it, not to mention a rethink of the wiring to both subs.
Last weekend i ended up making up the seating tabs for the pop out panel in the false floor.. Looks like this now.. 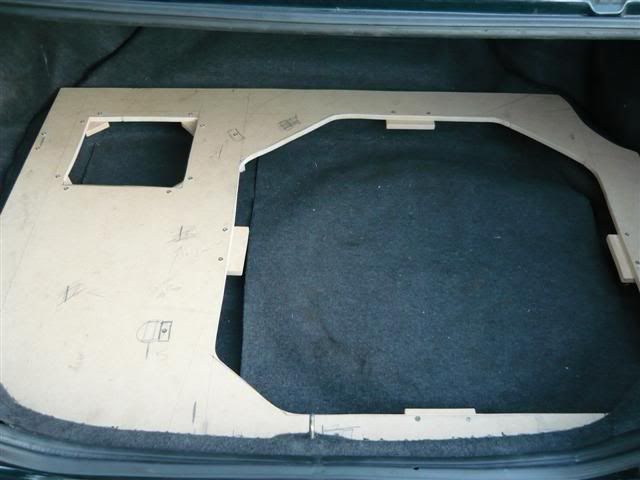 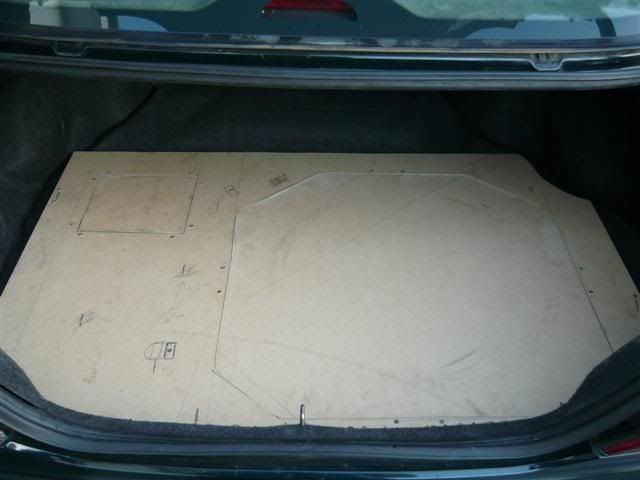 This weekend i will be heading to Jaycar to get some pocket handle which will be mounted in the pop out panels to allow easy removal when needed. This is one thing i did not think of at the start lol.. I did plan to get these purchased last week along with a bit of carpeting from Jaycar, but then all of a sudden my battery dies in the a**. Got that replaced with a better one suited to the EF, with a higher CCA rating. Starts up much better now Also picked up a cheap 2 channel amp to run my Response splits. Power Acoustik brand, 85wrms each channel going by specs on the net, so should be able to provide more than enough power to the splits which are rated at 50wrms, will have to keep the gain down a bit just to be safe 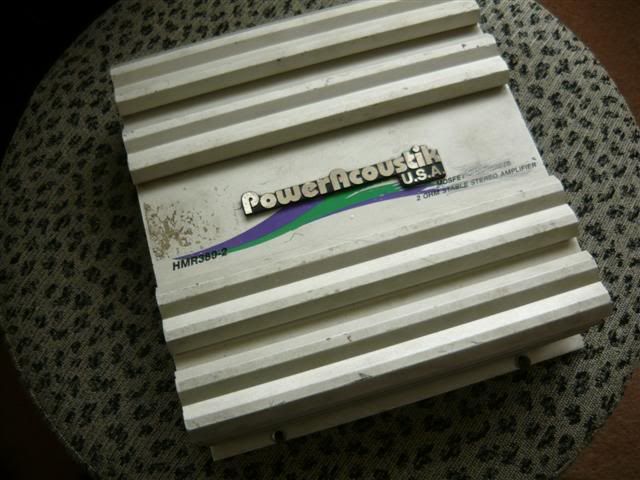 Apart from that, nothing else has been done with the audio boot install side of things... The other day i found that i had some chrome stripe tape laying around from when i first chrome striped the Fairmont way back (which eventually got removed a few months later due to going for a different look). Decided that now that i have the chrome grill up front, it would only be right to dress it up in more chrome so i re-striped the car. This time, i chose to take the striping all the way to each end of the mould instead of having a space between the ends like standard. Turned out well i reckon, makes it look a bit better now that it breaks up all the heritage green.. All that it needs now is the fairlane side repeaters fitted up, still have them sitting in the garage in need of some heritage green paint and some sikaflex 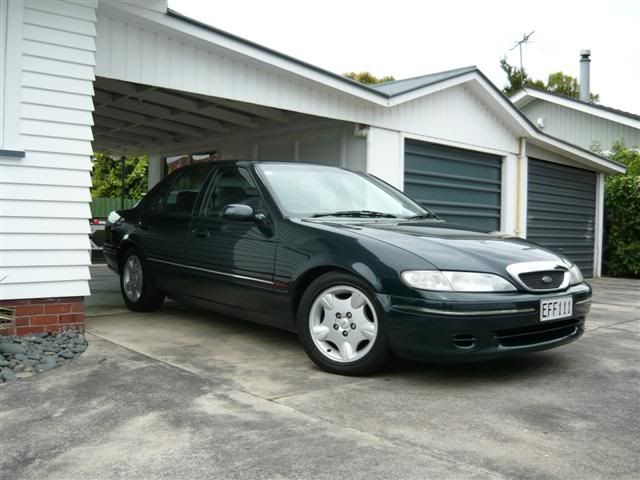 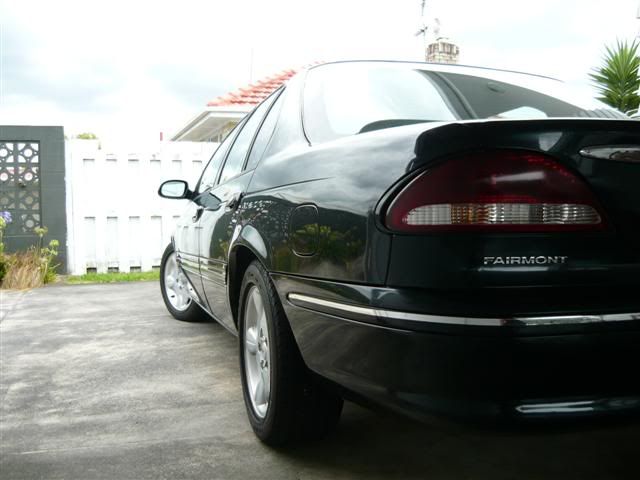 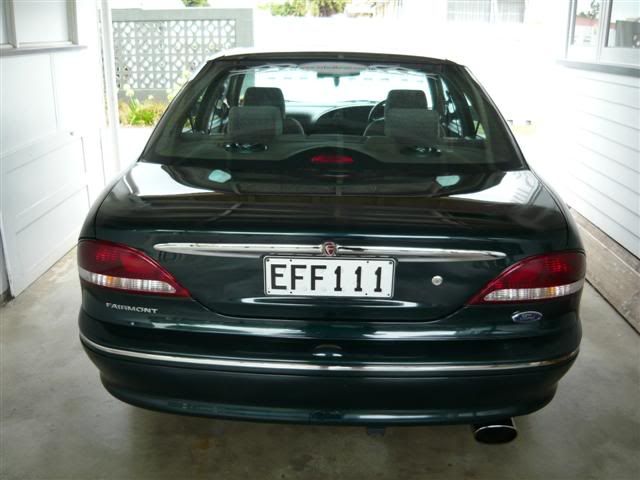 Also gave the intake piping and BBM a quick re-polish a couple of days ago so took a few snaps there too.. 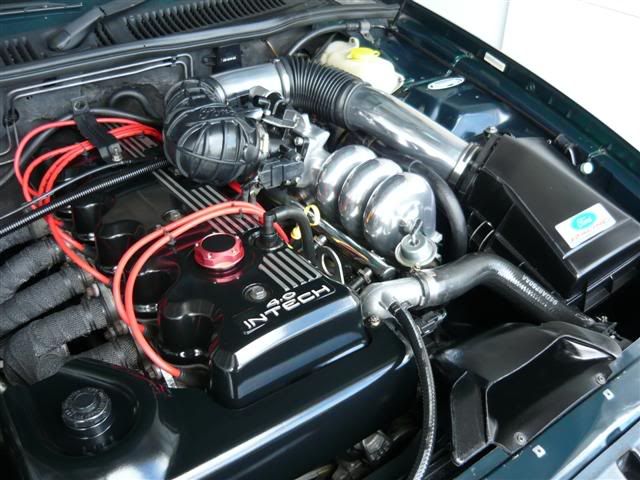 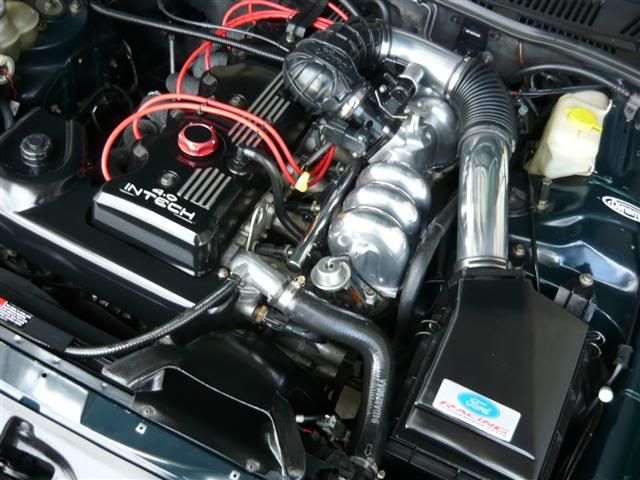 And thats about it, for now |
|||
| Top | |
|||
| dsyfer |
|
|||
|
The chrome stripe really sets it off nice.
|
|||
| Top | |
|||
| KWIKXR |
|
|||
|
Thanks dsyfer
|
|||
| Top | |
|||
| facer01 |
|
||
Age: 31 Posts: 284 Joined: 27th Sep 2009 Ride: 1995 EF Ford Fairmont Location: Bundaberg, QLD |
looks nice as, bout time you polished the thermostat dont your reckon? or a re polish if u have already done it.
boot installs comeing along nicely i see, havent started mine yet because i have to have a road worthy done and am not sure if its legal or not to have the fake floor |
||
| Top | |
||
| XR-Lane |
|
|||
|
Man your engine bay is tidy mate
Just an idea on your boot floor. You could put some piano hinge on them and use a gas strut on the spare wheel opening to make it easy to access the spare.. Cheers |
|||
| Top | |
|||
| facer01 |
|
||
Age: 31 Posts: 284 Joined: 27th Sep 2009 Ride: 1995 EF Ford Fairmont Location: Bundaberg, QLD |
{USERNAME} wrote: Man your engine bay is tidy mate Just an idea on your boot floor. You could put some piano hinge on them and use a gas strut on the spare wheel opening to make it easy to access the spare.. Cheers nice idea would work well i reckon as long as the gas strut opened far enough so you could get the wheel out with out hitting the strut or the flap |
||
| Top | |
||
| KWIKXR |
|
|||
|
Thanks guys
{USERNAME} wrote: looks nice as, bout time you polished the thermostat dont your reckon? Should have one fitted up sometime soon. I have a spare housing in the garage already polished up. It's just a matter of fitting it which i haven't been bothered to do yet, simple to do but it just keeps slipping my mind. Maybe this weekend hey {USERNAME} wrote: Just an idea on your boot floor. You could put some piano hinge on them and use a gas strut on the spare wheel opening to make it easy to access the spare.. Josh, that is actually a great idea. I'm definitely keeping that in mind, i did think of hinging the door but never thought about using a gas strut - good thinking and cheers for the suggestion mate, might give that a try if i can get suitable parts to do it |
|||
| Top | |
|||
| XR-Lane |
|
|||
|
Cool ill be watching out to see how you go mate
|
|||
| Top | |
|||
| facer01 |
|
||
Age: 31 Posts: 284 Joined: 27th Sep 2009 Ride: 1995 EF Ford Fairmont Location: Bundaberg, QLD |
{USERNAME} wrote: Thanks guys {USERNAME} wrote: looks nice as, bout time you polished the thermostat dont your reckon? Should have one fitted up sometime soon. I have a spare housing in the garage already polished up. It's just a matter of fitting it which i haven't been bothered to do yet, simple to do but it just keeps slipping my mind. Maybe this weekend hey ahh ok then sick, when i did mine i noticed it was extremely easy to polish, alot easier than the BBM |
||
| Top | |
||
| SLO247 |
|
||
|
Wow, the engine bay looks simply fantastic. What is that snorkel? Did you make the intake piping up?
With the boot install, that floor is exactly what I was thinking of. Except I'd like to have the extra hatch on the left larger, with a floor and sides built in underneath. So you would open it, and have a space for Chamois/Aerosol cans/Jumper Leads/Tools/Torch etc. I also want to box both sides in, then have a false wall across the back where your false floor ends. The sub will be mounted into this with the enclosure of the correct size built behind, and the amp would be mounted on this wall too with the wiring hidden. Then I'd sort something out with the lighting. I have no idea where to start though, my good mate used to work at hardware stores and will be able to sort me out, but still, Its a huge job! Excellent effort from you so far. I expect nothing less now however. Your thread always inspires me to do s**t. As for the chrome tape, I will try some on my bumper moulds. I have the proper door moulds. The proper bumper moulds are too hard, not available, expensive etc. As always, awesome work. The paint looks brilliant in those shots too. |
||
| Top | |
||
| KWIKXR |
|
|||
|
Thanks Slo, appreciate the kind words there mate
The intake snorkel is a BA XR6T item, fair bit bigger than the stocko EF ones, and is effectively about the same size as the EL GT or EF/EL XR snorkel. However with the BA XR6T snorkel you may need to do a bit of fiddling around with the thermo fan shroud to fit it which was the case with mine and also mount the snorkel back further on the radiator support panel. Pretty easy to fit though. The intake piping is just some 3" alloy offcuts i had laying around from a purchase a while ago, the outside of the piping had some scoring from when they were being bent in the mandrel bender so i picked them up cheap, just sanded them back smooth and hit them with some Autosol and it came out pretty decent. Your plans for the boot install sound spot on mate, thats kind of what im going for minus the space underneath the floor for tools etc. I will be making something up though to store away some tools, jumper leads and the jack, but still deciding how i am going to conceal it - i was thinking of making the compartment built into one of the side walls somehow.... We'll see what happens I too, had absolutely no idea on where i was going to start with this boot install. I just walked into Bunnings one day, went out into the timber section for a look and thought, "s**t, that MDF board could be useful for a boot install". Took it home and it all began... Once you get the floor done, you'll know what you want to do next and you start ripping into it. I reckon the floor is the place to start from as you can build around it, making up the walls etc. It is a big job, requires a lot of measuring, 'guestimating', and just pure trial and error at times. The most difficult thing about it all is getting the motivation to tackle these kinds of jobs in the first place, once you get started, you'll be on a roll |
|||
| Top | |
|||
| Who is online |
|---|
Users browsing this forum: No registered users and 6 guests |