

|
| KWIKXR |
|
|||
|
{USERNAME} wrote: Have you made up those custom dial faces yet dude? shouldnt cost more than $5 printing costs, and 30mins labour Unfortunately, no Still have the files sitting here on the computer, will have to take them somewhere to get printed out some day soon. Was thinking of maybe doing red needles along with it too. |
|||
| Top | |
|||
| kdogg |
|
|||
|
Hi Mate, Cool thread, am patiently waiting for the next mod/ installment, hows the boot mod coming along?
|
|||
| Top | |
|||
| KWIKXR |
|
|||
|
{USERNAME} wrote: Hi Mate, Cool thread, am patiently waiting for the next mod/ installment, hows the boot mod coming along? Hey mate, thanks The boot install hasn't had much progress at all, just don't have the funds to put into it right now, but i have decided that i will go ahead with it, as i was deciding against it previously. Once i get back to working (this is my last week of full time studying), i have a few things i need to get for it. Will be running 2x Pioneer TSW308D4's, off a decent mono-block running at 1 ohm, so will be pushing out around 800rms of thump, should have enough bump in the trunk with that for a while |
|||
| Top | |
|||
| KWIKXR |
|
|||
|
{USERNAME} wrote: Have you made up those custom dial faces yet dude? shouldnt cost more than $5 printing costs, and 30mins labour Finally got around to getting those carbon fiber dials printed off today dude, came out looking awesome!! Again, thanks so much for the time and effort you put into them mate, greatly appreciate it!! I added a small ford logo to the speedo side during the week using Gimp and it threw the whole file out of scale when you print it 'as is' for some stupid reason, but the chick at the print shop did a great job of getting it back to scale perfectly so I'm happy with that. I'll try get them fitted first thing tomorrow morning and will get some piccie's up then ----------------------------------------------------------------------------------------- Also as of last week, I'm finally finished with my full-time study (at f**k last) so am now on the way to getting back into a full time job. Once i do, i should be able to get a heap more work done and start finishing off the boot install and the like on the Fairmont |
|||
| Top | |
|||
| Falcon_92_EB |
|
||
|
Nice mate can't wait to see the dials
BTW that is one of the nicest "original" ef el's ive seen that is the spec i want to bring mine up to What were you studying? |
||
| Top | |
||
| KWIKXR |
|
|||
|
Thanks Lucas, appreciate it
The dials should look great, I'm not too sure how it will go with the carbon fiber faceplate/surround just yet. If it doesn't match the surround, I'll chuck a normal black one in. The CF dials will stay though I was studying computer networking mate. Trying to get into IT as i reckon that is one industry where the money is. Started off in computer hardware a couple years ago, but it's that simple now that almost anyone can do it, so decided to get into networking infrastructure. Hopefully i can get a decent job soon |
|||
| Top | |
|||
| FordFairmont |
|
||
Posts: 6113 Joined: 8th May 2007 |
cool, im sure the dials look good... but dont ditch the CF surround, it looks great!!
couple tips........ use a good quality clear drying gluestick like UHU to join the backing & top layer Also ive found the best way to line the 2 layers up is in a dark room in front of a torch. Before you put any glue on it, hold both layers up in front of a torch and line them up, then lay the dials down while holding them together and glue half a side at a time whilst holding the opposite side so they dont move out of alignment This is very important, as if they move, even just a little, they will look very blurry at night, then you will have to get another set printed up |
||
| Top | |
||
| KWIKXR |
|
|||
|
{USERNAME} wrote: cool, im sure the dials look good... but dont ditch the CF surround, it looks great!! couple tips........ use a good quality clear drying gluestick like UHU to join the backing & top layer Also ive found the best way to line the 2 layers up is in a dark room in front of a torch. Before you put any glue on it, hold both layers up in front of a torch and line them up, then lay the dials down while holding them together and glue half a side at a time whilst holding the opposite side so they dont move out of alignment This is very important, as if they move, even just a little, they will look very blurry at night, then you will have to get another set printed up Already done, haha. First thing i did when i got home was cut them out then glue them together, but did it pretty much exactly as you described, only i used the computer monitor on full brightness as the backlight to line them up properly They did print out a little glossy even though they were printed out on standard 80 gsm copy paper, due to the fuser in the printer or something from what the girl told me. Hoping they won't reflect direct sunlight too bad, guess we'll see how it goes tomorrow |
|||
| Top | |
|||
| Deff |
|
||
|
Looking forward to pix mate, loving what you have so far.
Got my nose cone so will be working on that today |
||
| Top | |
||
| KWIKXR |
|
|||
|
{USERNAME} wrote: Looking forward to pix mate, loving what you have so far. Got my nose cone so will be working on that today Thanks mate, great to see you finally tracked down an XR nosecone for your wagon, took a while hey. Can't wait to see some updated pic's with it all bolted on Well, i haven't started pulling apart the dash yet (late night Friday = sleep in Saturday 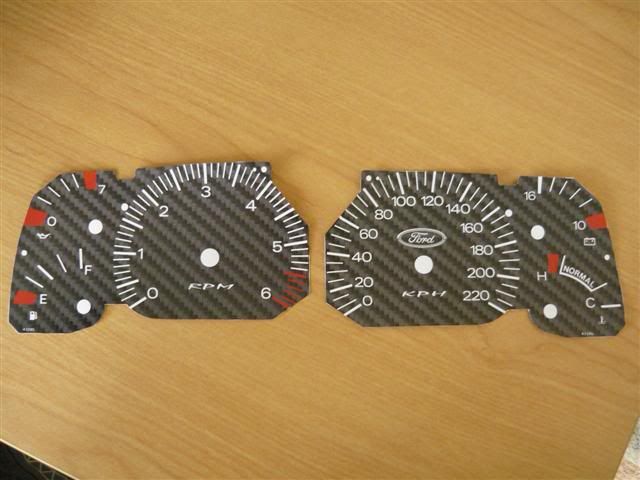
|
|||
| Top | |
|||
| Falcon_92_EB |
|
||
|
Very nice
|
||
| Top | |
||
| KWIKXR |
|
|||
|
{USERNAME} wrote: Very nice That they are 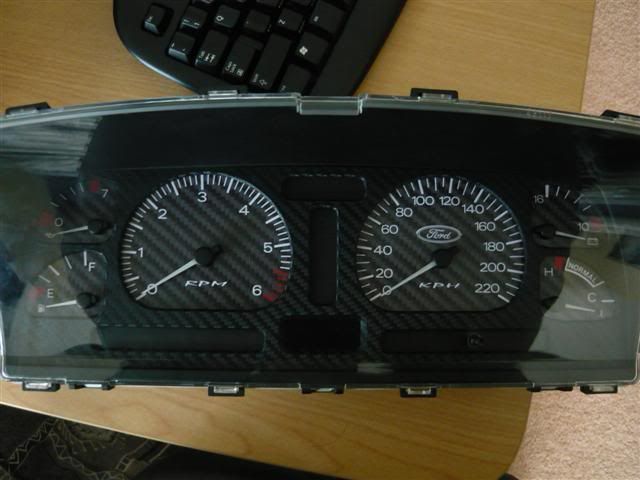 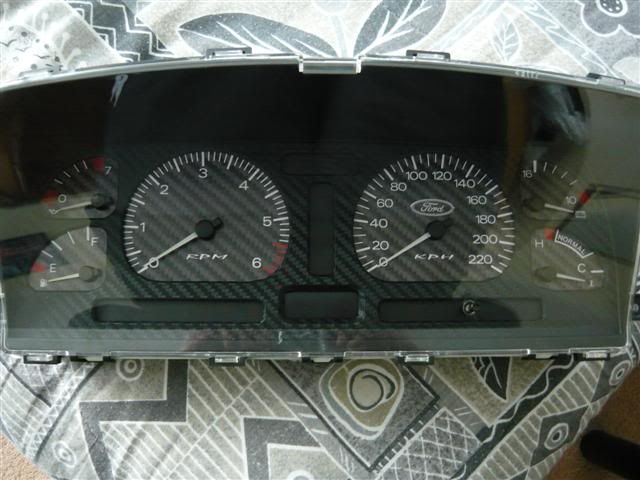 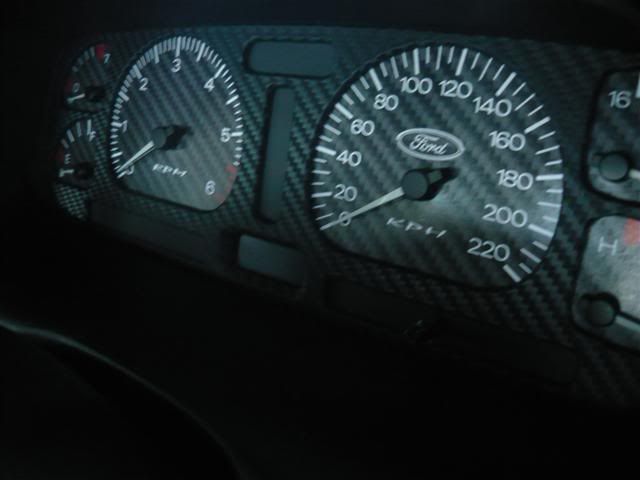 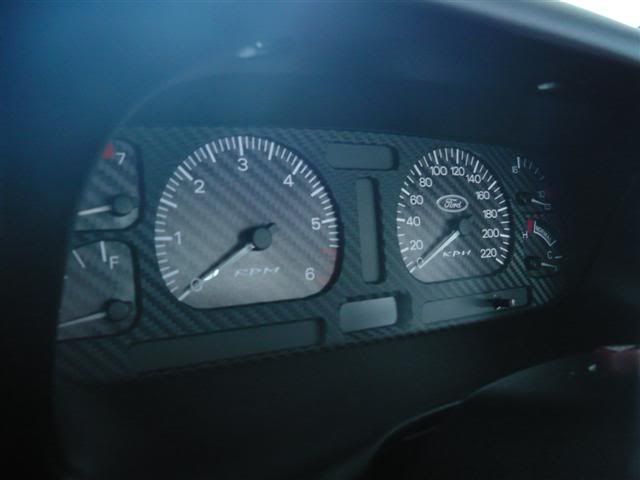 Now i realize how much i missed the EF styled dials, much better than the EL styled ones now. The little warning symbols actually light up now, instead of just an orange box with the EL dials, and the fuel gauge actually looks a bit better because the increments are slightly bigger so I'm no longer looking at the gauge thinking s**t I'm almost out of fuel Seems to light up pretty good too with the white LED's, might get a snap of it lit up tonight if i remember. They are a little glossy and reflect light just a tad too much, but i can live with that for now |
|||
| Top | |
|||
| Falcon_92_EB |
|
||
|
Thats awesome
Last edited by Falcon_92_EB on Thu Jul 09, 2015 12:23 am, edited 1 time in total. |
||
| Top | |
||
| KWIKXR |
|
|||
|
In advance, sorry for the s**t pic's, they were taken with my POS cellphone..
Here's a shot of it with the lights on, it's not too bad. It's a little dull from 3k to 5k on the tacho side and 40km mark to 110km mark on the speedo side, apart from that it lights up okay. 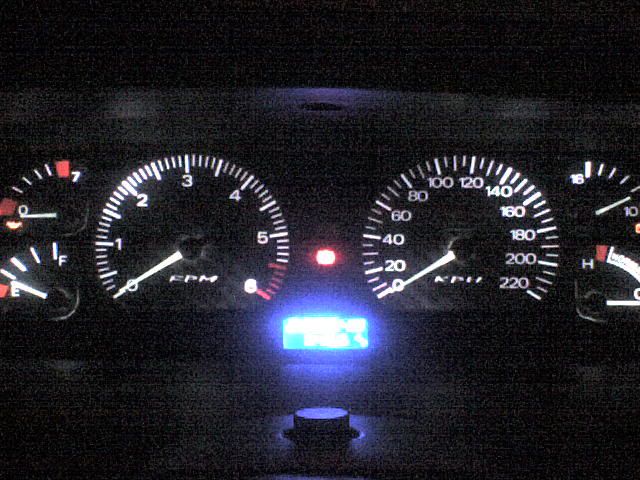 I might get these dials made up again to try reduce the gloss it has when printed, so I'll redo the mask to include the Ford logo and get it to light up on the top layer. Right now the mask is just a blank with no logo as i didn't think it would light up too well, but it's almost showing through right now with it masked so i reckon it could turn out nicely. And here's one of my LED parkers i chucked in a few weeks ago, my phone makes them look hella bright 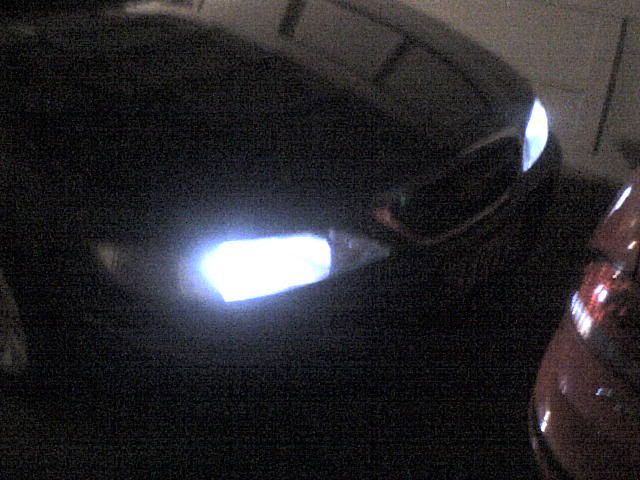
|
|||
| Top | |
|||
| thepistonhead |
|
|||
|
{USERNAME} wrote: And here's one of my LED parkers i chucked in a few weeks ago, my phone makes them look hella bright  Wow that looks really good! I've had problems with my RHS parker not working. Stupid question, but are the parkers separate to the regular beam bulb? If so, how do you get to them? I always thought that parker and regular beam was the single bulb and couldn't see a seperate parker bulb!
_________________
|
|||
| Top | |
|||
| Who is online |
|---|
Users browsing this forum: No registered users and 4 guests |