

|
| Dansedgli |
|
||
|
This pic was posted on xfalcon.com. It looks messy but seems to do the job.
It was his way to overcome bonnet clearance. I would drop the K frame down like others have done and use stock mounts.  Fiend ~ couldnt you just use a standard mount as a reference and drop the engine side by however many mm? |
||
| Top | |
||
| XR-Lane |
|
|||
|
It doesn’t appear to be much lowering needed to get the bonnet to shut properly.
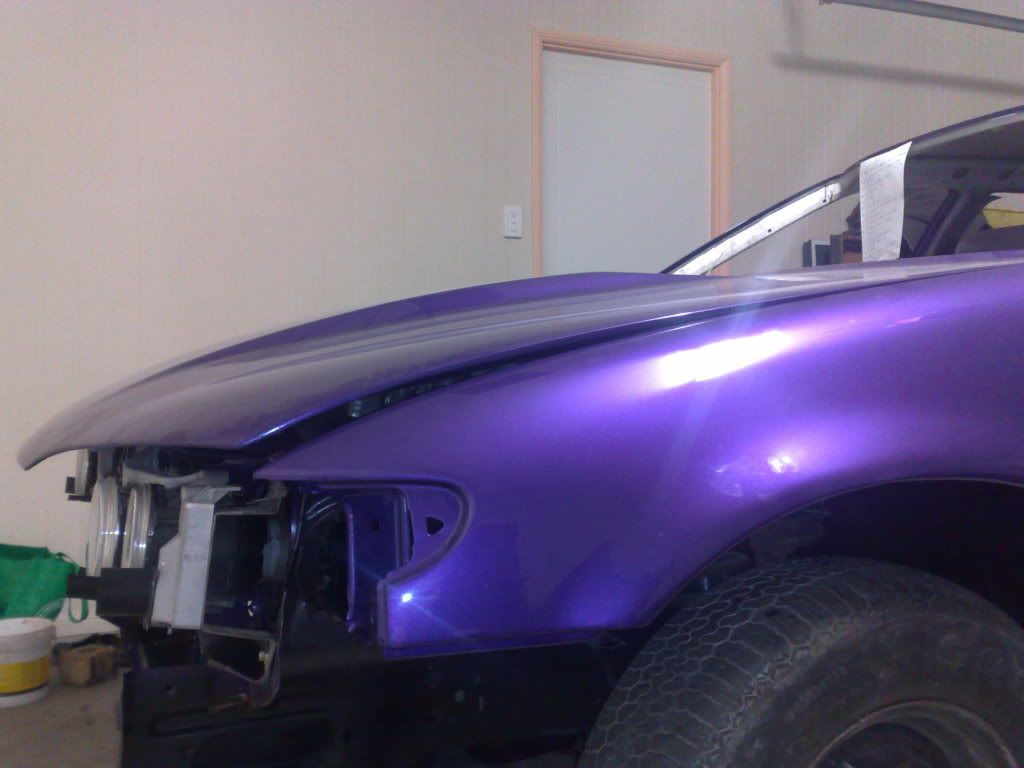 This is not just a factory mount with a piece of steel spacing it down.  In my opinion I would steer away from doing this because its not just a matter of making up a plate with holes in it and bolting it in. You would need at least 6mm plate and the engine mounts are made to be bolted on the block in order to sit on the K frame. So with one of these on both engine mounts you will be spacing the mounts out 6mm each side of the engine. You may be able to force them into position on the K frame but you would then be putting undue stress on the engine mount. Another point to think about is if you lower the engine this way you are bringing the balancer on the front of the engine closer to the K frame. How far do you need to go down and will the balancer be affected? Lowering the K frame sounds like a better option. You could have some spacers made up on a lathe and get longer bolts to bolt the K frame back up. But again how much do you need to space it down and how will this affect the front wheels when you sit the car back down. The camber may be out and depending on how much you need to space it down in the first place, and you may not be able to get a camber kit to correct it. I would cut the bonnet rather than touch anything else. I never realised these fibre glass bonnets resembled the factory bonnet from underneath with all the supports. The engine should be fouling on the same spot as the factory bonnet. Being fibre glass you would be able to finish it off nicely after cutting the glass bonnet brace out. |
|||
| Top | |
|||
| Dansedgli |
|
||
|
Those plates dropped the engine 18mm from memory.
Agreed about the sideways stress. E series mounts suck in the first place, using those plates wouldnt help much. |
||
| Top | |
||
| XR-Lane |
|
|||
|
Another thing I was thinking of is, what happens when you lower the engine? You will need to make spacers for the gearbox cross member because that will have to came down the same length the engine does. If the engine gets spaced down it will affect the exhaust pipe. But I imagine you will be getting an exhaust made for this car anyway so its not so bad.
My point is the B series blocks are mostly the same as E series, witch is why these conversions are made possible without major f**k around, other than the K frame issue. The Engine is already where it should be as Ford intended it. I would modify your bonnet mate, I think you will be better off that way. |
|||
| Top | |
|||
| fordman351 |
|
|||
|
Smithy, i cut a section out of my bonnet when i did my conversion, it's a bit messy, i'm yet to clean it up and make it look pretty, but the engine clears the bonnet without having to cut a hole in the bonnet skin. Might be a bit easier to do than having to lower the engine...
You do not have the required permissions to view the files attached to this post. |
|||
| Top | |
|||
| smithykicks85 |
|
||
|
Thanks guys for the advice. Ill have a go at removing the bracing under the bonnet then, its a shame itll need re painting but might be the eaziest solution. Ill have a go at it tomorrow arv and let yous know how i go. Cheers
_________________ Weapon of choice, EB shell with a EL XR front powered by a BA engine. |
||
| Top | |
||
| Mar55s |
|
|||
|
It's def worth the try and a hell of a lot less stuffing around to customise the bonnet by the looks of it..
Poll anyone? |
|||
| Top | |
|||
| fordman351 |
|
|||
|
{USERNAME} wrote: Ill have a go at removing the bracing under the bonnet then, its a shame itll need re painting but might be the eaziest solution. You won't need to cut out as much as i did. See those black lines on the underside of the bonnet? That's exactly where the belt runs, so that gives you a good indication as to where the head will need to clear. |
|||
| Top | |
|||
| fiend |
|
|||
|
{USERNAME} wrote: This pic was posted on xfalcon.com. [[[insert picture similar to what Fiend thought up]]] Fiend ~ couldnt you just use a standard mount as a reference and drop the engine side by however many mm? YeaHP- You could... But I am not sure if the BA has the mounting bolt pattern as the EF (which is the only mounting plate I have handy...) It's not exactly what I was saying though... But gives you an idea of similar, sure. You would probably need to drop the gearbox by a few mm too. At a rough guess, probably add washers to push the gearbox mounts down about half as much as you've lowered the engine... Some people say you want a straight driveline from the front harmonic balancer through to the diff... But others I've spoken to said that just created harmonics in the final drive components and you're better off having a few degrees bend behind the gearbox and the same at the diff. Besides which, as soon as you actually drive the car and hit any sort of bump the diff is jumping up and down so much you'll have trouble justifying why you ever thought a few degrees pinion angle ever mattered! Smithy --- It's not hard to weld 6mm (or even 10mm) steel plate. And it's pretty easy to cut and drill. And.... What the hell. Chopping the bonnet is probably easiest - But judging by what you've done to the rest of the car I wouldn't say "easiest" is a requirement for you!!!! Then again, you could follow this prime example... 
Last edited by fiend on Sun Oct 11, 2009 7:17 pm, edited 1 time in total. |
|||
| Top | |
|||
| comhelp |
|
||
Age: 41 Posts: 638 Joined: 6th Nov 2004 Ride: 1994 Ford EF Fairmont Ghia Sedan Location: Melbourne |
just read through the whole thread. Word for word (took me a couple of hours)
Bloody awesome job mate. Given me a few more ideas to do to my beast once she is all up and running
_________________ 1994 ford fairmont ghia - Currently 302 with T5 - Work in progress |
||
| Top | |
||
| EFFalcon |
|
|||
|
{USERNAME} wrote:  Titanium Bulge FTW.
_________________ FALCN6 - EF GLi Turbo, 20" Rims, Air Bag Suspension, Straight LPG, 225rwkw |
|||
| Top | |
|||
| low_ryda |
|
|||
|
where do you find such gold fiend ?
_________________ Not to get technical, but according to chemistry alcohol is a solution. |
|||
| Top | |
|||
| Buntz-93ED- |
|
||
|
Wow.
This is my first post here... I joined so that I'd have access to the photo's. BTW. I'd have to agree with the bonnet modding mate. After all, now that you have the engine and transmission (I believe) all fitted in and dandy, the last thing you want to do is go about altering the heights of engine, trans.. and interfere with the exhaust too. But seeing as how your handy with fibreglass, I'm sure it wouldn't be a problem to put a bit of a bull nose on that bonnet... it won't look as pretty, but that BA I6 is worth making one or two concessions for. Anyway, best of luck with it all, you have my complete attention. |
||
| Top | |
||
| sexyr6 |
|
|||
|
any more updates?
|
|||
| Top | |
|||
| smithykicks85 |
|
||
|
FITTING A BA T5 GEARBOX
Remove the old BA gearbox cross member by simply removing the two 1/2 inch or 13 mm nuts on both sides of the cross member. In the photo you can compare the difference in the BA cross member (on left) to the EA-EL. While your doing this you may want to purchase a new gear box mount, only $20-$30, saves having to do it down the future: 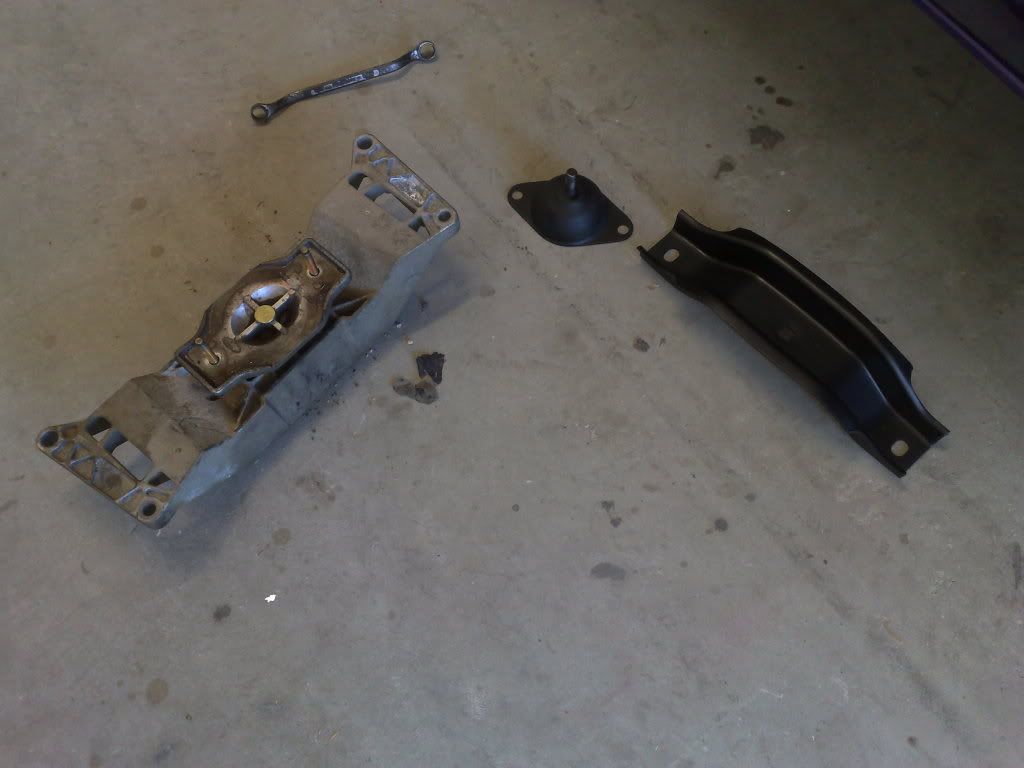 Heres the BA cross member removed off its boxed, should look something like this: 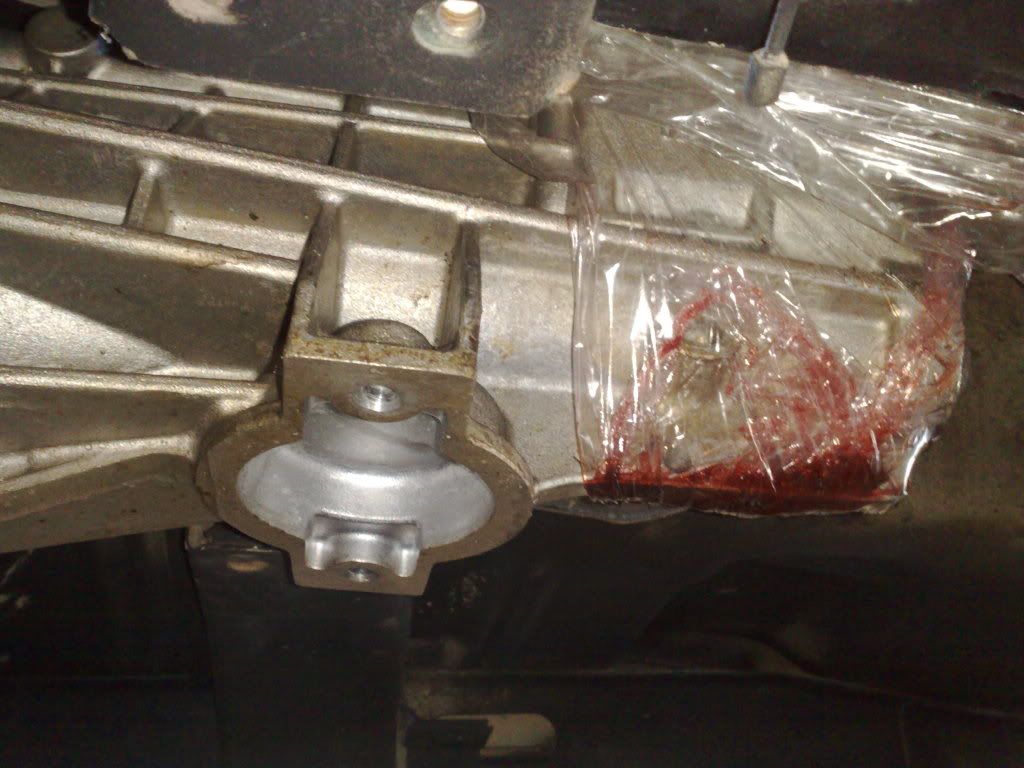 Fit the new mount on. Use 2 high strength bolts and nuts and tighten it up as shown: 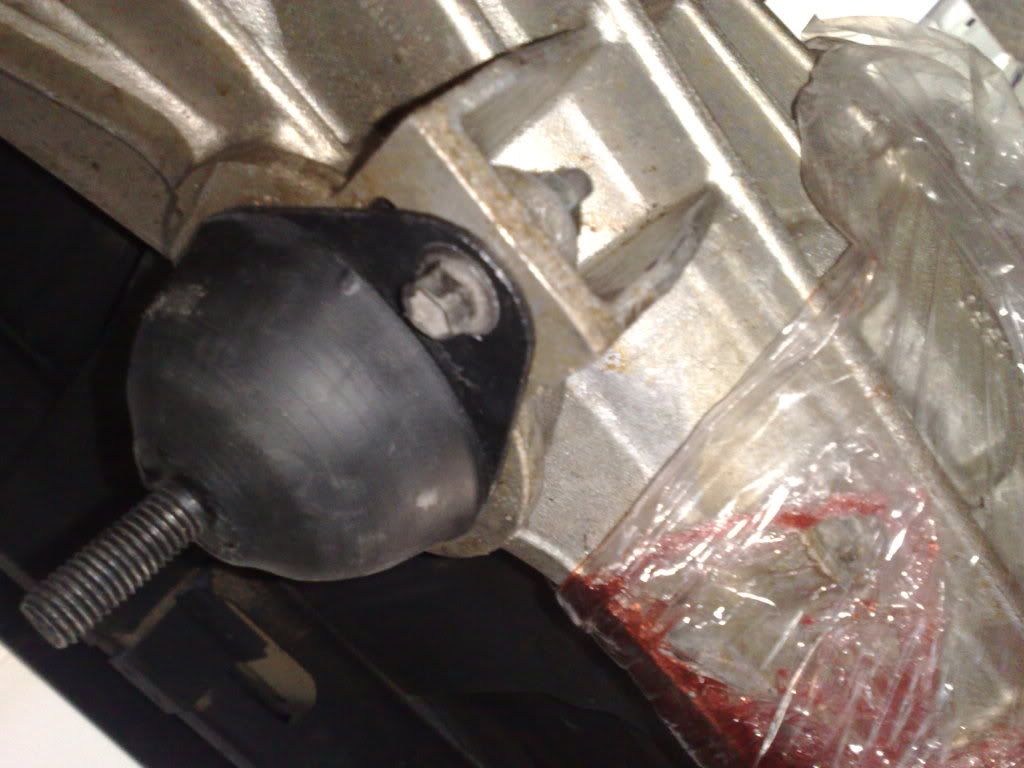 Use a jack and lift the box up, then place ea-l cross member on and you can use the original 2 13mm bolts on either side, tighten them up (note, you may need a breaker bar / rattle gun): 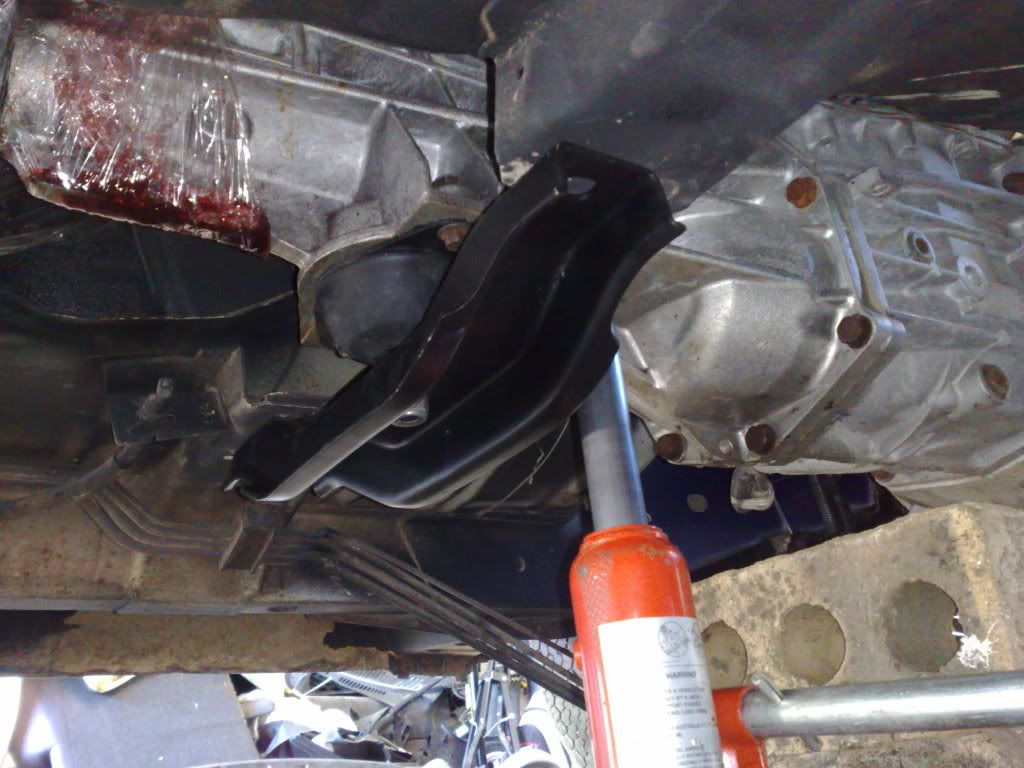 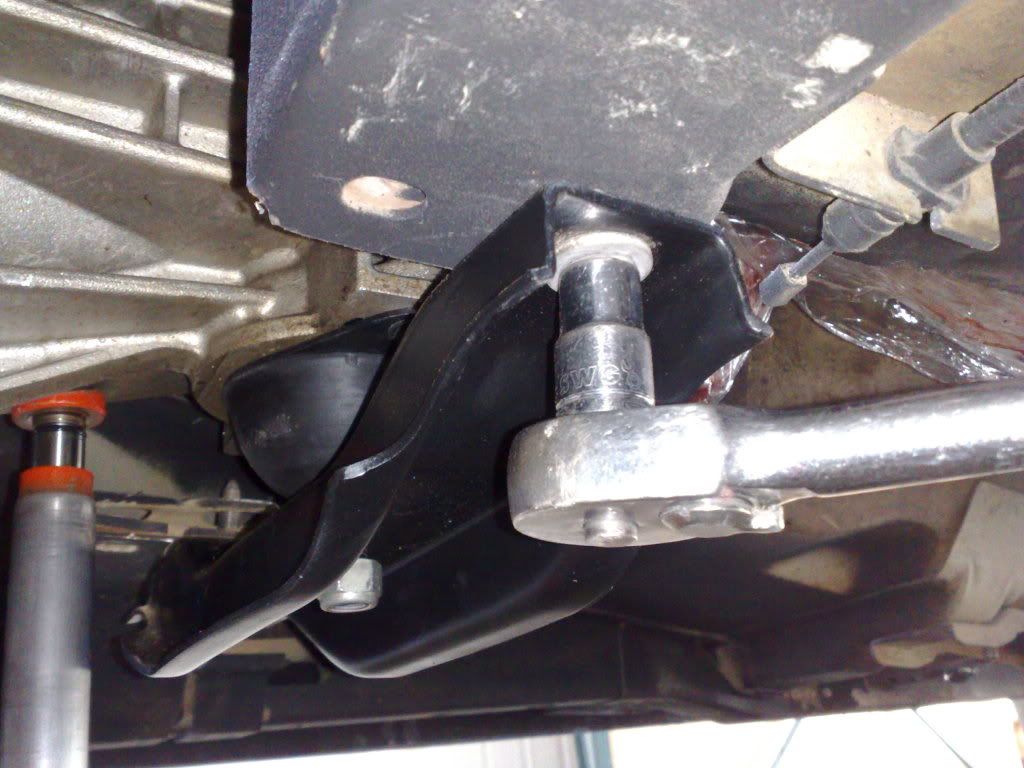 Place the original washer and 19mm but on the gear box mount thread and begin tighting it up. Heres what it should look like once complete: 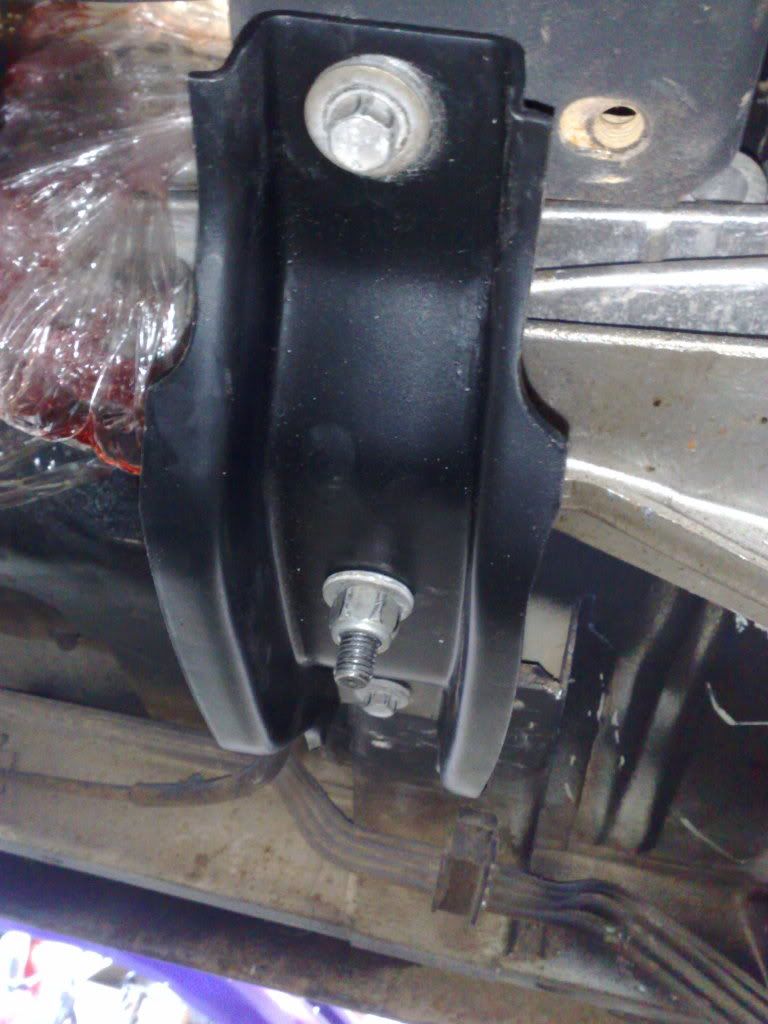 PLEASE NOTE: While installing the BA box remember that the shifter sits back a fair few inches, so youll need a air hack saw or cutting grinder close by, heres what mine looks, ill neaten it up later and weld up the unused area when I get my hands on a mig: 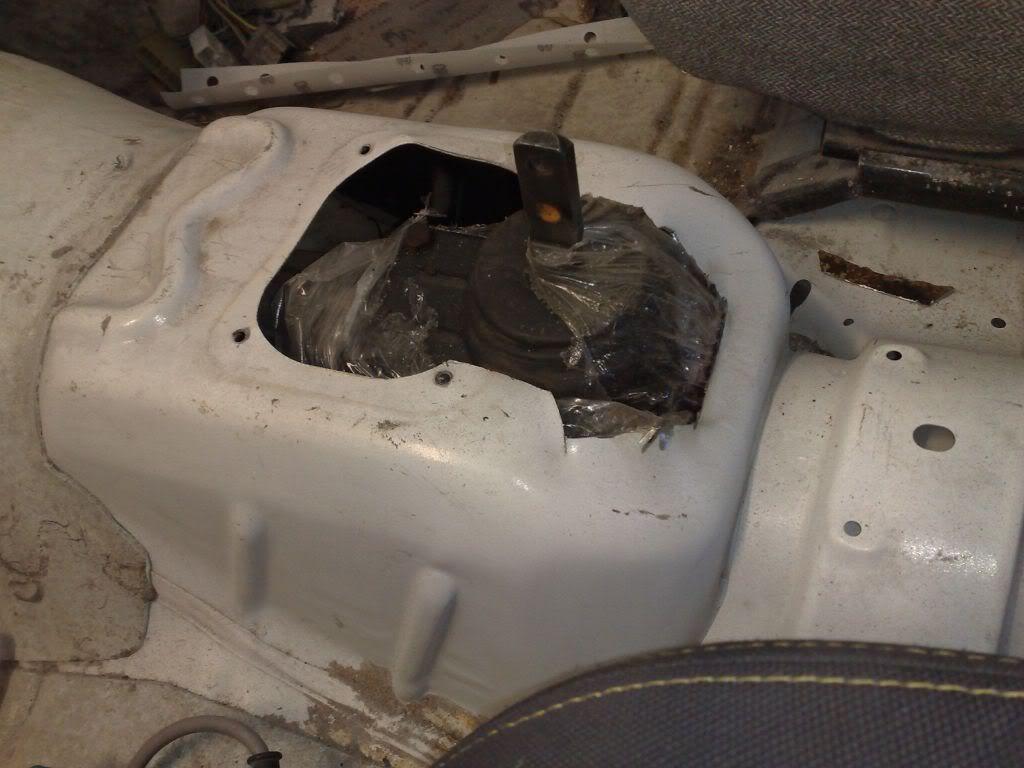 Ill be going back to fitting the dash now, so hopefully will have a big write up with pics tonight
_________________ Weapon of choice, EB shell with a EL XR front powered by a BA engine. |
||
| Top | |
||
| Who is online |
|---|
Users browsing this forum: No registered users and 23 guests |