

|
| smithykicks85 |
|
||
|
Ooops double post, my bad.
_________________ Weapon of choice, EB shell with a EL XR front powered by a BA engine. |
||
| Top | |
||
| Froudey |
|
||
|
{USERNAME} wrote: Ooops double post, my bad. u are really moving along with this thing hey
_________________ R.I.P Tobias my son. |
||
| Top | |
||
| itlookslikeaxr6 |
|
|||
|
Im sure it will look mint when all painted.
Good to hear your happy with it and got it fitted without to much hassle. Just edit that double post and delete it all and fill it with your next write up when you do it. Regards, Michael.
_________________
|
|||
| Top | |
|||
| smithykicks85 |
|
||
|
Wow what a day, i only just walked in the door after spending a good 12 hours on the car today, didnt feel like i got to much, feels as if i am kinda chasing my tail. but itll get there. Any ways i started off this morning by removing the rest of the tow bar and making the rear bar sit better, also finished sanding down the bonnet so its now ready for its final coats of prime, started sanding the rear bar down, and made a start on the passenger side rear quarter pannel and sill. Unfortunately iv come across some narsty rust. However its pretty common to get rust in the sills and above the rear wheel archs on the old box car. So i figured id do a little tutorial on minor rust repair, i figured it may help someone out there. Any way here it is:
MINOR RUST REPAIR: At first glance of the rear archs i knew there would be a bit of work involved, however dont let these small spider rust marks fool you, they are bigger then they look, as youll soon find out. This is just a step by step tutorial on cutting out rust. Heres a shot of the rust before the paint was removed: 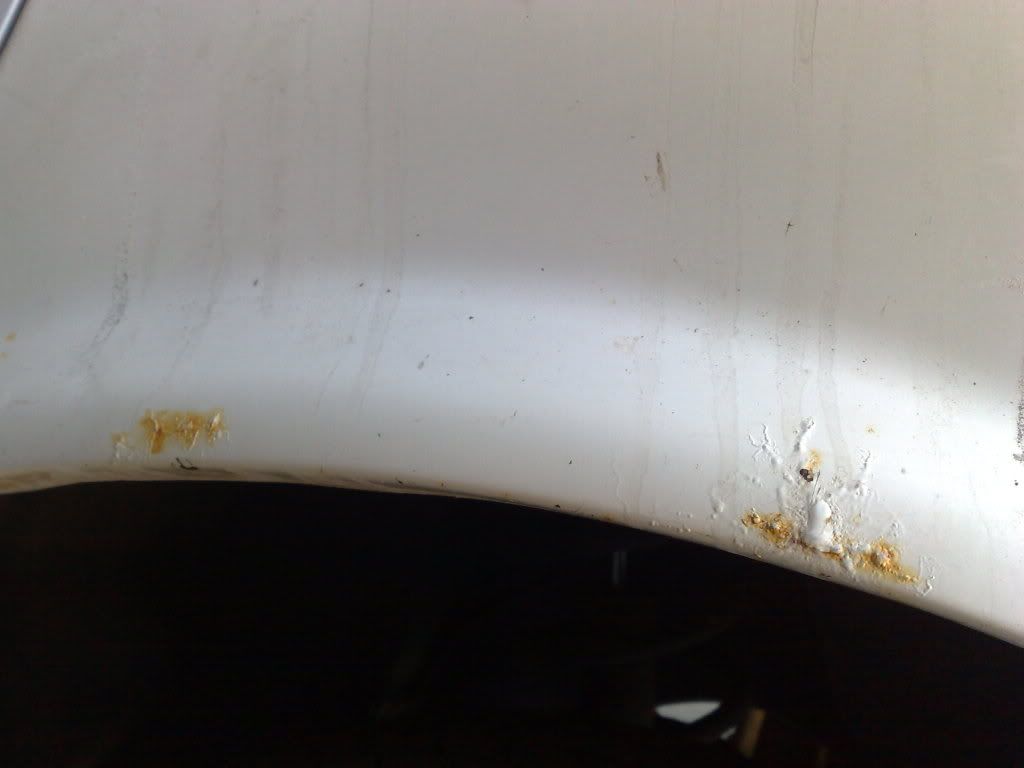 I start by using a air saw to remove a section out to see what the fuss is about: 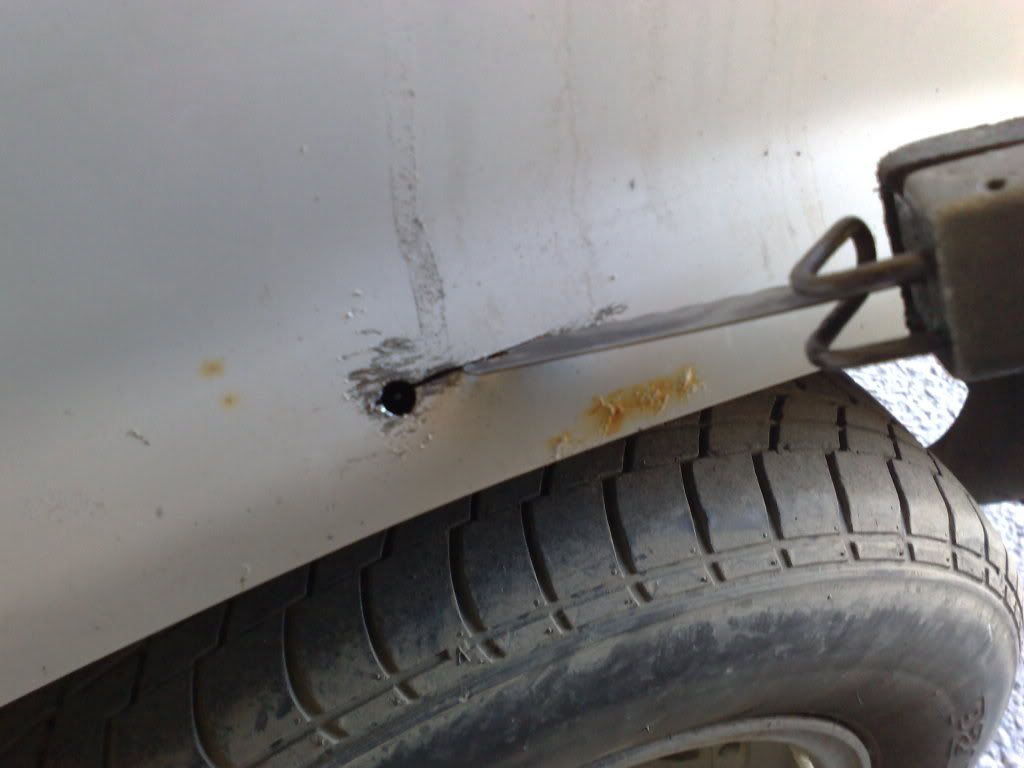 mmm not looking to good, most of that is surface rust but i ended up having 2 holes threw the inner gaurd (wheel arch): 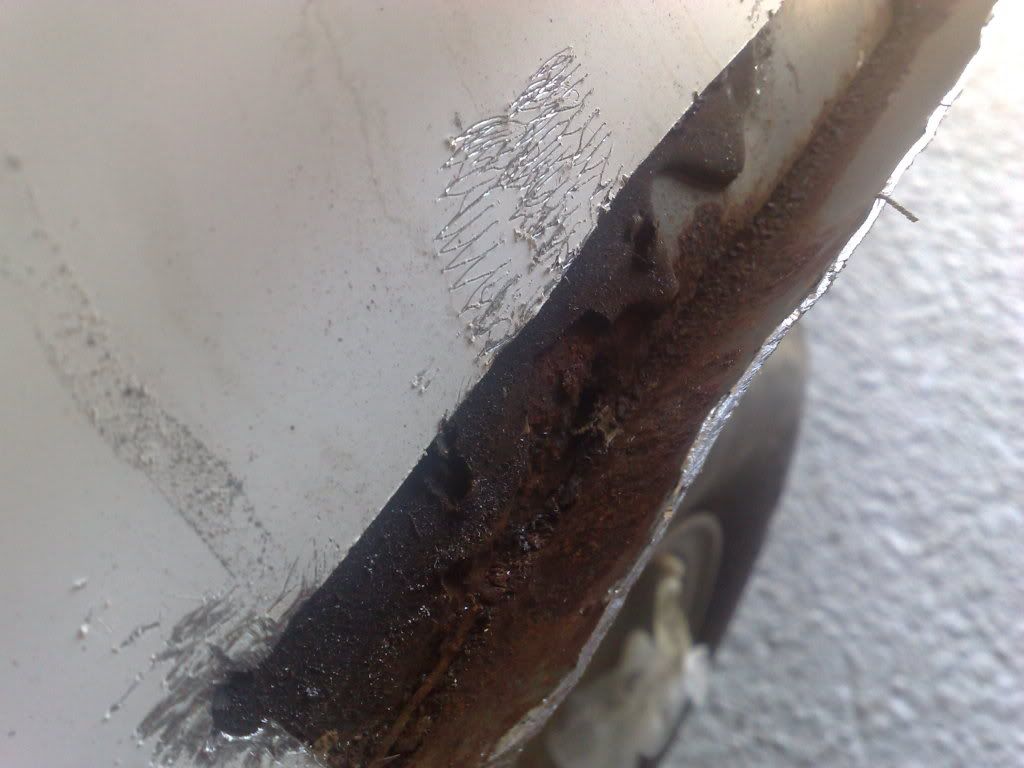 A fair few squirts of rust conversion in a sqirty bottel to try and see if i can clean some of this up. Squirt the area for a good 20 odd mins and let it settle and see what the out come of the damage looks like: 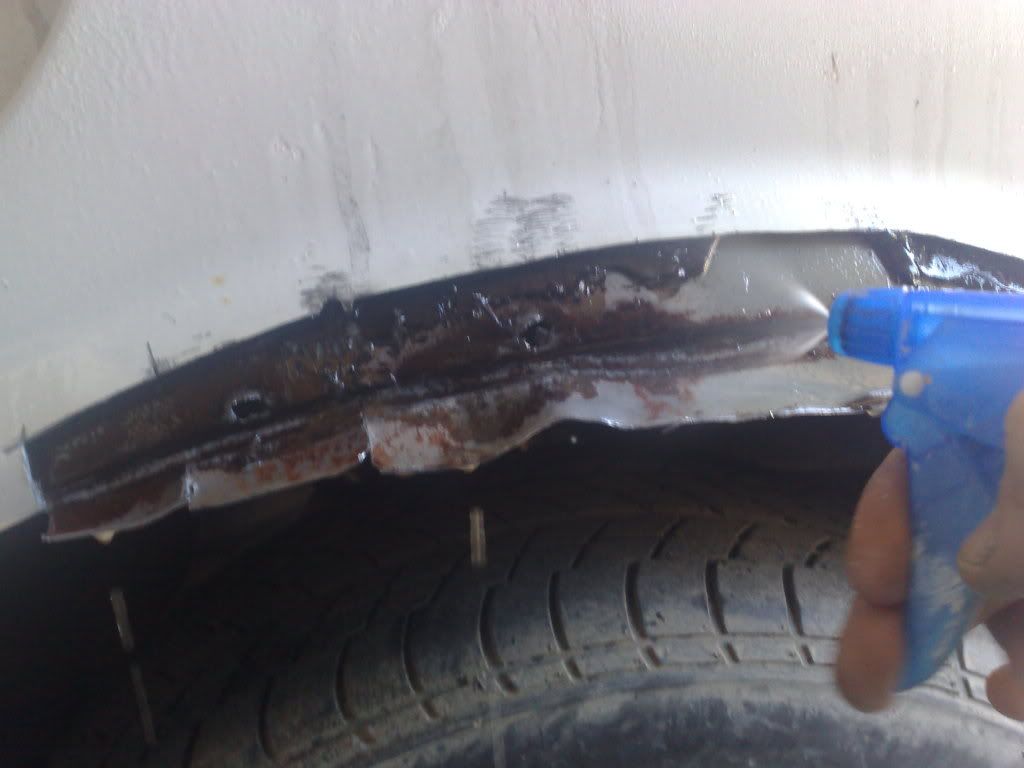 If you have to cut the inner pannels make sure the cut of the inner pannel is smaller then the out side one (skin). This will help you heaps when it comes time to weld it back together, gives you room to weld the inner in. Heres a shot of the inner cut out, not looking good at all: 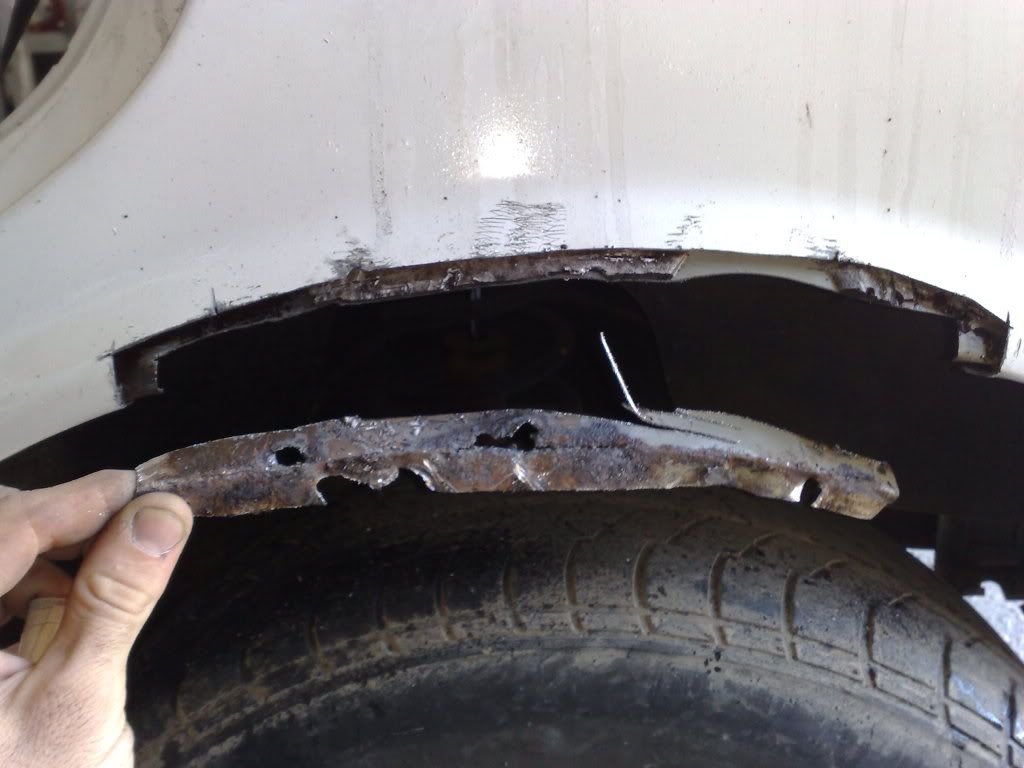 I brused some paint stipper on the quarter, (iam not gonna go in to, to much detail here as iv done a write up on paint stripping earlier on in this thread) heres it is : 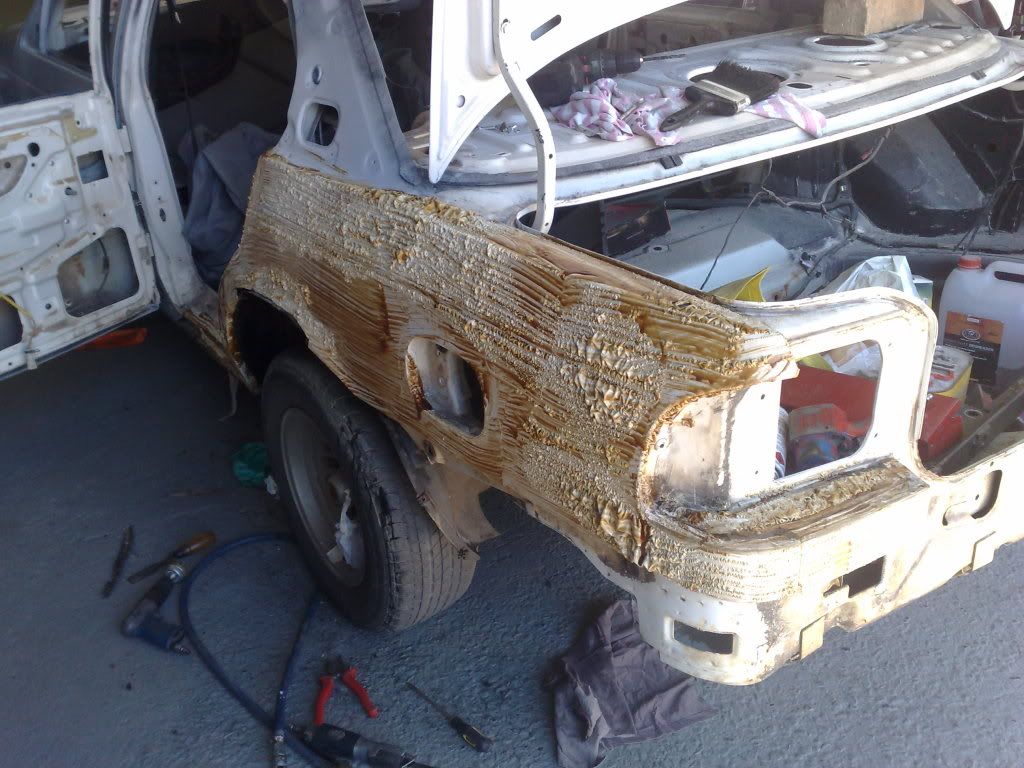 Heres a shot of the paint stripper removed and its been sanded with an electric sander with some 24 grit i think on it, just to smooth it out a bit: 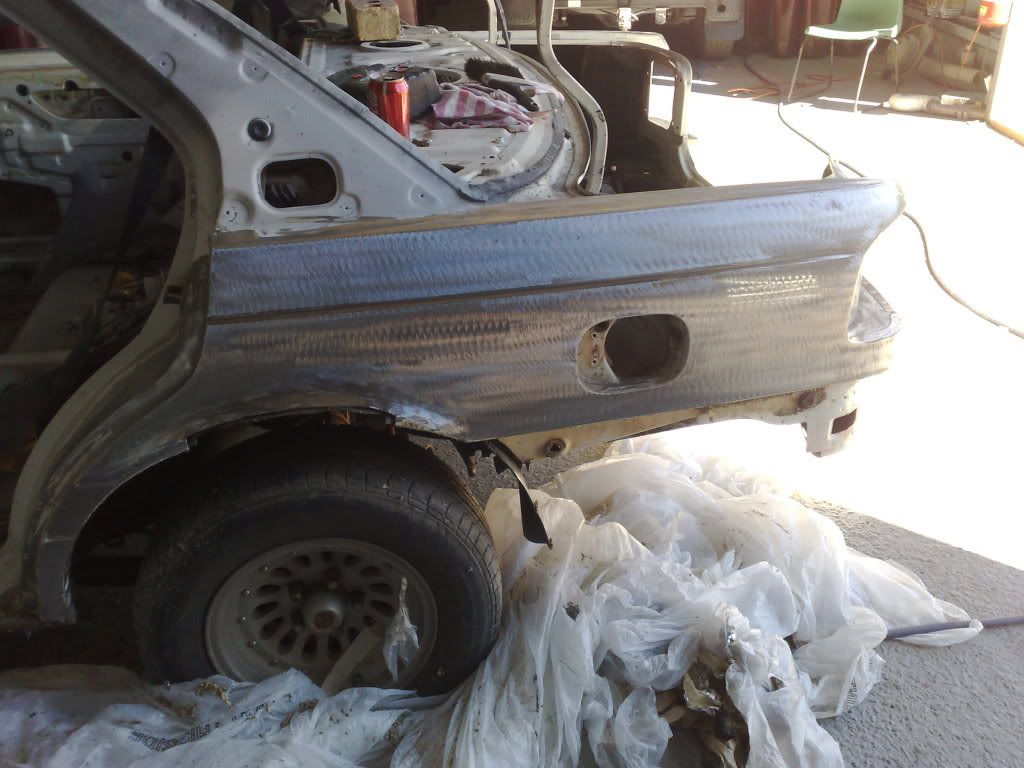 Any ways back to it, i made a template up of the inner, you can do this with a sheet of scrap metal and knock one up, or if you wanna cheat like i did, i used an old damaged gaurd from another car, which had a similar shap in the wheel arch, i just cut out a large section, then marked out what needed to go and sized it down with the old bench grinder: 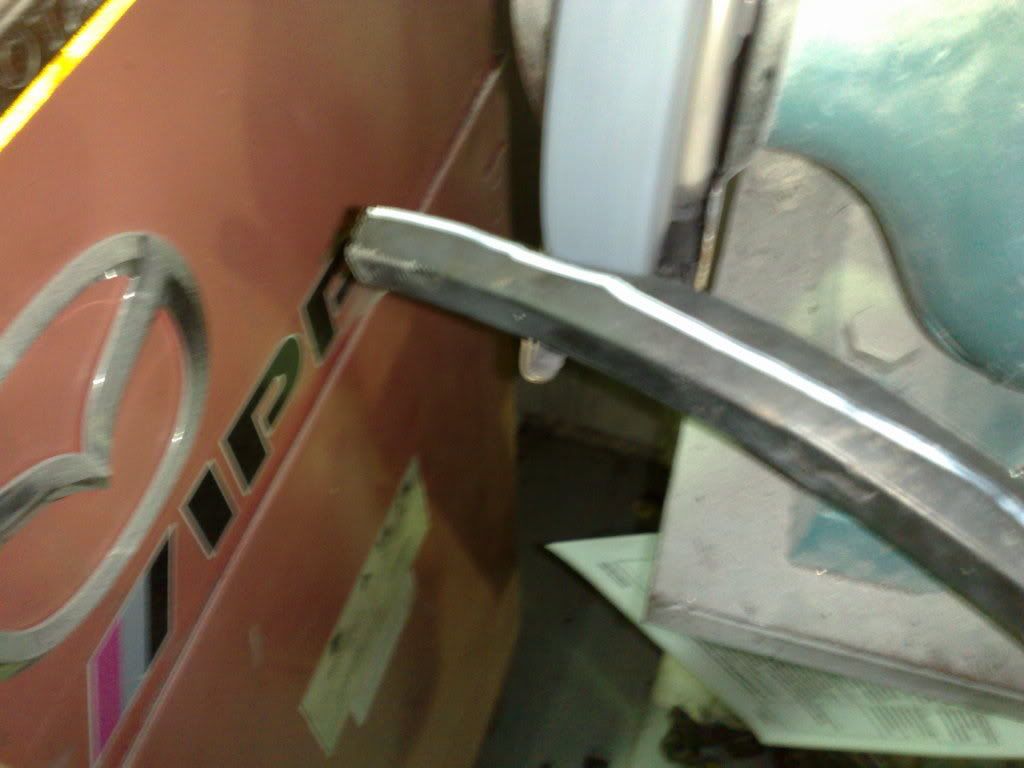 Heres a trial fit shot, just to make sure itll fit nicely, youll want to but weld it, and not weld it over hanging or on top of one another, thatll just trap moisture in if you do and itll rust like theres no tomorrow: 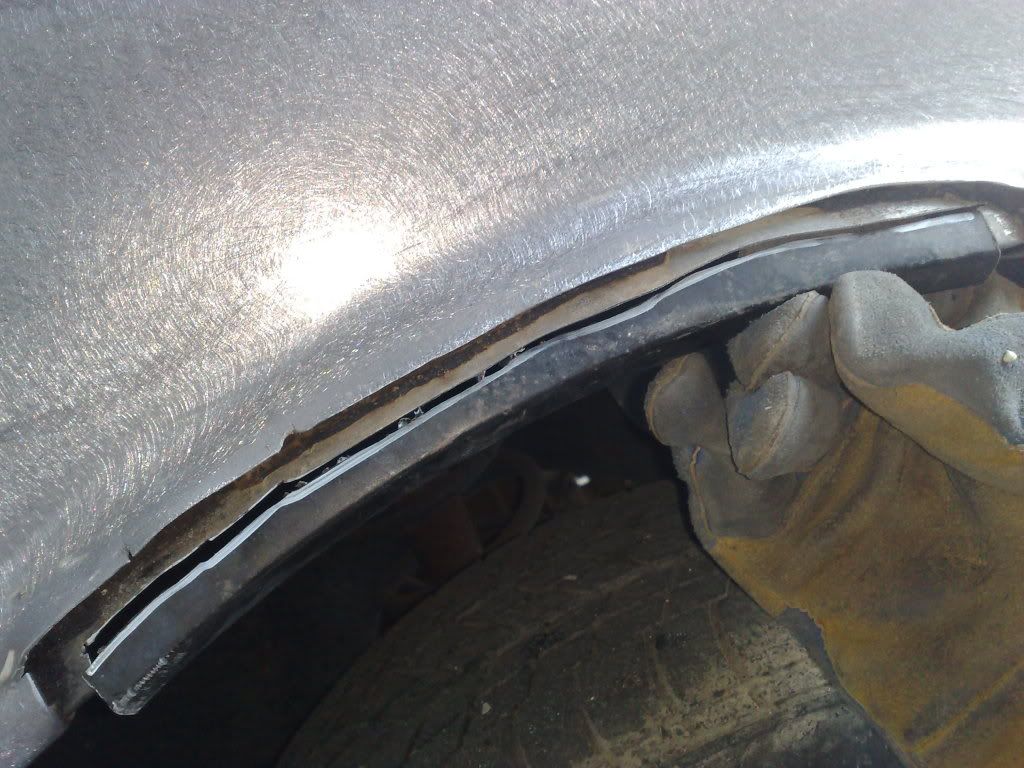 A couple of tacks with the welder to see how things fit, also have a pannel hammer near you, you may need to gentle tap it into shape a bit, also use a brase welder, itll also help against rust in the future. If you choose to use a steel welder youll want to prime the inner and maybe rust proof before welding the outer pannel on: 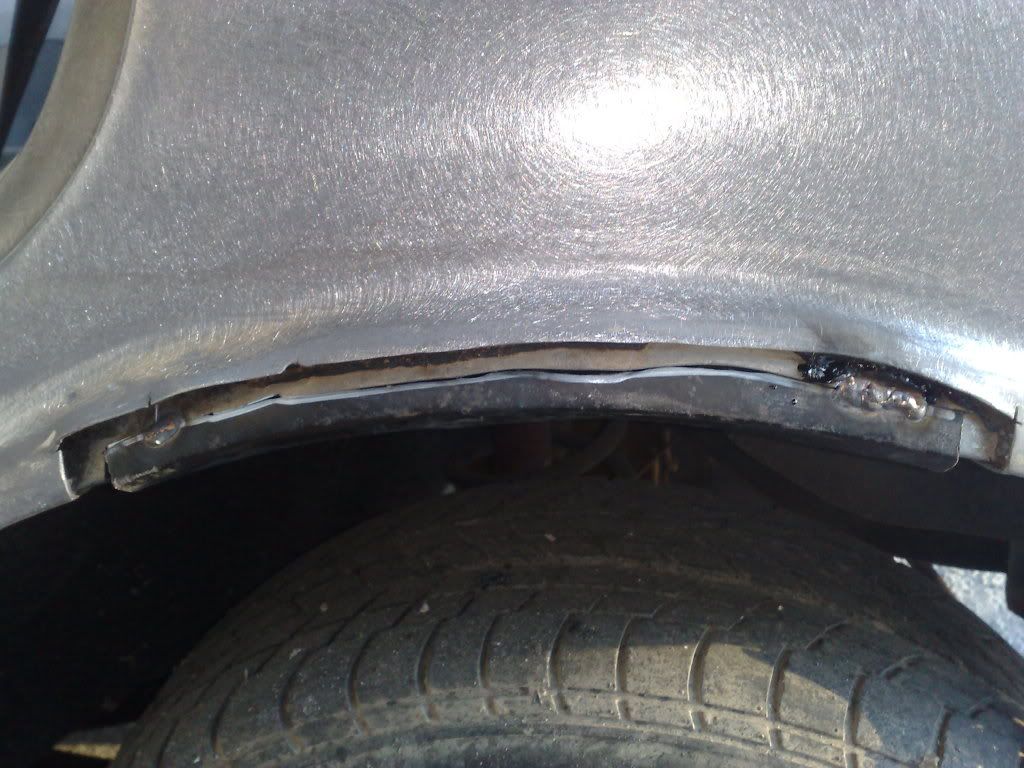 Heres the shot of it welded up, brace always looks narsty after you weld it, however it grinds and sands back really nicely: 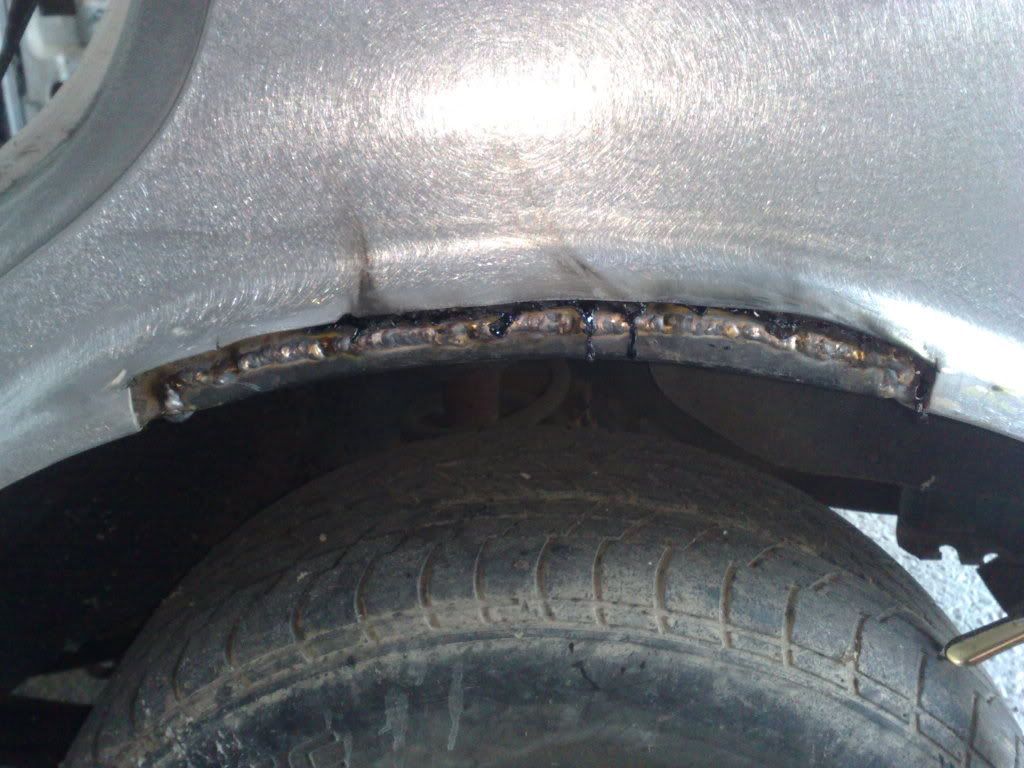 .jpg[/img] .jpg[/img]Give the inner a clean up and a rub with some sand paper and spray some etch primer in it, itll help prevent from rusting: 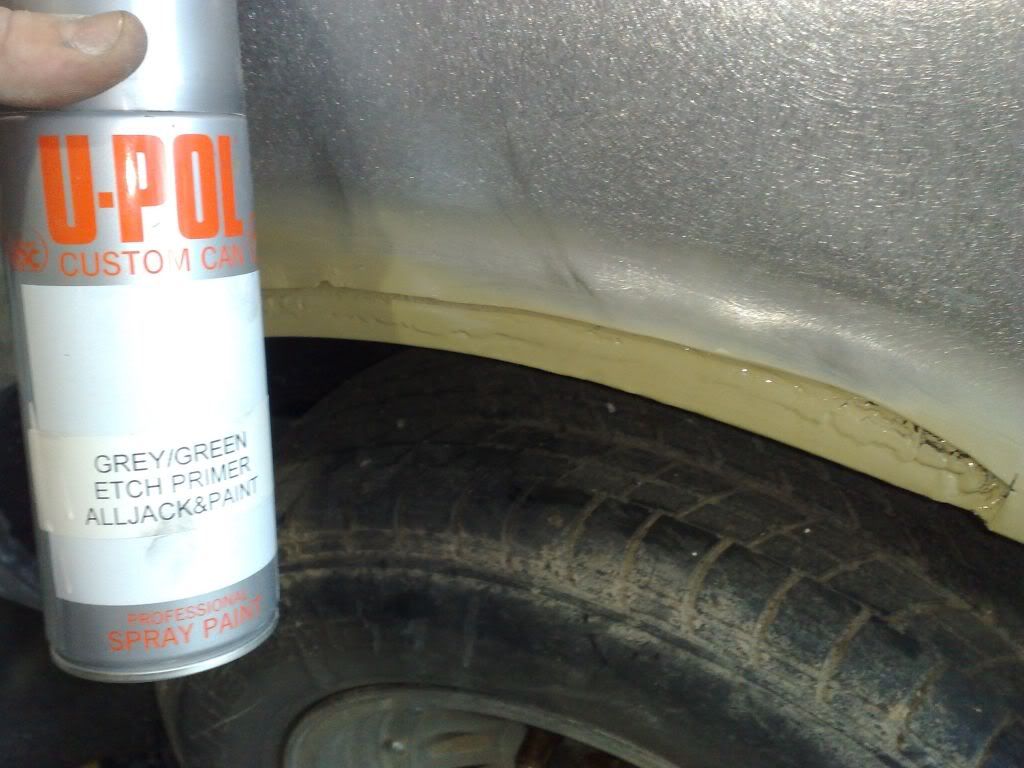 Now for the outter, I couldnt find a decent gaurd to cut up so i used a bit of sheet. As you can see i gave myself more then enough. Do the same as before, get your pasic template happening and start welding (as you can see in the next pic) weld most of it up before folding it around: 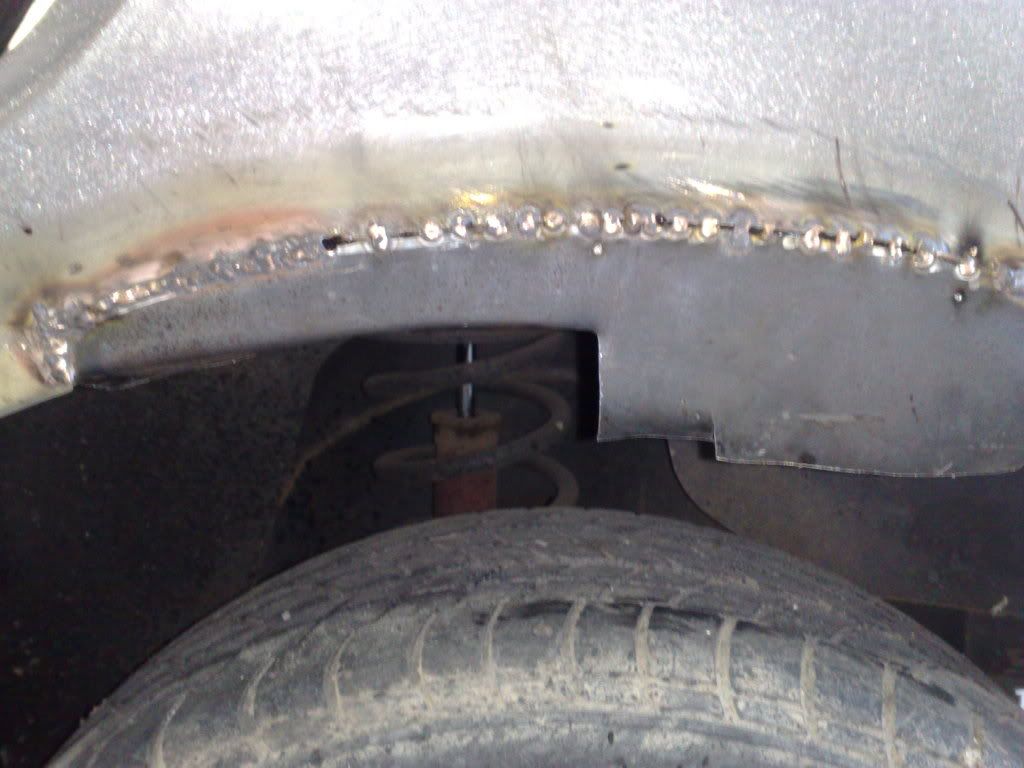 Unfortunatly this is where my camera phone went dead, so ill have to get a finished pic of it later, but once youv shaped it and welded the sides up you can use a shot welder to weld the 2 pannels together under your wheel arch, or you can drill evenly spaced holes with a spot welder drill and weld them together. After that youll have to sand and clean it all down, then apply your body filler. Ill get some pics later on of that. Any ways ill post a few randaom photos up of the car: heres a shot of it with the scorcher bar on it in the sun light: 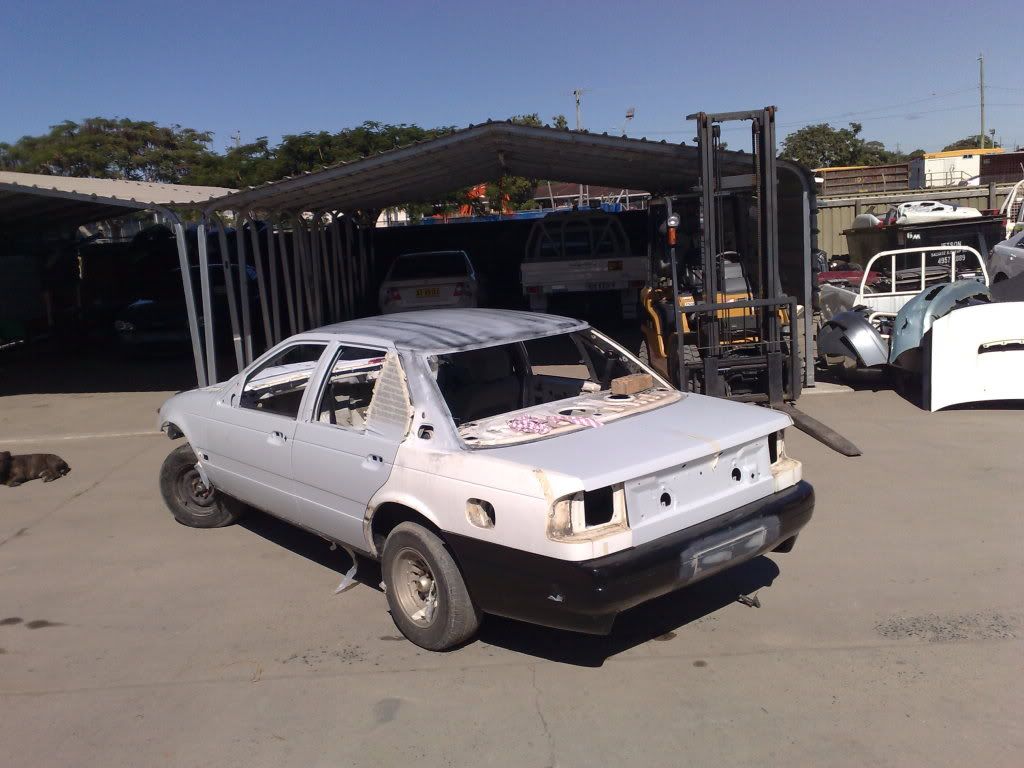 And another: 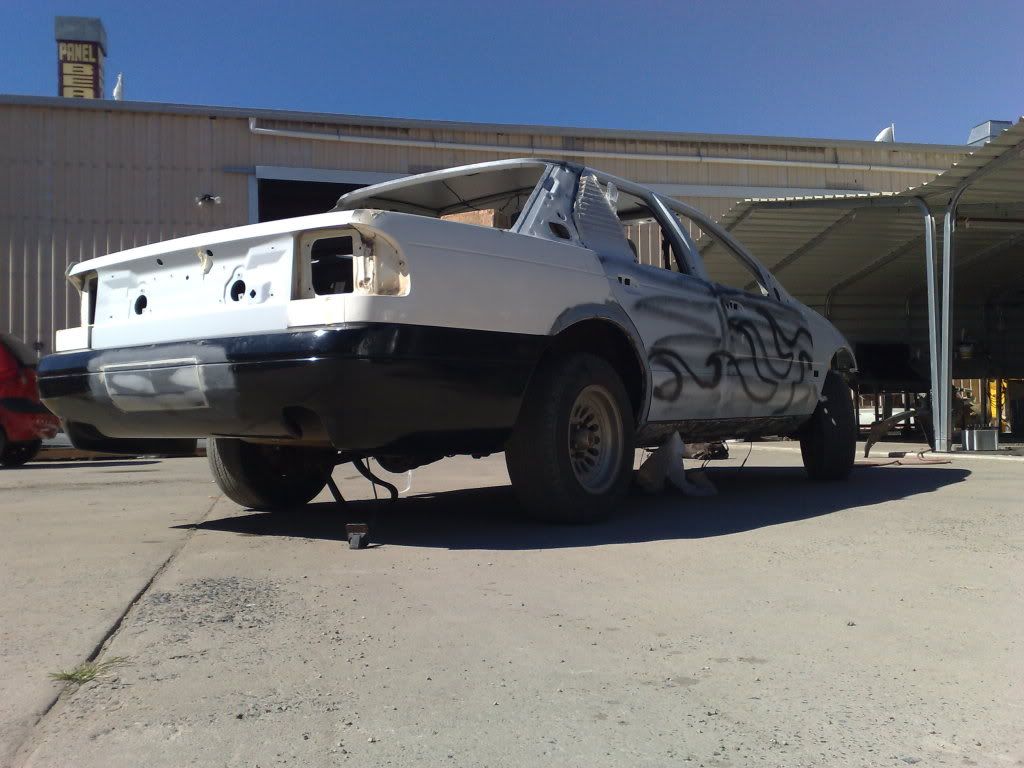 Heres a shot of the 2 front doors down with the BA trims on them (still got the 2 back ones to do yet): 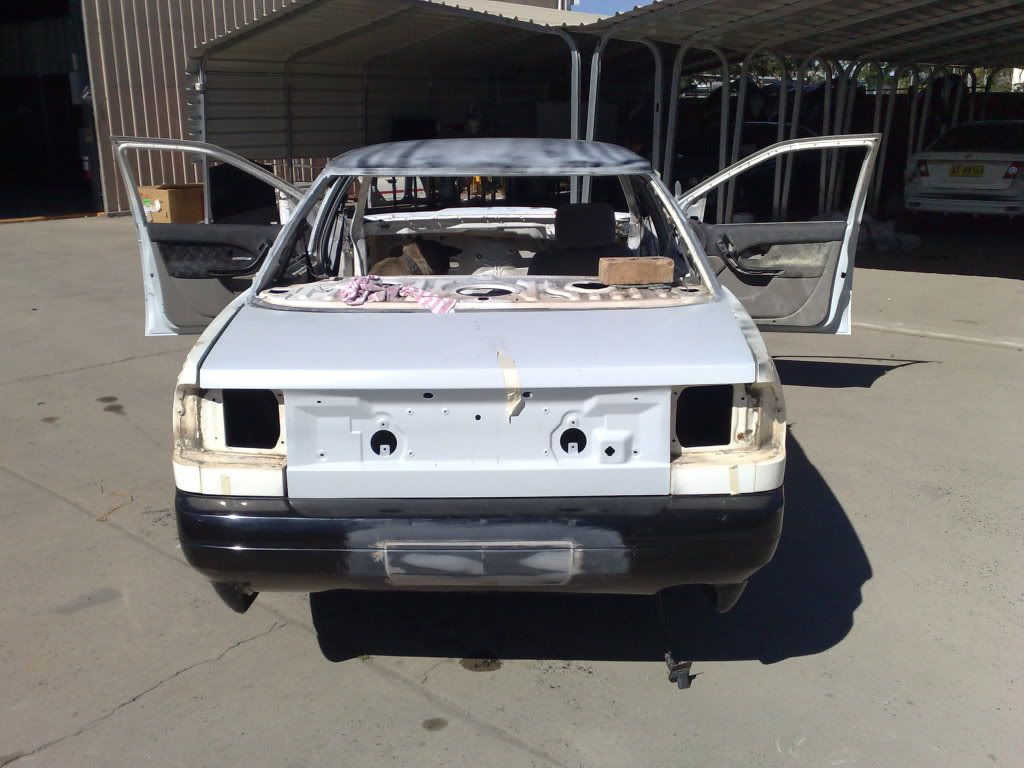 And finally a random shot of the work shop, she stretchs for a long way and vears of to the left and right, after the coke machine is pretty much the pannel end, however straight behind it is another spray booth, also right at the end and around the right side is all the car-o-liner gear and measuring system. I figured theres a few painters and beaters on here who may find the shop interesting: 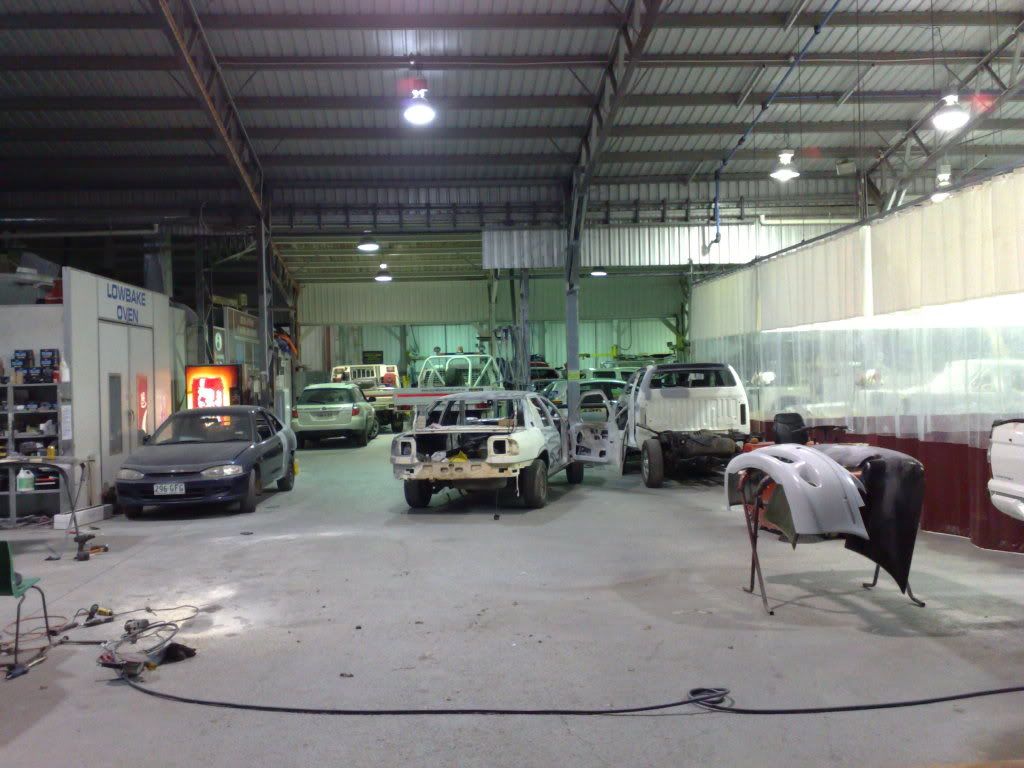 Cheers guys. ill be sure to post my work up as i go along, and thanks for the cool comments, havent had a bad one yet (pheww
_________________ Weapon of choice, EB shell with a EL XR front powered by a BA engine. |
||
| Top | |
||
| smithykicks85 |
|
||
|
Back to the repairs, i finished off sanding the wheel arch off and coated the quarter with DP40 and then a couple coats of prime, like all the other pannels i sanded down the quarters then i used some 2pac filler over. I used a light skim over the hole quarter to make sure its dead flat and doesnt have any rippel effects threw it. After i did that i re-Dp40'ed and primed it heres a few shots of what happened:
heres a photo of it sanded and body filled before 2nd prime up: 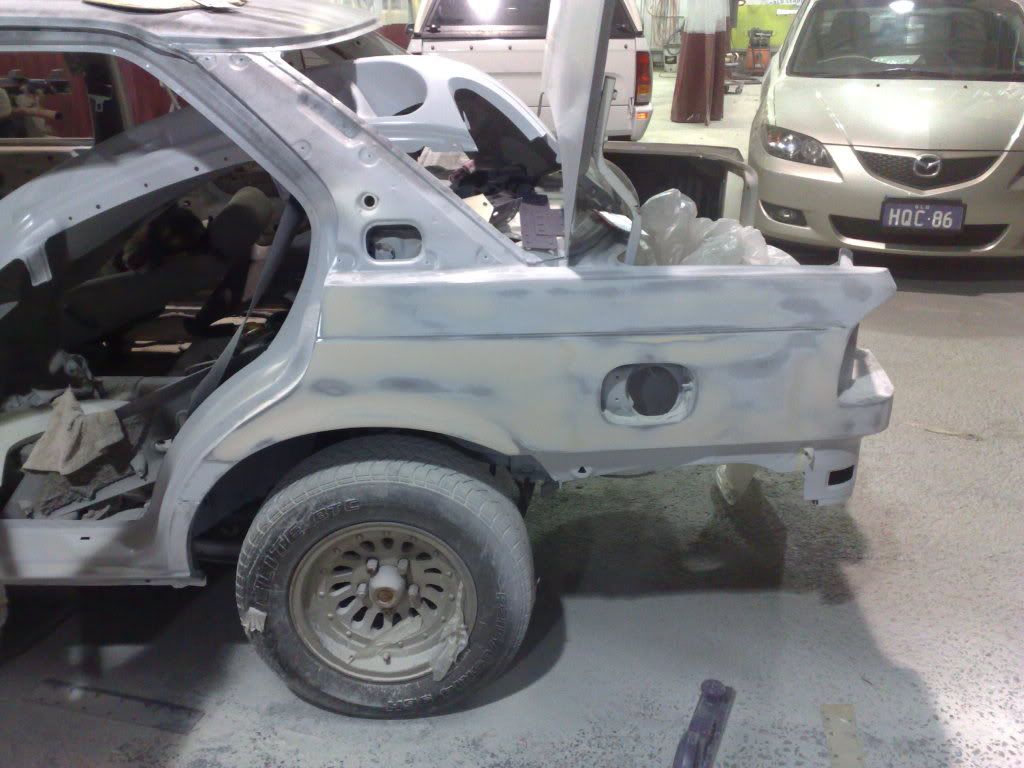 Make sure you spend time masking up and doing all the prep work, it pays off in the end with a cleaner and neater job: 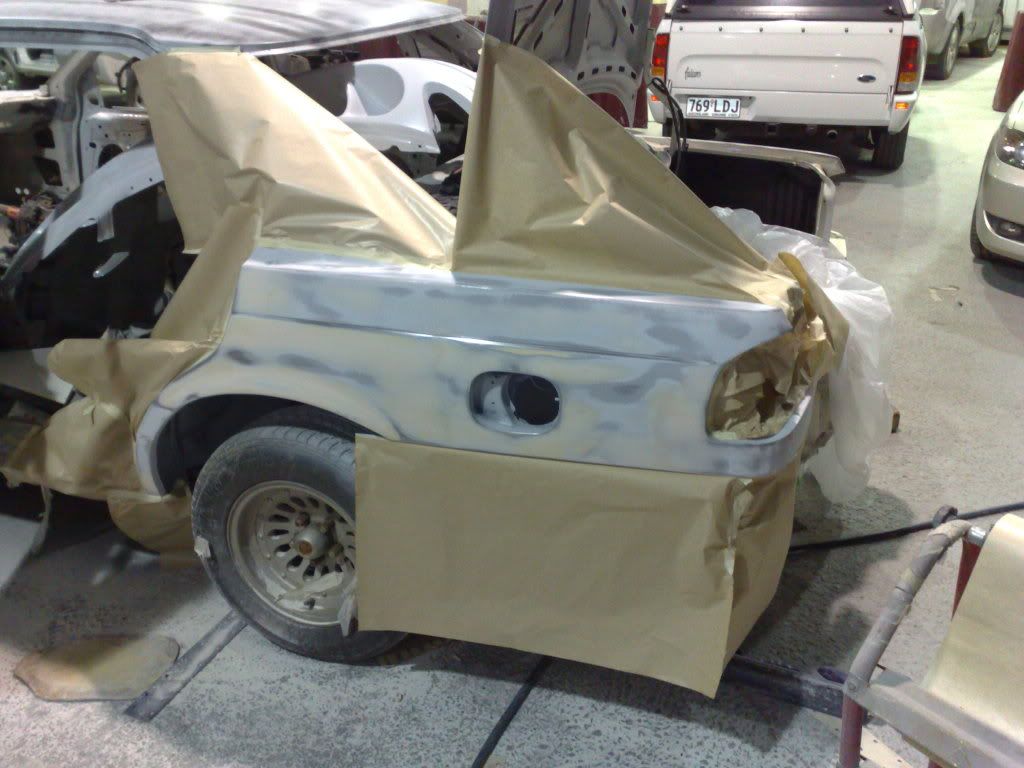 The use of infra rad heat lamps helps out alot for in petween coats: 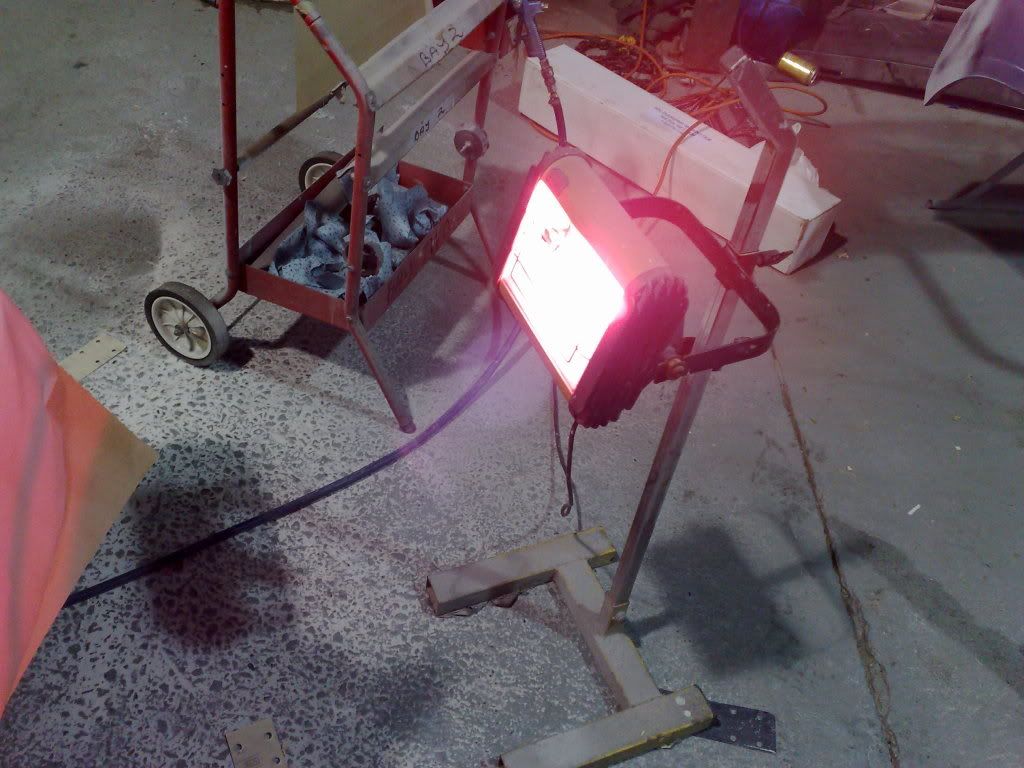 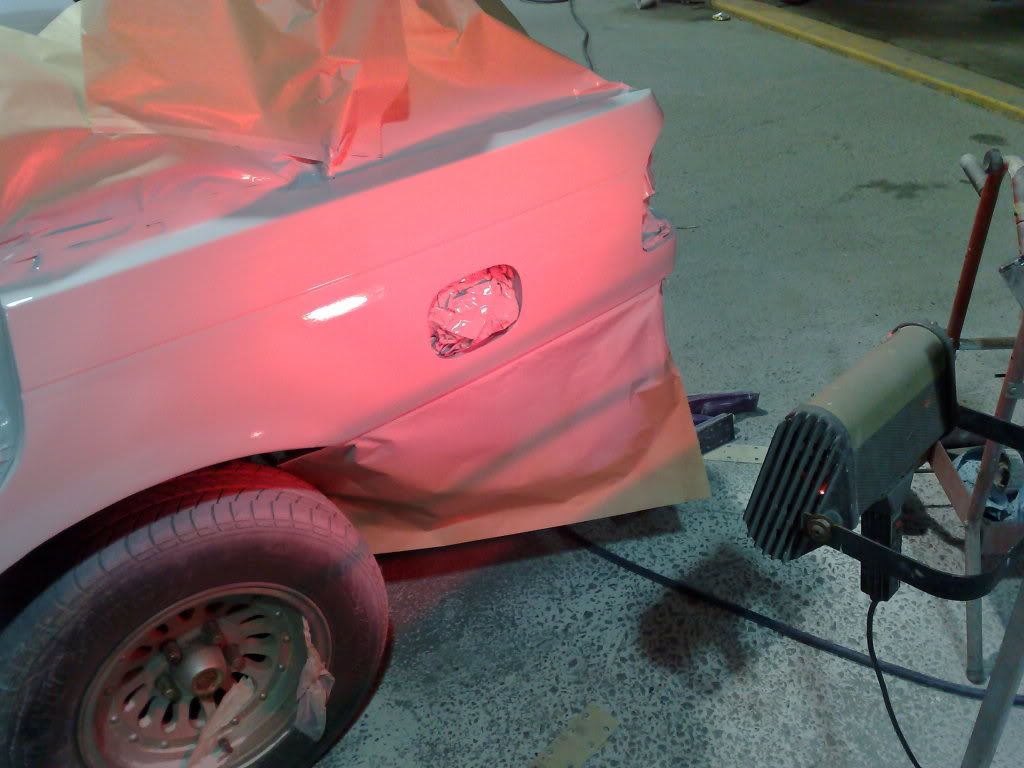 Iam planning to have all the repair and prep work completely done by the end of this weekend (itll be a big weekend). Any ways all this talk about pannel stuff is a bit boaring as iam dying to get it painted and brought home so i can fit and get the BA donk, do the wiring and seat and get it all running. It wont be painted until June 13thish coz the painter will be returning from holidays... im hoping to get the paint sample made up this week, that way ill be able to show you guys a photo of it. Ill post some more info up probably after it gets sprayed. Wish me luck it turns out alright. Cheers.
_________________ Weapon of choice, EB shell with a EL XR front powered by a BA engine. |
||
| Top | |
||
| Froudey |
|
||
|
I must say you are progressing well, my first thought back when you started this i was like another dreamer but i am eating my words.
_________________ R.I.P Tobias my son. |
||
| Top | |
||
| smithykicks85 |
|
||
|
{USERNAME} wrote: I must say you are progressing well, my first thought back when you started this i was like another dreamer but i am eating my words. Thanks froudey and everyone elses comments. Iam hoping to post some new pics on sunday night, hopefully the car will be repaired and primed and waiting to be painted. However however i have to wait roughly 2 weeks until it gets painted. Dont think i can last that long. I had a major brain storm about what to do with the rear lights and garnish. I need to know what you guys think. Iv been looking on you tube and ebay at these DIY smoke tint that you can put on your tail lights and that. Any ways theres a few vids on you tube which show you how to do it... looks kinda simple. Any ways i was on ebay and i found purple shaded tint for sale and it got me thinking, I was either gonna put the clear EB/D tail lights in or tint the stock ones dark, but if i was to put the purple tint on the lights and maybe paint the garnish black would that look any good???? I dont want to make it tacky looking, however for some reason i really wanna do this. Putting the tint on the clear tail lights would probably make it stand out way more then the already darker stock ones. I need some thaughts and ideas people, even if i ordered the tint and a set of clearies and trialed it, if i didnt like it i could always remove the tint straight away i guess. Any thaughts on this? Thanks guys.
_________________ Weapon of choice, EB shell with a EL XR front powered by a BA engine. |
||
| Top | |
||
| itlookslikeaxr6 |
|
|||
|
Does this mean the car is going to be a shade of purple?
Other wise why the hell purple If you want a new XR6 badge for the EB/ED garnish i can hook you up I wouldn't mind getting some of the alltezza white/clear ones and tinting them a bit to suit my white car. They make those smoked EA ones but there a different shape to the EB/ED. I'm also in a pickle about what i want to do if you havn't noticed But i'd most likely go for normal lights a fairmont garnish all tinted darker. Then do a LED conversion so the lights are brighter.
_________________
|
|||
| Top | |
|||
| smithykicks85 |
|
||
|
{USERNAME} wrote: Does this mean the car is going to be a shade of purple? Other wise why the hell purple If you want a new XR6 badge for the EB/ED garnish i can hook you up I wouldn't mind getting some of the alltezza white/clear ones and tinting them a bit to suit my white car. They make those smoked EA ones but there a different shape to the EB/ED. I'm also in a pickle about what i want to do if you havn't noticed But i'd most likely go for normal lights a fairmont garnish all tinted darker. Then do a LED conversion so the lights are brighter. Yeah the car is going to be painted purple, i thaught the purple tint may suit. I didnt know you could do a LED conversion on the brake lights, very interesting... is it hard to do? or as simple as changing bulbs? Iv seen the EA ones but for some reason they just dont do it for me. Well iv got some dark tint here i guess i could do a quick trial on the old lights and garnish to see how it looks when i get the car back. You still got that xr6 garnish? Ill PM u in a bit then. Cheers again Mick.
_________________ Weapon of choice, EB shell with a EL XR front powered by a BA engine. |
||
| Top | |
||
| frankieh |
|
|||
|
Colour code the garnish and tint the lights purple..
I converted my EA to ED rear and messed with it.. 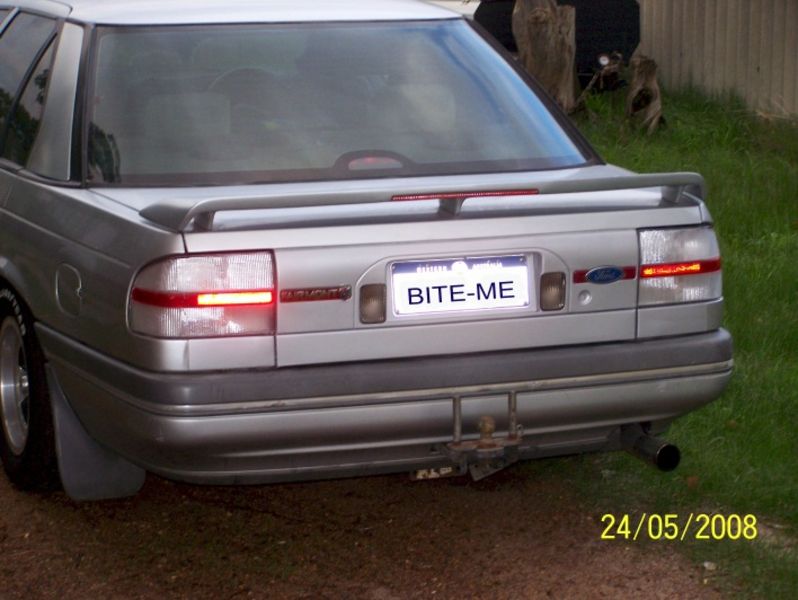
|
|||
| Top | |
|||
| nicco |
|
|||
|
if i were you, i'd be going a different path again, i would remove the orange lens from the boot garnish and tail lights, but leave the red ones in (unlike the altezzas) cause then you have something which looks stock, but f**k awesome at the same time!
in case you were interested, the EB/ED tail lights actually are all clear lenses with a coloured insert inside them, so all the altezza lights are is the standard ones opened and the coloured lens removed. |
|||
| Top | |
|||
| Luxo Sprint |
|
|||
|
im luving this congrats already made u have done a great job so far
|
|||
| Top | |
|||
| TROYMAN |
|
||
|
{USERNAME} wrote: if i were you, i'd be going a different path again, i would remove the orange lens from the boot garnish and tail lights, but leave the red ones in (unlike the altezzas) cause then you have something which looks stock, but f**k awesome at the same time! in case you were interested, the EB/ED tail lights actually are all clear lenses with a coloured insert inside them, so all the altezza lights are is the standard ones opened and the coloured lens removed. ive got the orange inserts removed from my tail lights... here is a pic.. Attachment: DSC01302.JPG
You do not have the required permissions to view the files attached to this post. |
||
| Top | |
||
| EFNA |
|
|||
|
{USERNAME} wrote: {USERNAME} wrote: if i were you, i'd be going a different path again, i would remove the orange lens from the boot garnish and tail lights, but leave the red ones in (unlike the altezzas) cause then you have something which looks stock, but f**k awesome at the same time! in case you were interested, the EB/ED tail lights actually are all clear lenses with a coloured insert inside them, so all the altezza lights are is the standard ones opened and the coloured lens removed. ive got the orange inserts removed from my tail lights... here is a pic.. Attachment: DSC01302.JPG how hard is that to do troyman, is there any cutting or does it just pull out?
_________________ AU FAIRMONT GHIA: 5.0 Dealer ordered SVO mods ( seeking clarification ATM), tickford suspension. |
|||
| Top | |
|||
| fiend |
|
|||
|
Simply awesome. Nice rust repair, nice door work... Nice to see an EF / EL front going onto an old BOX. Love the boxes rear end, love the EL XR6 front end... Love the BA interior. You've got it sorted all right.
I'm not one given to jealousy but this is worthy of such. |
|||
| Top | |
|||
| Who is online |
|---|
Users browsing this forum: No registered users and 55 guests |